
Chapter 2 · Getting started · 4 min read
Creating your company file
On this page
Choosing New Company on the Welcome screen brings you to Set up your organization, the one form SAABI asks you to complete before it will open a set of books. It collects who you are, where you trade and when your financial year runs. From those answers SAABI builds your chart of accounts, sets your currency and creates the bank account you will post to. This chapter goes through the form field by field and explains the choices that are awkward to change afterwards.
Opening the form
The form appears automatically after you have chosen a location and a file name for the new .db file. It is divided into three parts: an unnamed block at the top for your identity, then Locale, then Accounting.
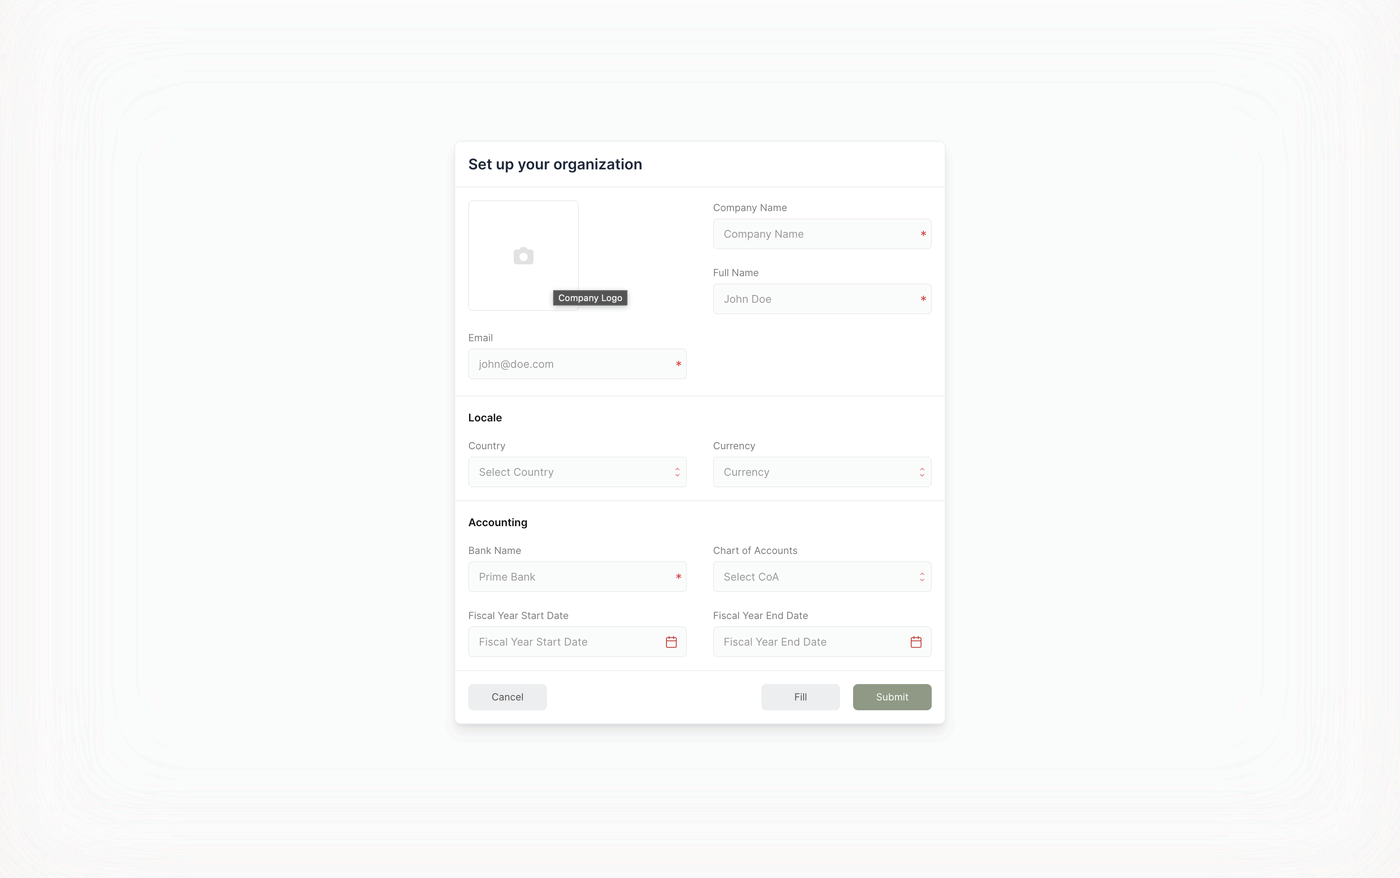
Fields marked with a red asterisk are required. The Submit button stays dimmed until all of them hold a value.
Your identity
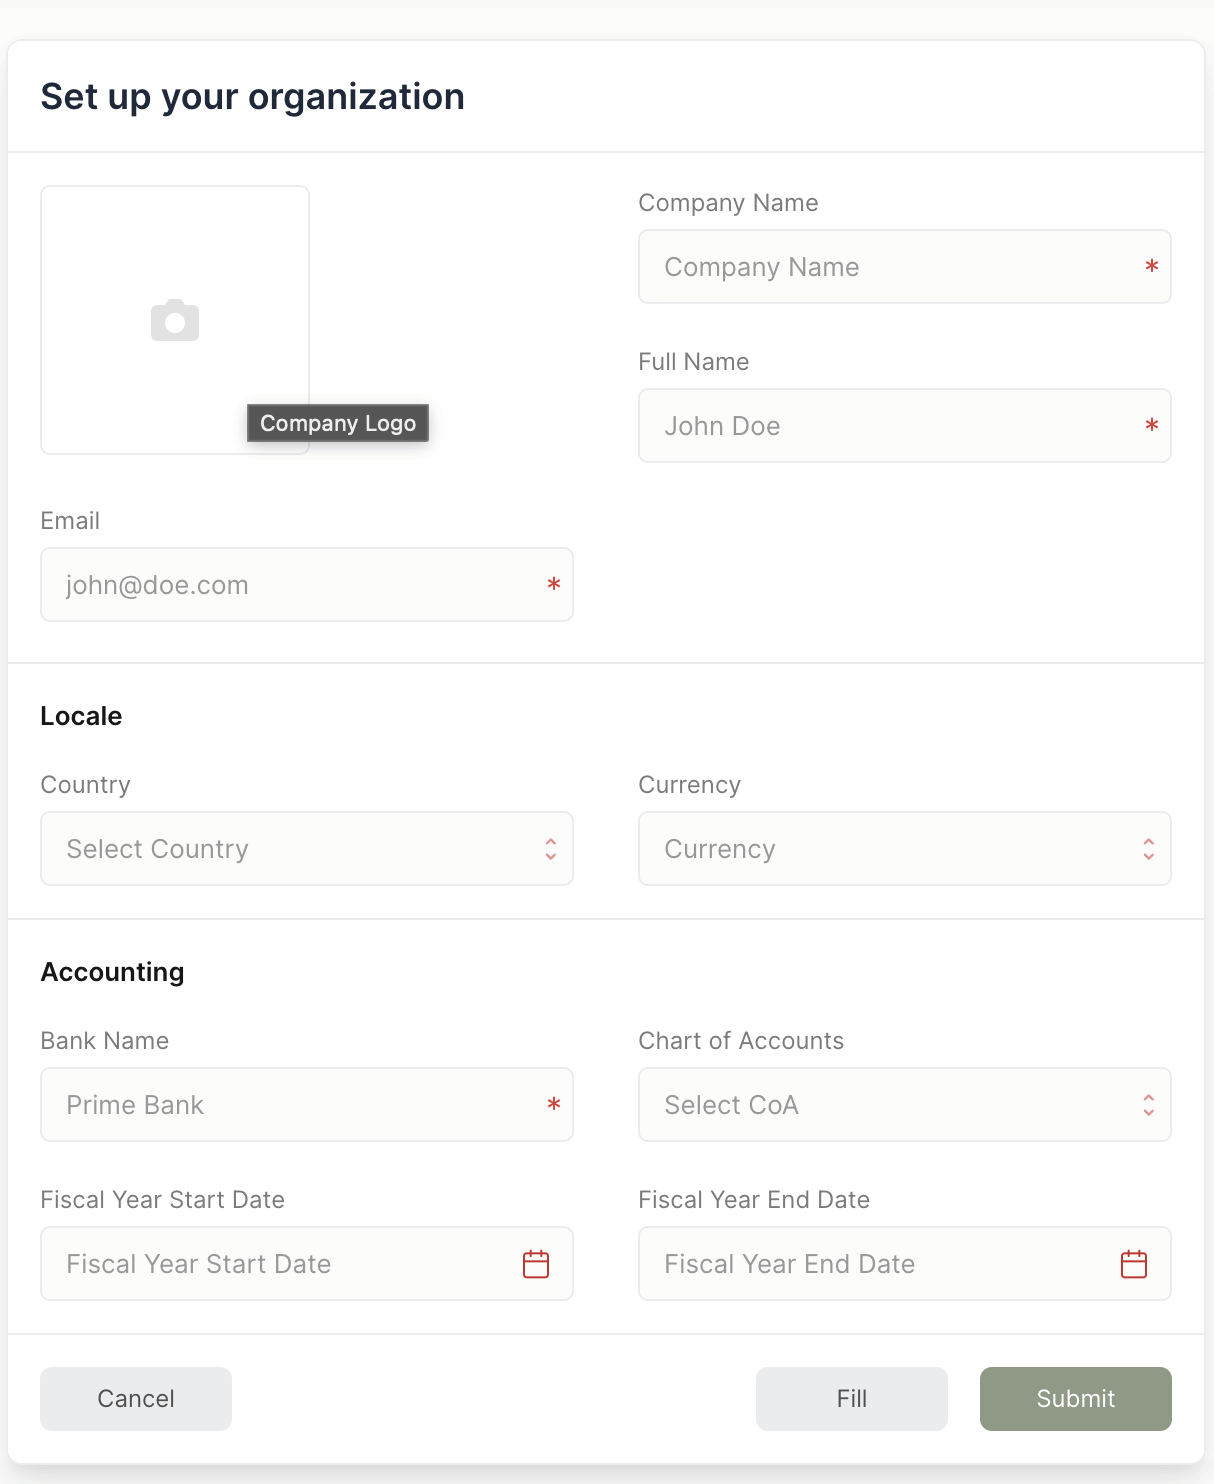
- Company Logo — the square tile on the left. Click it to select an image file. The logo appears on printed invoices and other documents. This field is optional, and you can set or change it later under
Setup > Settingson the Print tab. - Company Name — the legal or trading name of the business, for example
Saabi Demo Trading LLC. It is required. It appears at the top of the sidebar, on your printed documents and in the recent-companies list. - Full Name — the name of the person who owns or runs the books, for example
Demo Owner. It is required, and it is used as the default contact name on documents. - Email — a contact address for the business, for example
owner@saabidemo.example. It is required and it appears on printed documents.
Note
None of these details are sent anywhere. SAABI writes them into your .db file and uses them when it renders documents on your own computer.
Locale
The Locale section holds two fields, and the first drives the second.
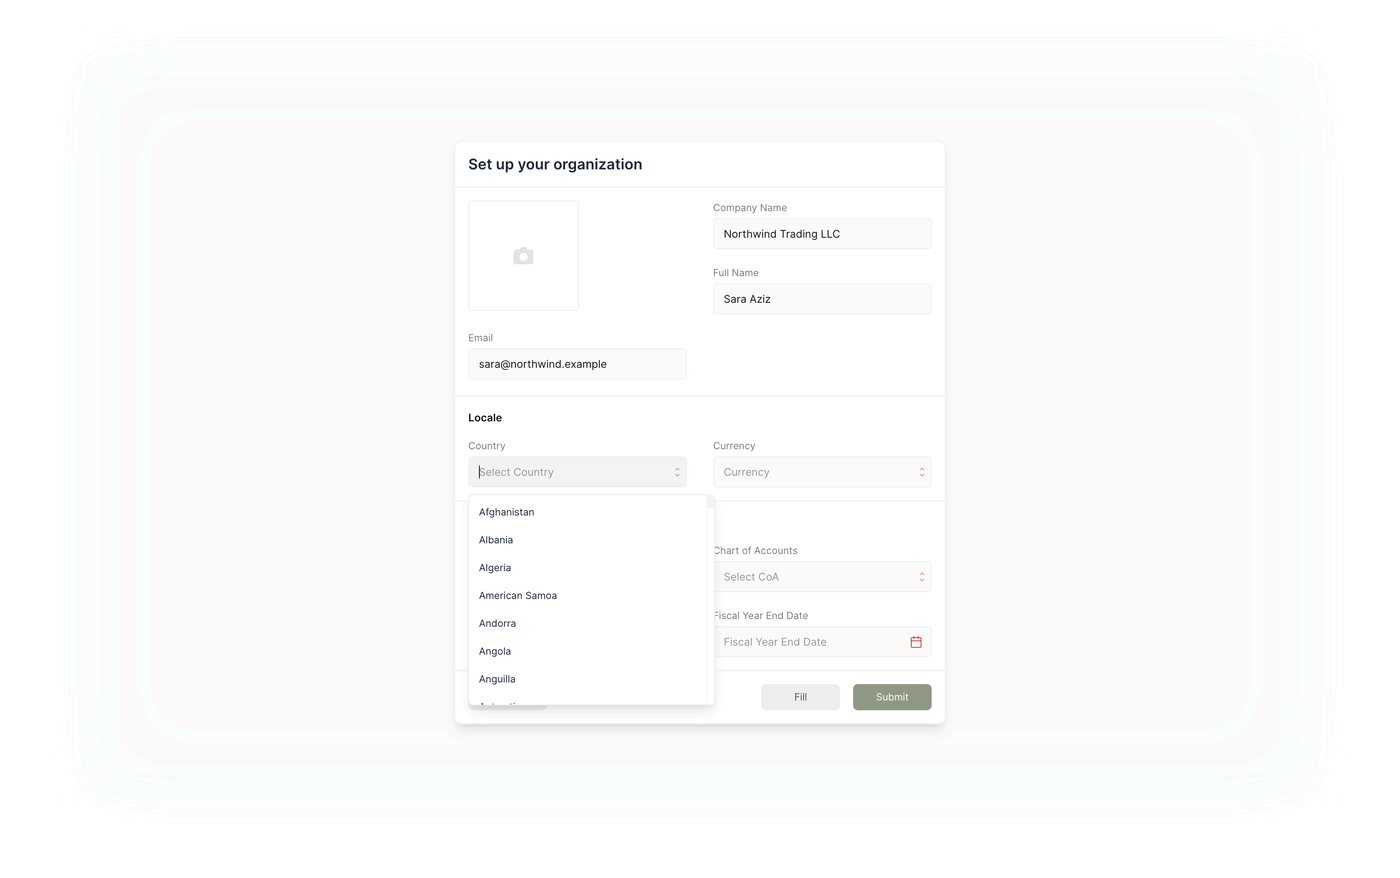
- Country — the country the business trades in. Click the field and pick from the list, or start typing to narrow it.
- Currency — the currency your books are kept in. SAABI fills this in from the country you chose. For a business in the United States it becomes
USD, and amounts throughout the application then appear as$ 1,234.00.
Choosing the country is the single most consequential decision on this form. It sets three things at once: the Currency, the Chart of Accounts in the section below, and the number and date formats SAABI uses to display your figures.
Important
Set the country correctly the first time. The chart of accounts it selects is created in full when you submit the form, and changing the country afterwards does not rebuild it.
You can override the Currency after the country has filled it in — a business registered in one country but keeping books in another currency is a normal arrangement. Leave it as proposed unless you have a specific reason to change it.
Accounting
The Accounting section sets up the accounts themselves and the period they report on.
- Bank Name — the name of your main bank, for example
Emirates NBD. It is required. SAABI creates a ledger account with this name underApplication of Funds (Assets) > Current Assets > Bank Accounts, and that account becomes the default for payments. If your business has more than one bank account, enter the main one here and add the rest from the Chart of Accounts afterwards. - Chart of Accounts — the account structure your books are built on. SAABI selects this from the country you chose, so in most cases you leave it alone.
- Fiscal Year Start Date and Fiscal Year End Date — the first and last days of your financial year, for example
Jan 1, 2026andDec 31, 2026. Click either field to open a date picker. Reports such as Profit and Loss use this period as their default range.
If your country is not listed
Not every country has a chart of accounts of its own. If yours is absent from the Chart of Accounts field, choose the Standard Chart of Accounts. It provides the five conventional root groups — assets, equity, expenses, income and liabilities — and a usable set of accounts beneath them. You can add whatever your business needs on top of it; Chapter 4 explains how.
Fill and Submit
Two buttons sit at the bottom right of the form.
Fill populates the form with sample values so you can see a completed example. Use it while you are looking around; overwrite the values with your own before you submit.
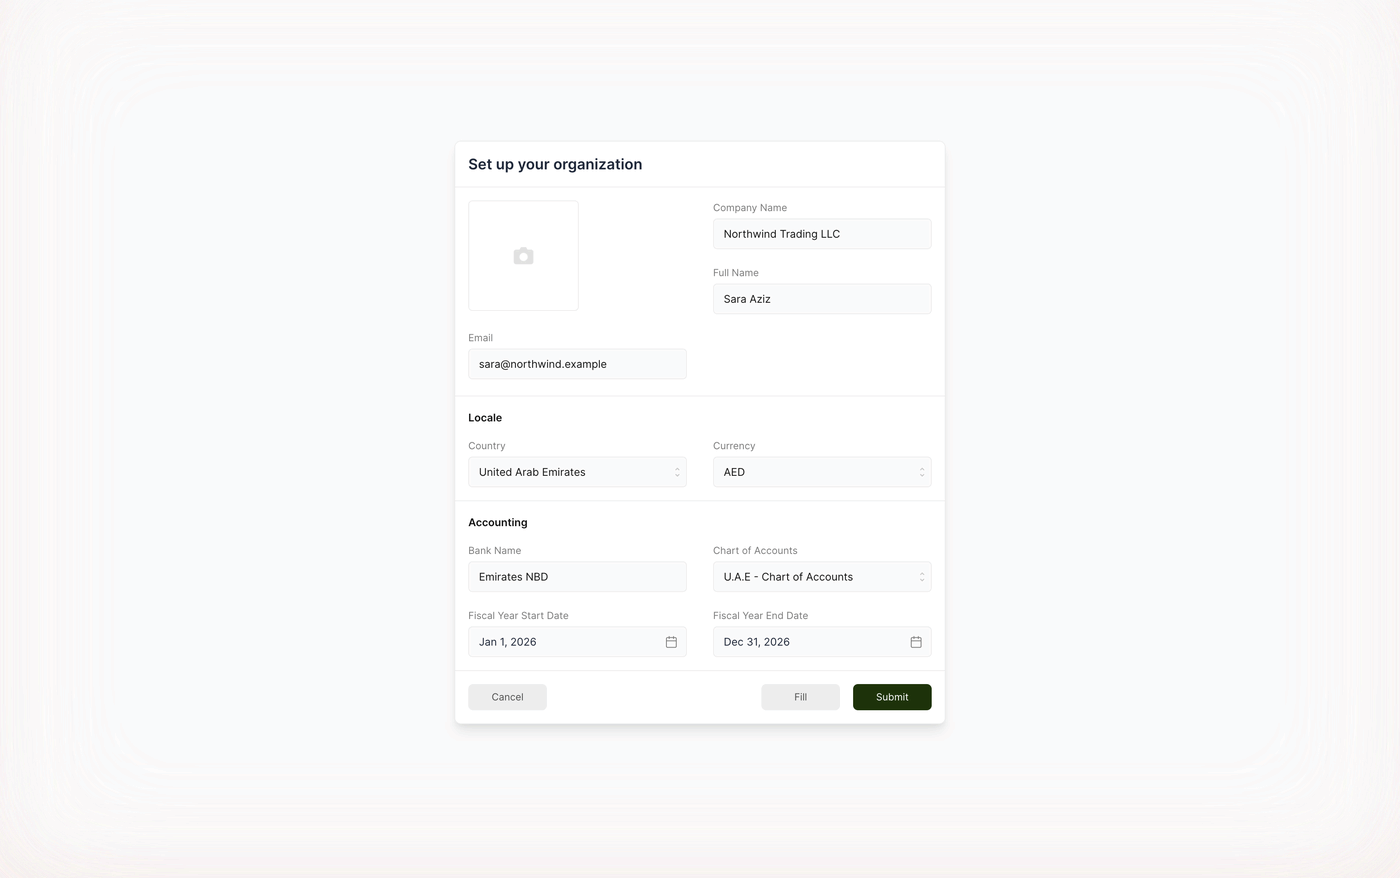
Submit creates the company. SAABI writes the chart of accounts, the bank account and your settings into the .db file and opens the books. This takes a moment on slower machines.
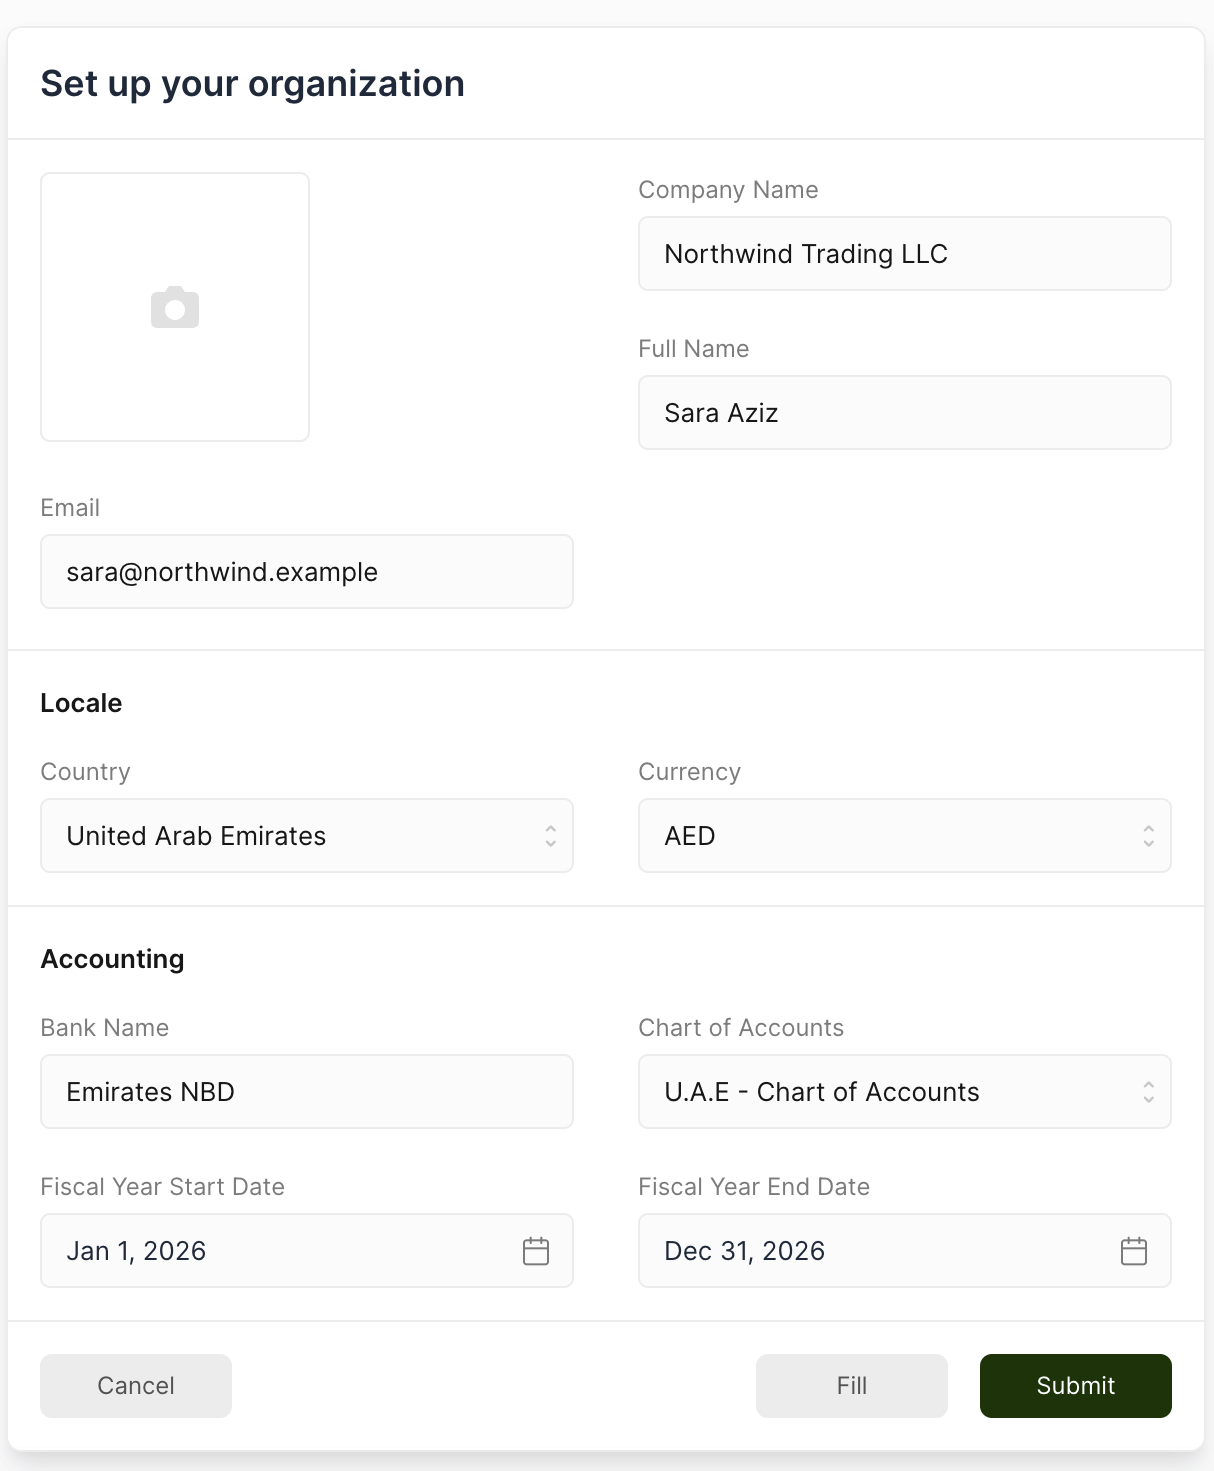
Cancel, at the bottom left, abandons the form and returns you to the Welcome screen.
After you submit
SAABI opens on the Get Started page, headed Set Up Your Workspace, which presents the remaining setup tasks as cards grouped under Assistant, Organisation, Accounts, Sales and Purchase; cards you have completed show a green tick.
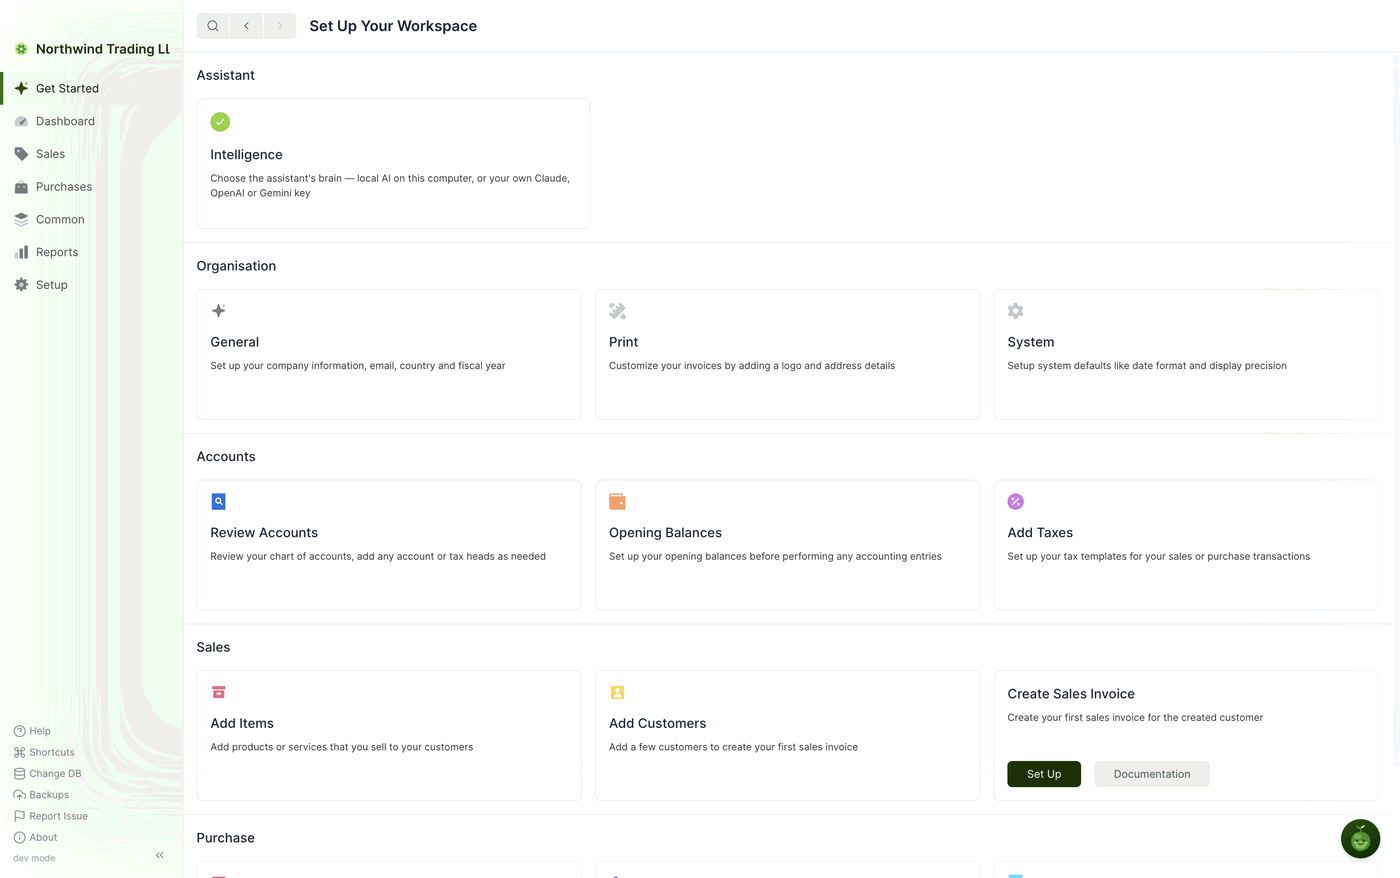
Work down the page in order: review your accounts, enter your opening balances, add your taxes, then add items and customers. The page and its cards are described in Chapter 3.
Tip
Every value on this form can be changed later under Setup > Settings on the General tab (Chapter 52) — company name, full name, bank name, country, email and fiscal year all appear there. The chart of accounts is the exception, which is why the country deserves your attention now.
Chapter 3 is a tour of the workspace SAABI has now opened: the sidebar, the page header, and the list and form views you will spend most of your time in.
Saabi Desktop User Manual 1.0 · covers Desktop 1.0.0 · Something wrong or missing? Tell us