
Chapter 3 · Getting started · 5 min read
Finding your way around
On this page
Once a company is open, SAABI settles into a layout it keeps everywhere: a navigation sidebar down the left, a header strip across the top of the page, and the page itself filling the rest of the window. Nearly everything you do falls into one of two page shapes — a list of records, or a form for a single record. This chapter names each part, so that later chapters have somewhere to point.
The sidebar
The sidebar is the primary navigation. At the top sits the company switcher, showing the company currently open. Below it are two standalone pages and six groups: click a group to expand it, then an item inside to open that page.
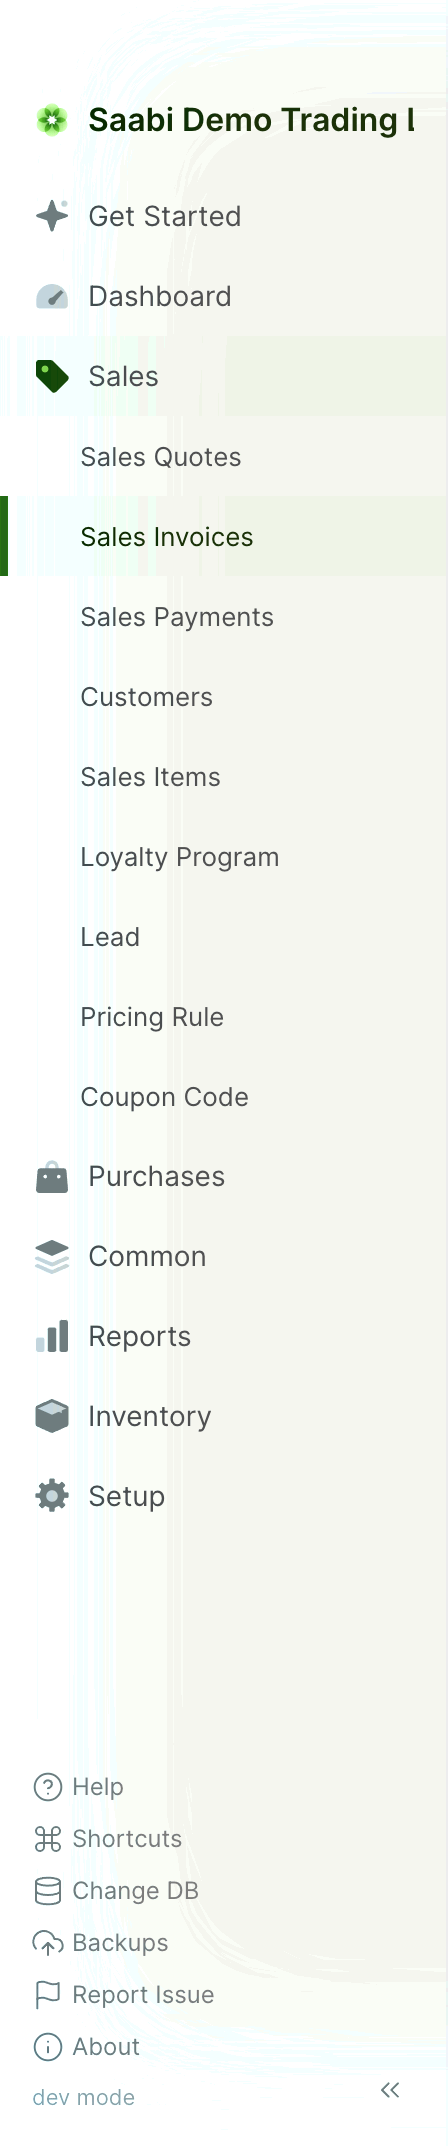
- Get Started — the setup checklist, described below.
- Dashboard — the summary view of cash, receivables, payables, revenue and profit.
- Sales — Sales Quotes · Sales Invoices · Sales Payments · Customers · Sales Items · Loyalty Program · Lead · Pricing Rule · Coupon Code
- Purchases — Purchase Invoices · Purchase Payments · Suppliers · Purchase Items
- Common — Journal Entry · Party · Items · Price List
- Reports — General Ledger · Profit And Loss · Balance Sheet · Trial Balance
- Inventory — Stock Movement · Shipment · Purchase Receipt · Stock Ledger · Stock Balance
- Setup — Chart of Accounts · Tax Templates · Import Wizard · Print Templates · Customize Form · Settings
Navigation paths in this manual are written as Setup > Chart of Accounts: open the Setup group, then click Chart of Accounts.
Note
Some items appear only when the matching feature is switched on in the Features list under Setup > Settings (Chapter 52). If Loyalty Program, Lead, Pricing Rule or Coupon Code is missing from Sales, that is why.
The sidebar footer
Six links sit at the foot of the sidebar, available from any page; Appendix C covers them in more detail.
- Help — opens the documentation.
- Shortcuts — lists the keyboard shortcuts.
- Change DB — closes the company and returns you to the Welcome screen, where you can open a different
.dbfile. - Backups — opens the backup settings, to take a backup now or set a schedule.
- Report Issue — reports a problem with the application.
- About — shows the version of SAABI you are running.
The « control at the bottom right collapses the sidebar, giving the page the full width of the window. Click it again to bring it back.
The Get Started page
Get Started opens a page headed Set Up Your Workspace. It presents the setup tasks as cards grouped into sections, and ticks each completed card in green.
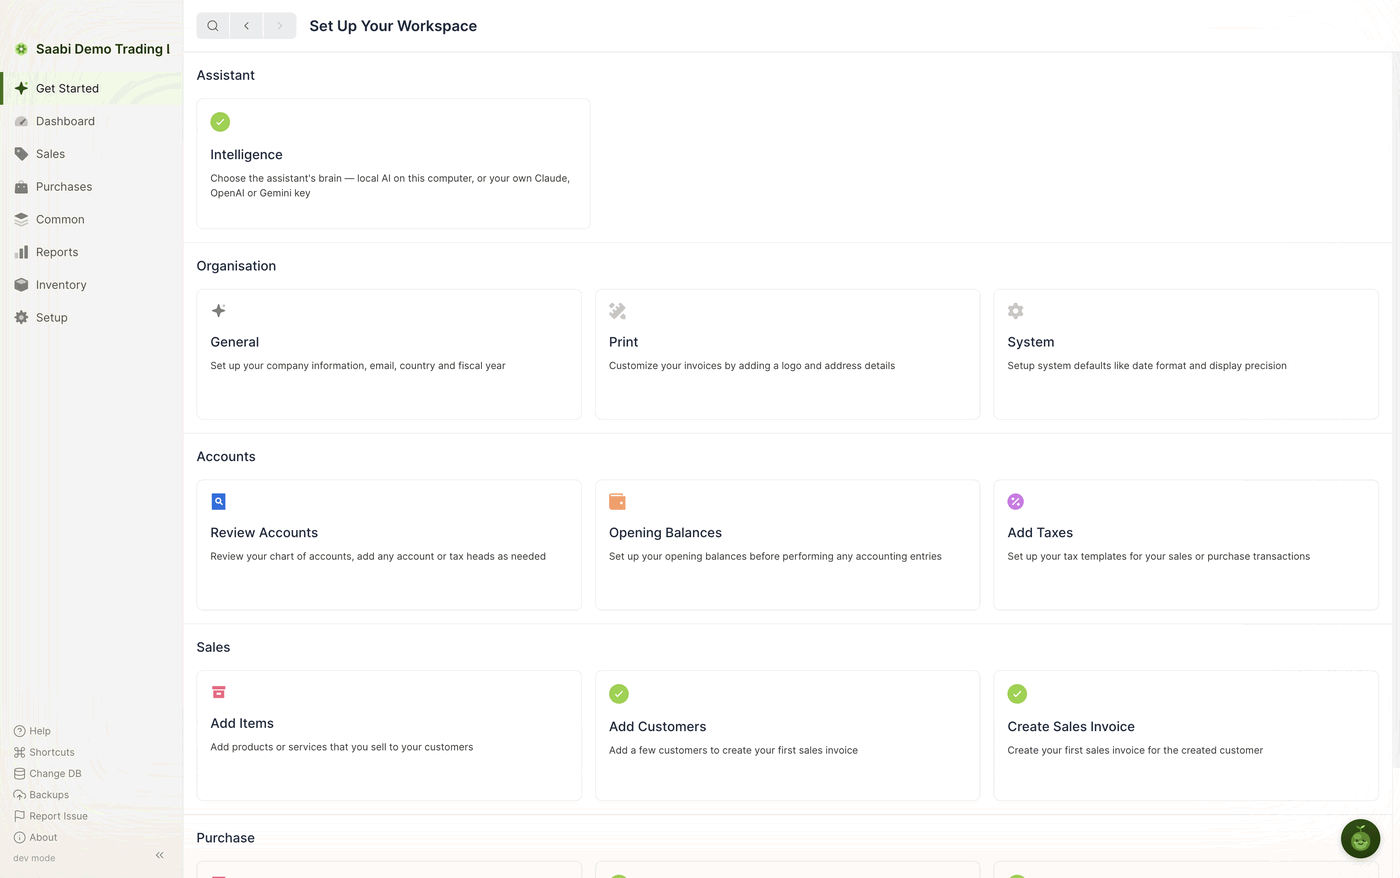
- Assistant — Intelligence, where you choose the assistant's brain: local AI on this computer, or your own Claude, OpenAI or Gemini key.
- Organisation — General (company information, email, country and fiscal year), Print (invoice logo and address details) and System (date format and display precision).
- Accounts — Review Accounts, Opening Balances and Add Taxes.
- Sales — Add Items, Add Customers and Create Sales Invoice.
- Purchase — Add Items, Add Suppliers and Create Purchase Invoice.

Hover a card and it reveals its buttons: Set Up opens the screen the card refers to, and Documentation opens the relevant background reading.
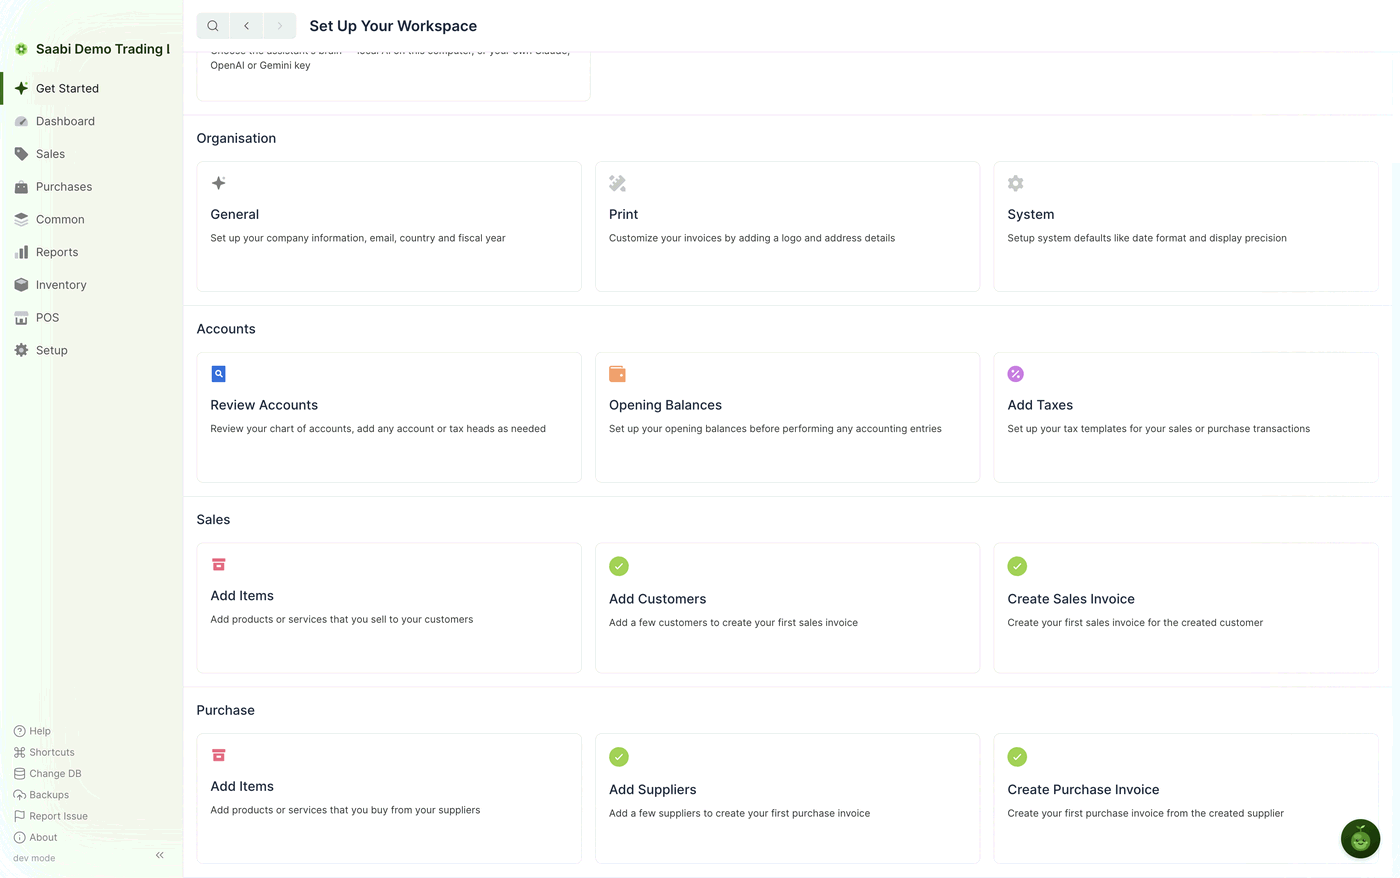
The page is a convenience, not a gate: nothing on it must be completed before you record transactions.
The page header
Three controls sit at the left of the header on every page, before the page title.
- The search icon opens Quick Search (Chapter 8), the fastest route to anything in the application.
- The back arrow returns to the previous page.
- The forward arrow moves forward again after going back.
List views
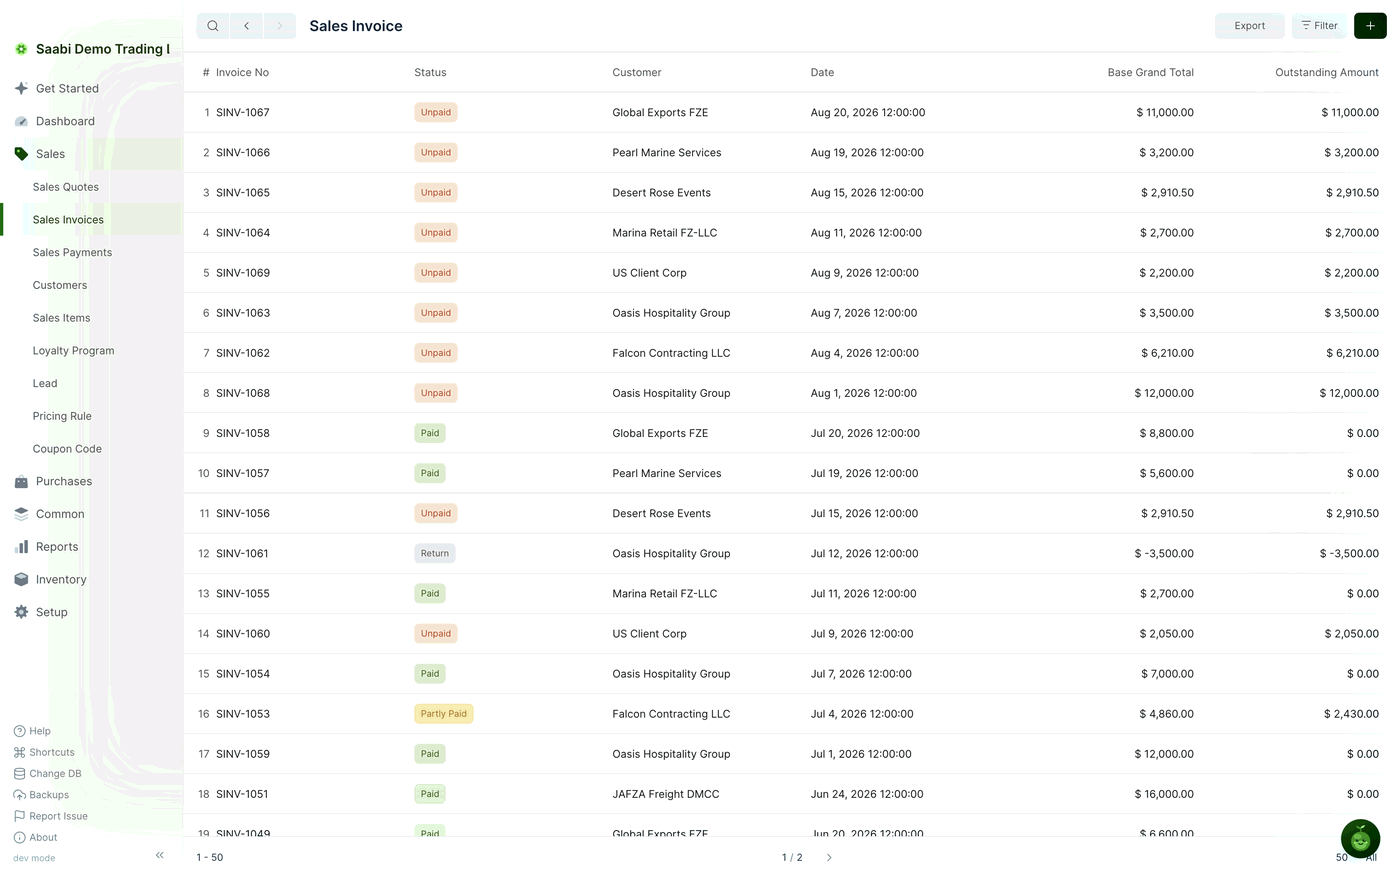
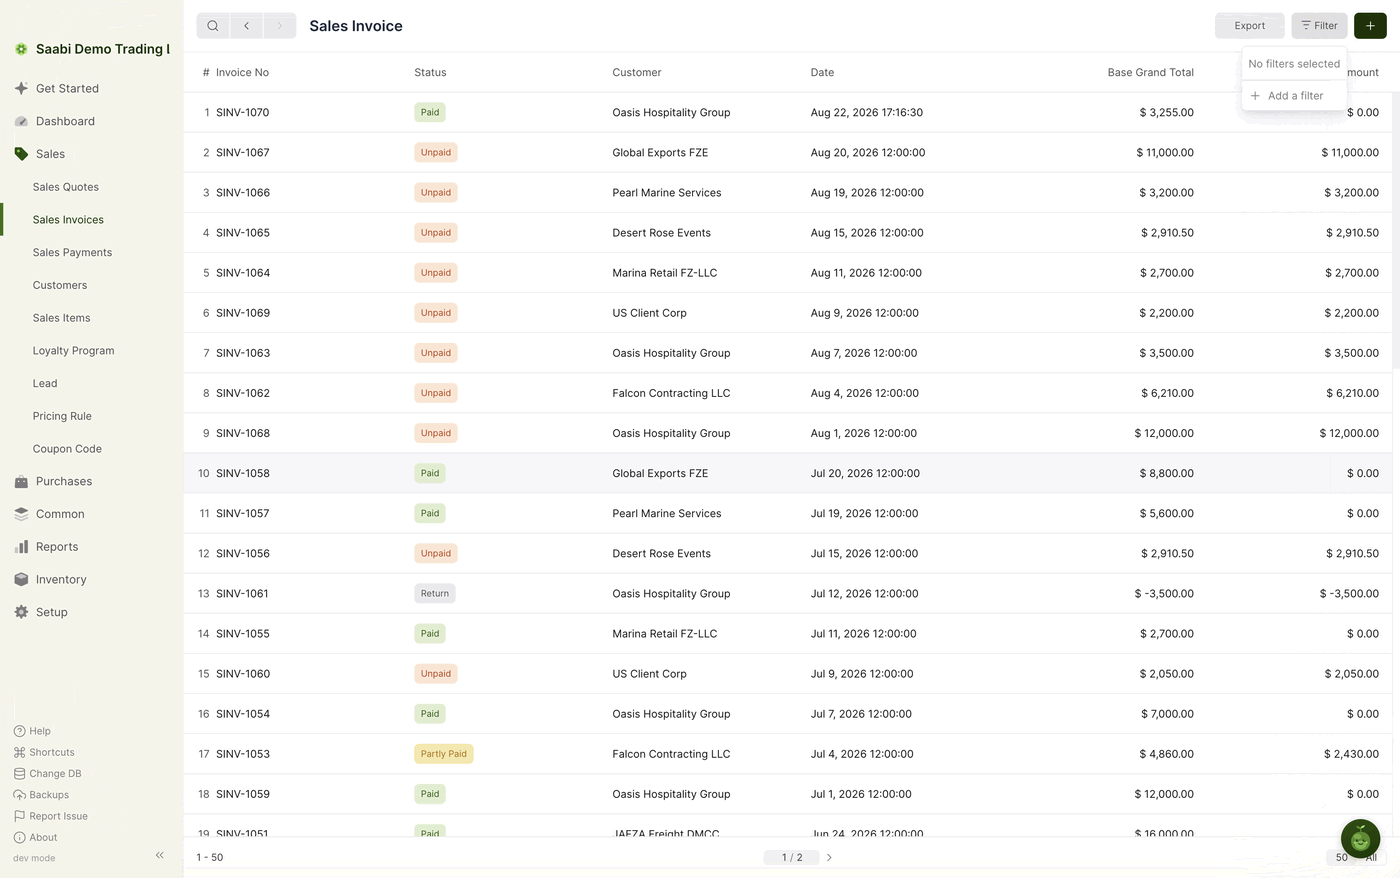
Clicking a record type in the sidebar — Sales Invoices, Customers, Items — opens a list view: one record per row, with the columns that matter for that record type.

Three controls sit at the right of the header: Export, Filter and the green +, which creates a new record of that type and opens its form. The first two are covered below.
Filtering
Click Filter and a panel opens showing No filters selected and + Add a filter. Choose the field, the comparison and the value, and the list narrows as you go. Add further filters to narrow it more.
Exporting
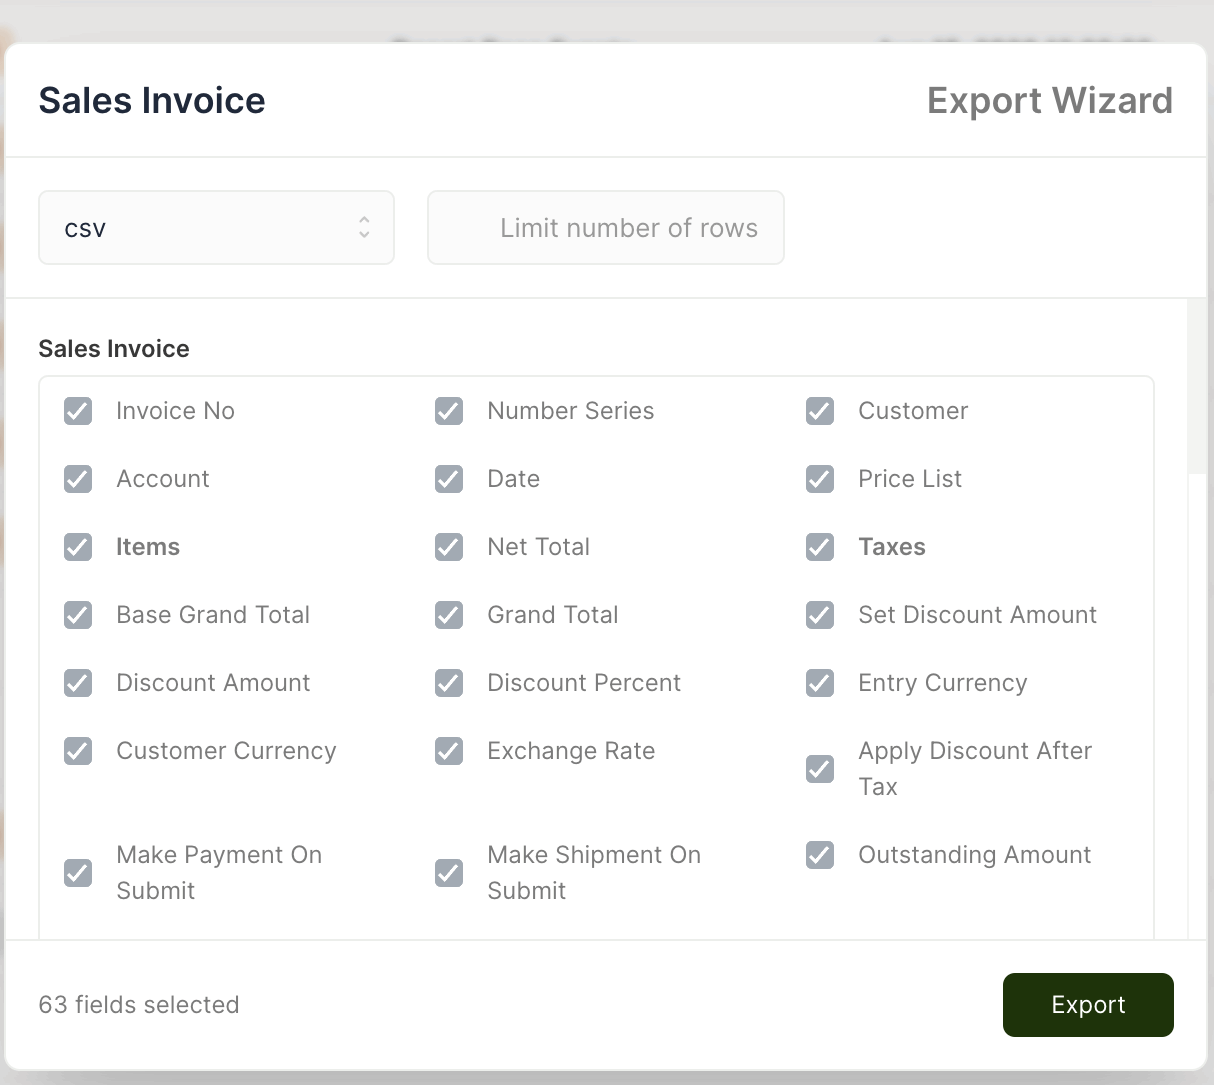
Export opens the Export Wizard. Choose the file format from the dropdown at the top left, optionally cap the number of rows, and tick the fields you want. The count at the bottom left confirms the selection. Click Export to write the file.
The list footer
The footer runs across the bottom of every list. The left-hand end shows the range of rows on display, such as 1 - 50. The centre holds the page control — current page over total, with arrows to move between pages. The right-hand end sets the page size: 50, 100 or All.

Form views
Clicking a row in a list, or the + button, opens a form view: one record on a card in the middle of the page.
The record name sits at the top left of the card, and a status badge at the top right. Badges you will see include Draft, Saved, Submitted, Unpaid, Partly Paid, Paid, Return and Not Transferred. The badge tells you what the record is allowed to do next: a draft can still be edited, a submitted entry cannot. Appendix B lists every status.
Fields are arranged in collapsible sections down the card; click a heading to fold one away. At the bottom of the card, forms with secondary options show tabs — Main holds the fields you normally fill in, Settings the options you rarely change.
The toolbar at the top right changes with the state of the record. A new entry offers Create and Save. A saved or submitted entry replaces Save with a link icon, a print icon, an expand icon, Create, View and a … menu holding the remaining actions.
The assistant button
A round button sits at the bottom right of every screen. It opens the Assistant panel, which docks to the right of the window and answers questions about your books in prose, tables and charts. The panel has its own chapters, beginning with Chapter 46.
Saabi Desktop User Manual 1.0 · covers Desktop 1.0.0 · Something wrong or missing? Tell us