
Chapter 20 · Sales · 6 min read
Point of Sale
On this page
The point of sale is the counter screen: a full-width till where you ring up a sale, take the money and hand over a receipt, without filling in an invoice form for each customer. Behind the scenes every POS sale still produces a sales invoice and a payment, so the takings land in your accounts the same way they would if you had raised the invoice by hand. Around the selling, POS adds shift management — you open a shift with a counted float at the start of the day and close it with a counted till at the end, and SAABI reconciles the two.
Enabling the point of sale
POS is off until you turn it on. Go to Setup > Settings > General and find the Features section.
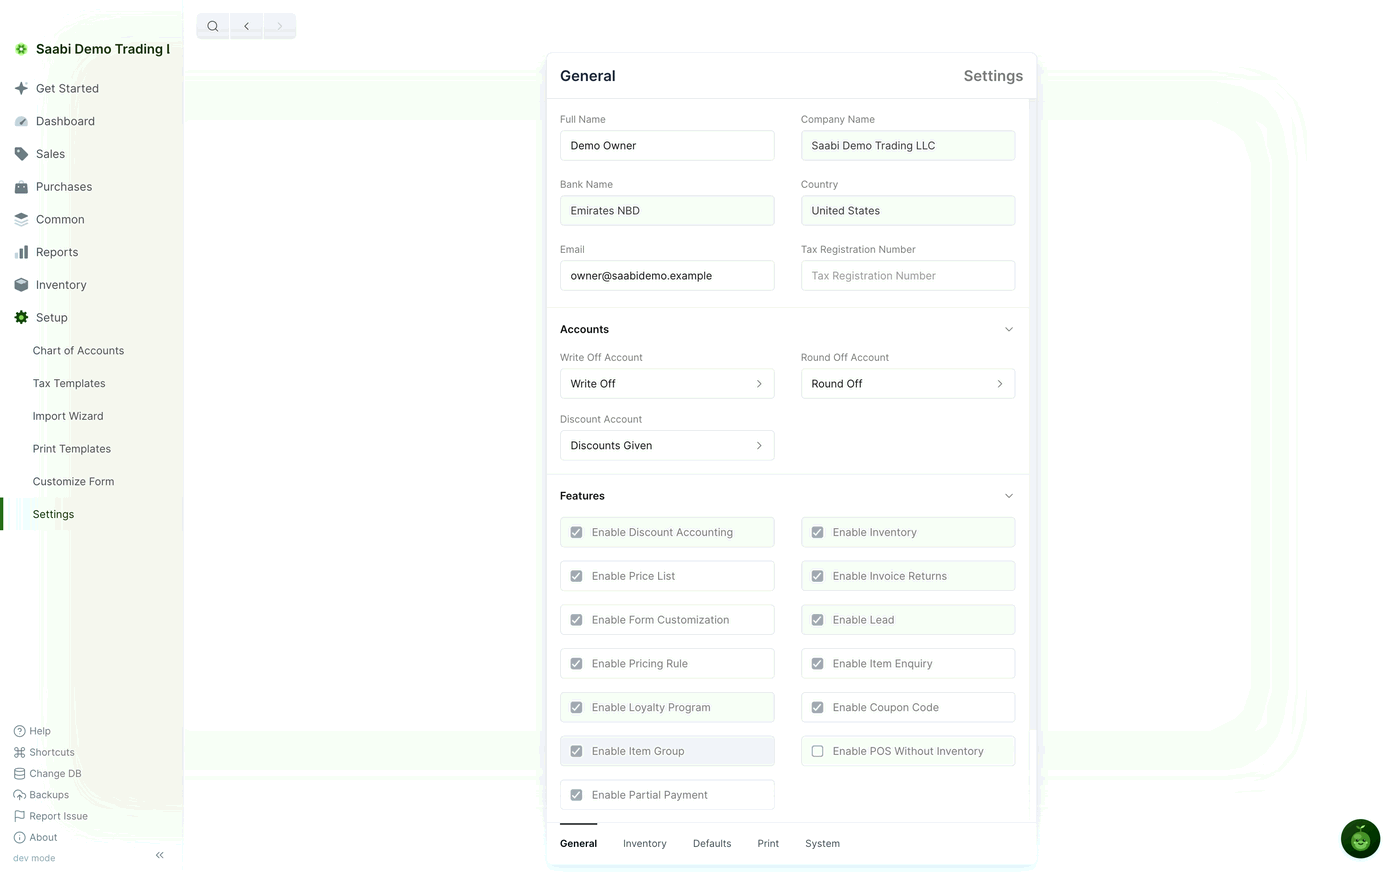
Tick Enable POS Without Inventory.
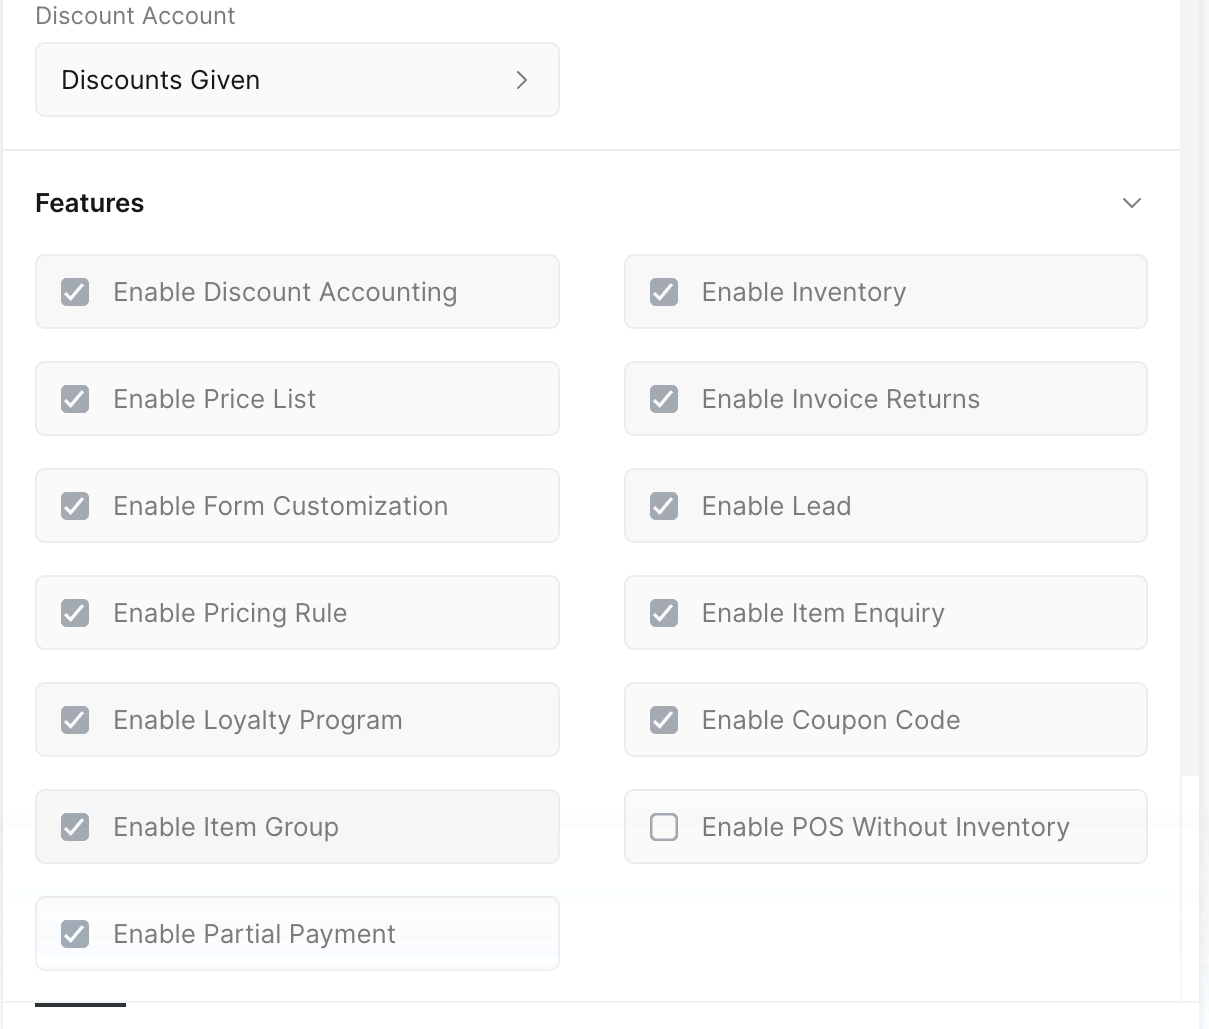
Save the setting. SAABI adds a POS entry to the sidebar and a POS Settings tab to the Settings page.
POS Settings
Open Setup > Settings and go to the POS Settings tab, which now sits between Defaults and Print.
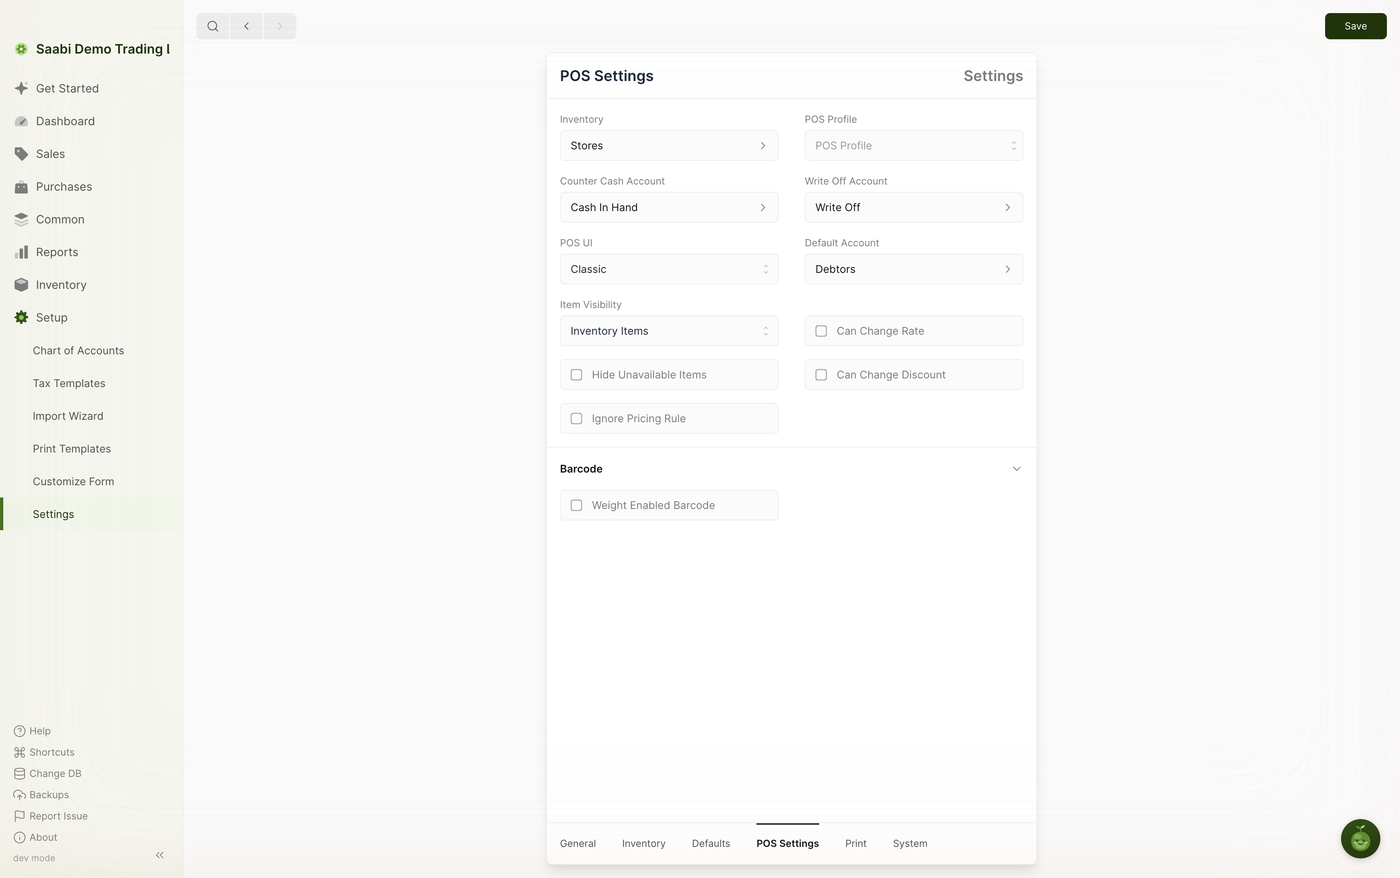
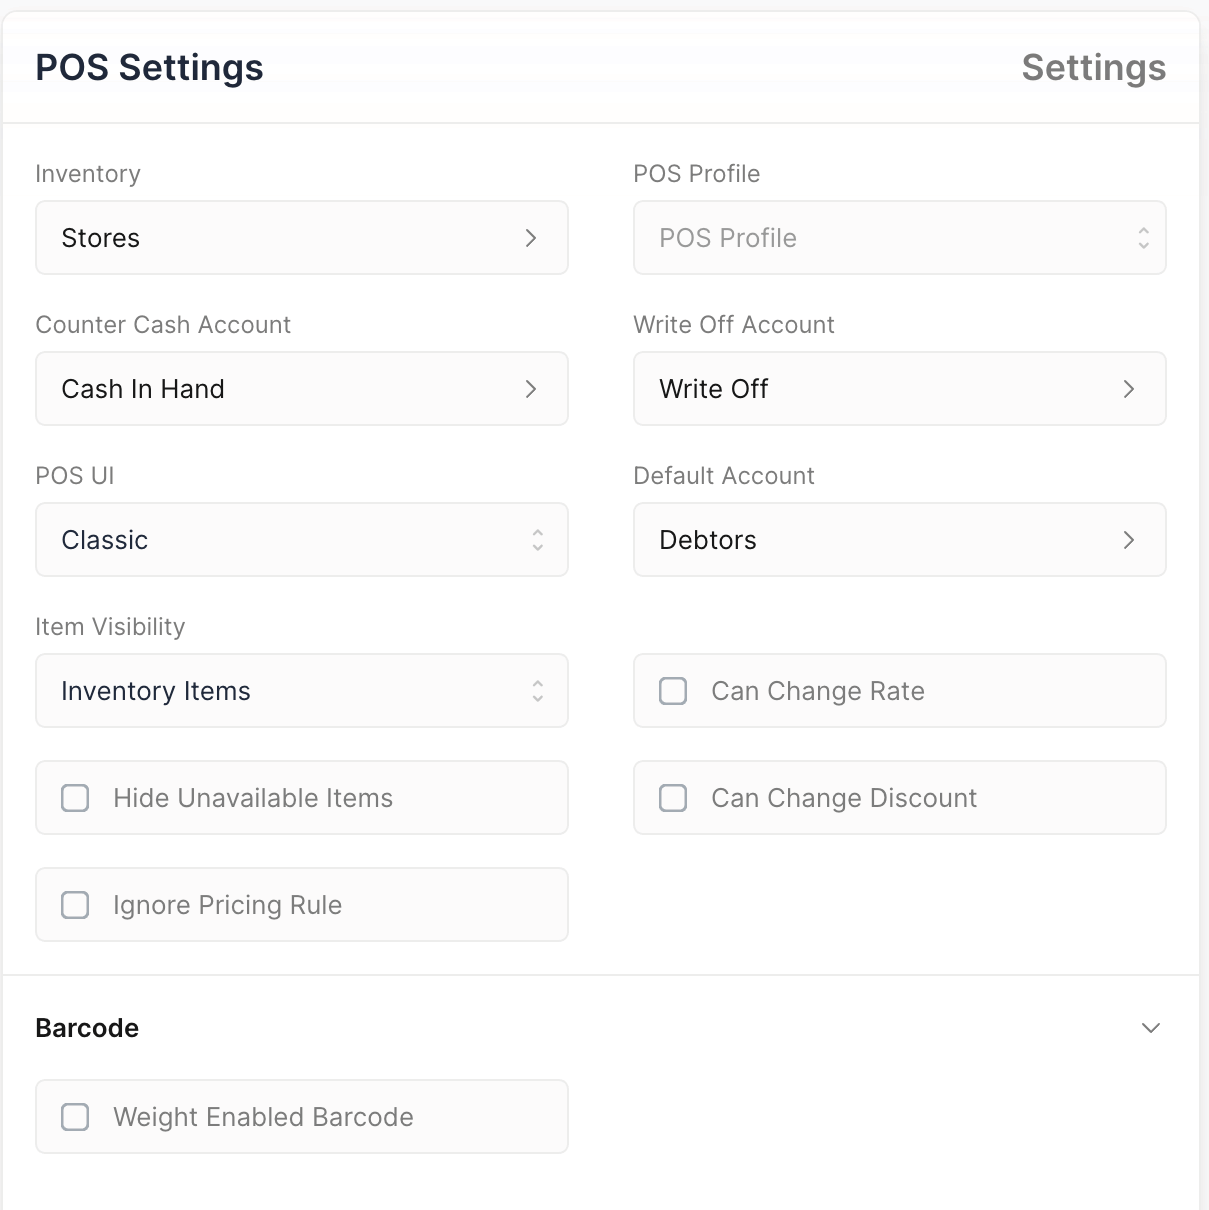
- Inventory — the location stock is sold from at this till.
- POS Profile — a saved profile of till settings, if you keep more than one configuration.
- Counter Cash Account — the account cash taken at the counter is posted to,
Cash In Handby default. - Write Off Account — where small unreconciled differences are booked.
- POS UI — the layout of the till screen.
Classicgives the list-based screen shown in this chapter. - Default Account — the receivable account POS invoices are booked against,
Debtorsby default. - Item Visibility — which items appear in the till's item list, for example inventory items only.
- Can Change Rate — allows the cashier to override an item's price at the till.
- Can Change Discount — allows the cashier to apply a discount at the till.
- Hide Unavailable Items — keeps items with no stock out of the list.
- Ignore Pricing Rule — sells at list price at this till, ignoring any pricing rules that would otherwise apply.
- Weight Enabled Barcode — reads barcodes that carry a weight in them, for goods sold loose.
Note
Can Change Rate and Can Change Discount are the two settings worth deciding deliberately. Left clear, a cashier can only sell at the prices you have set, which is usually what you want at a busy counter.
Opening a shift
The till will not sell until a shift is open. Opening one records what was in the drawer before the first sale, which is what makes the closing count meaningful.
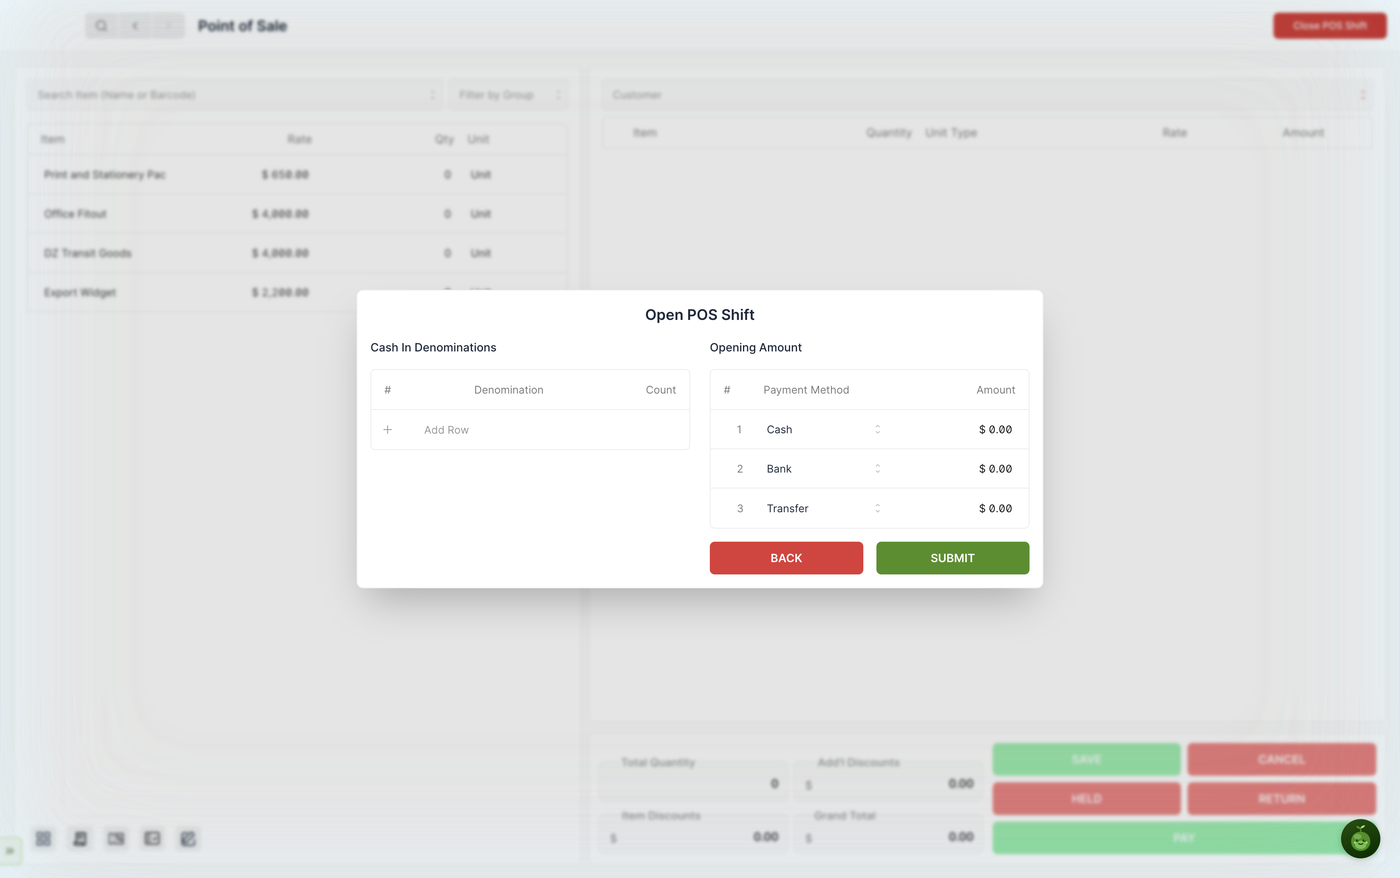
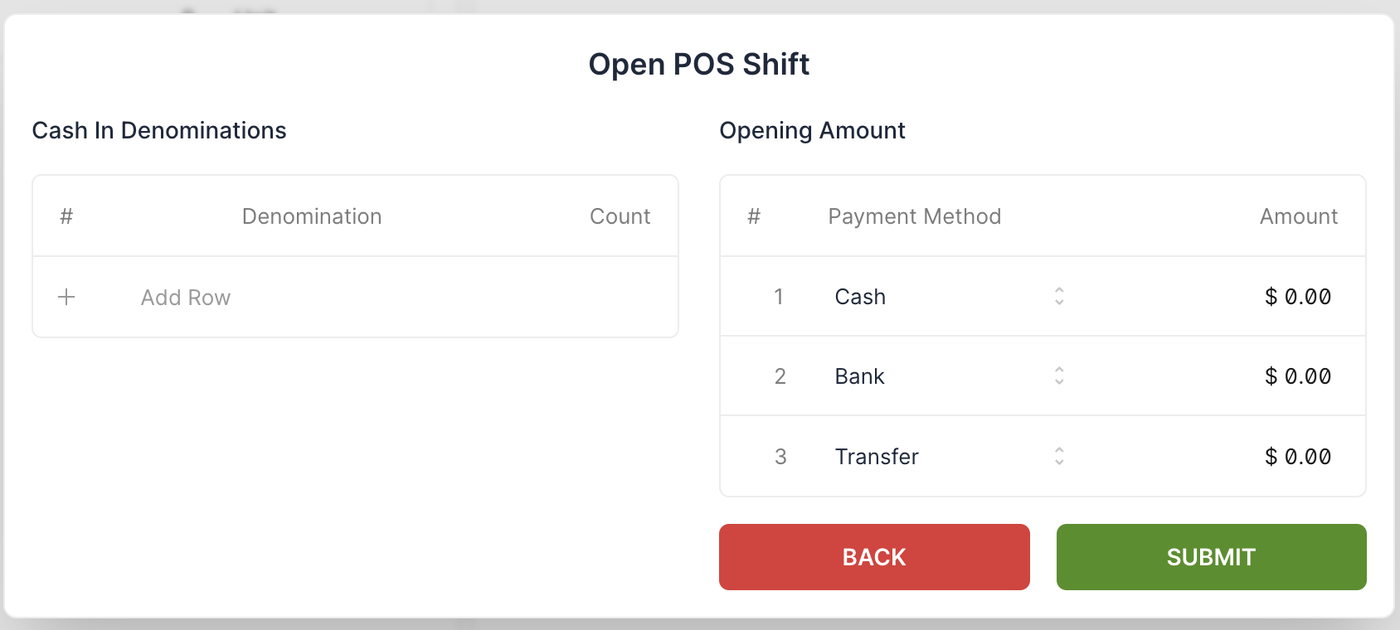
- In Cash In Denominations, click Add Row and enter each note and coin denomination in the drawer with its Count. SAABI totals them as you go.
- The total lands in the Cash row under Opening Amount.
- Enter opening balances for the other payment methods — Bank and Transfer — if any apply.
- Check the figures and click SUBMIT. The shift is marked open and its opening date and time are recorded.
The POS screen
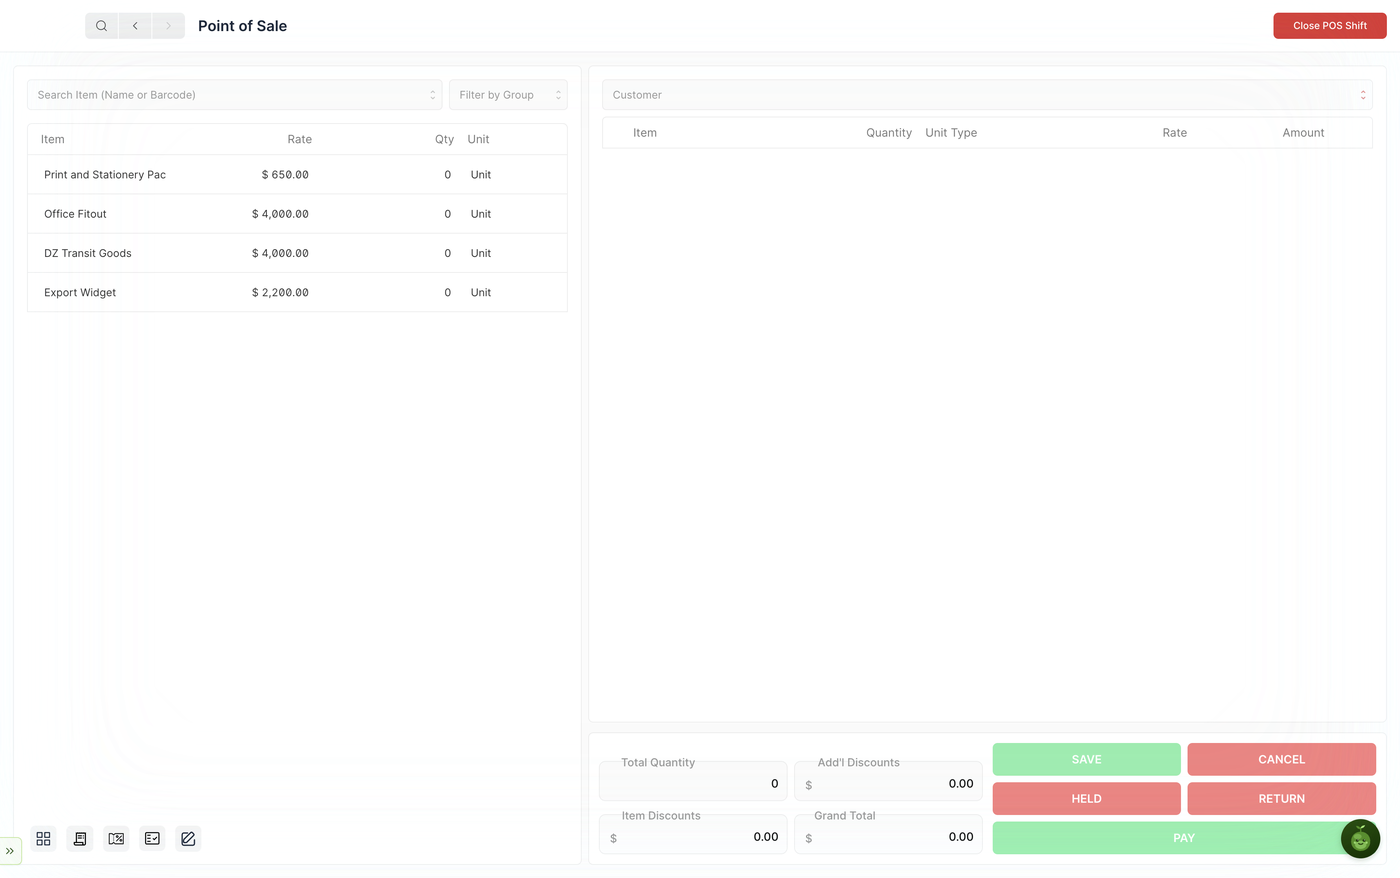
The screen is in three parts.
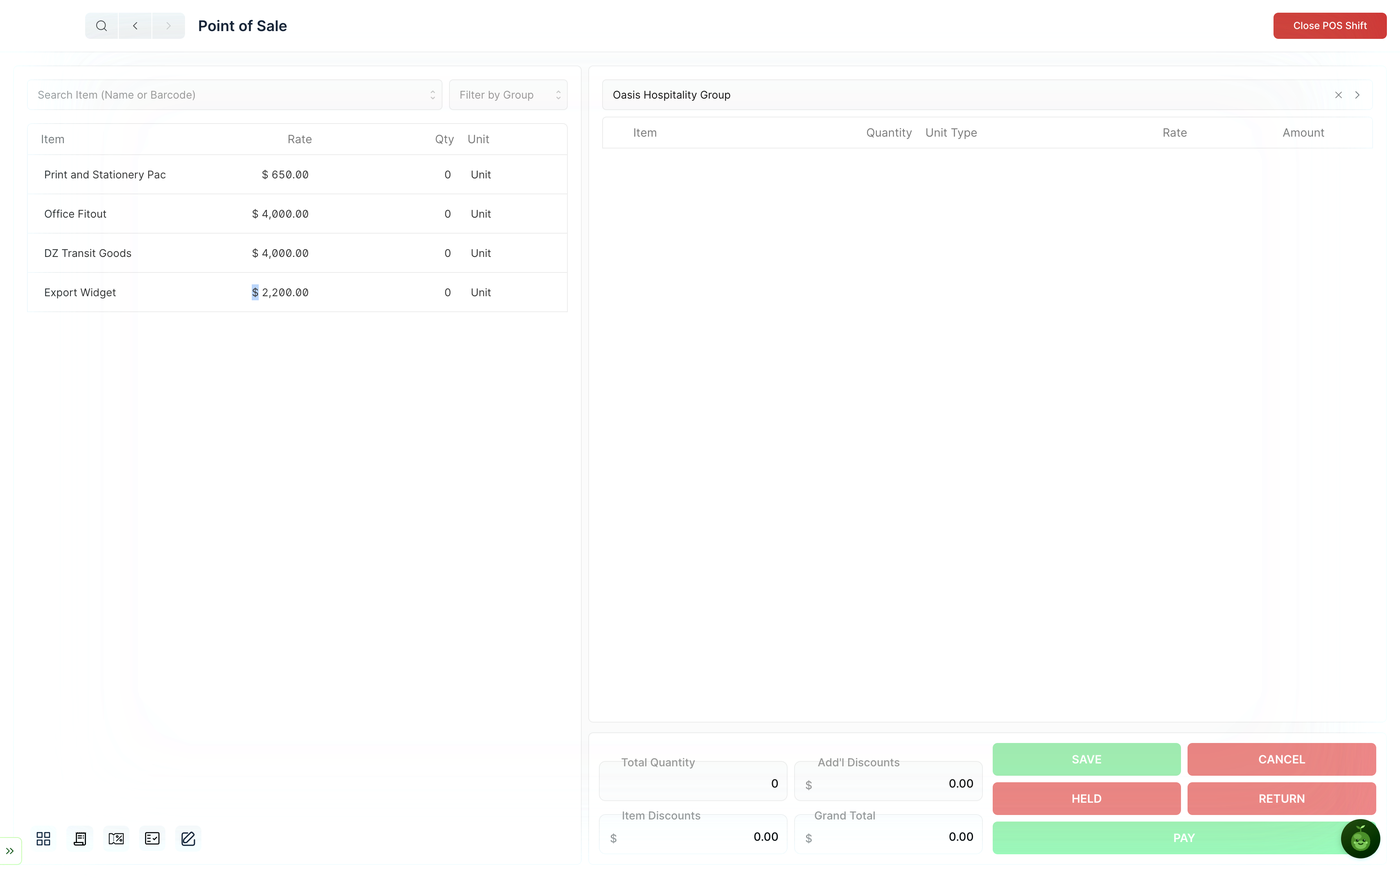
On the left is the item list, with Search Item (Name or Barcode) above it and Filter by Group beside that. The list shows each item's Rate, the Qty in the cart, and its Unit.
On the right is the cart, with the Customer field above it. The cart's columns are Item, Quantity, Unit Type, Rate and Amount.
Across the bottom sit the totals and the action buttons. A row of icons in the bottom left corner switches the item list to a grid view with pictures and opens the extras — the sales invoice list, loyalty points, coupon codes, price lists and item enquiries.
Choosing the customer
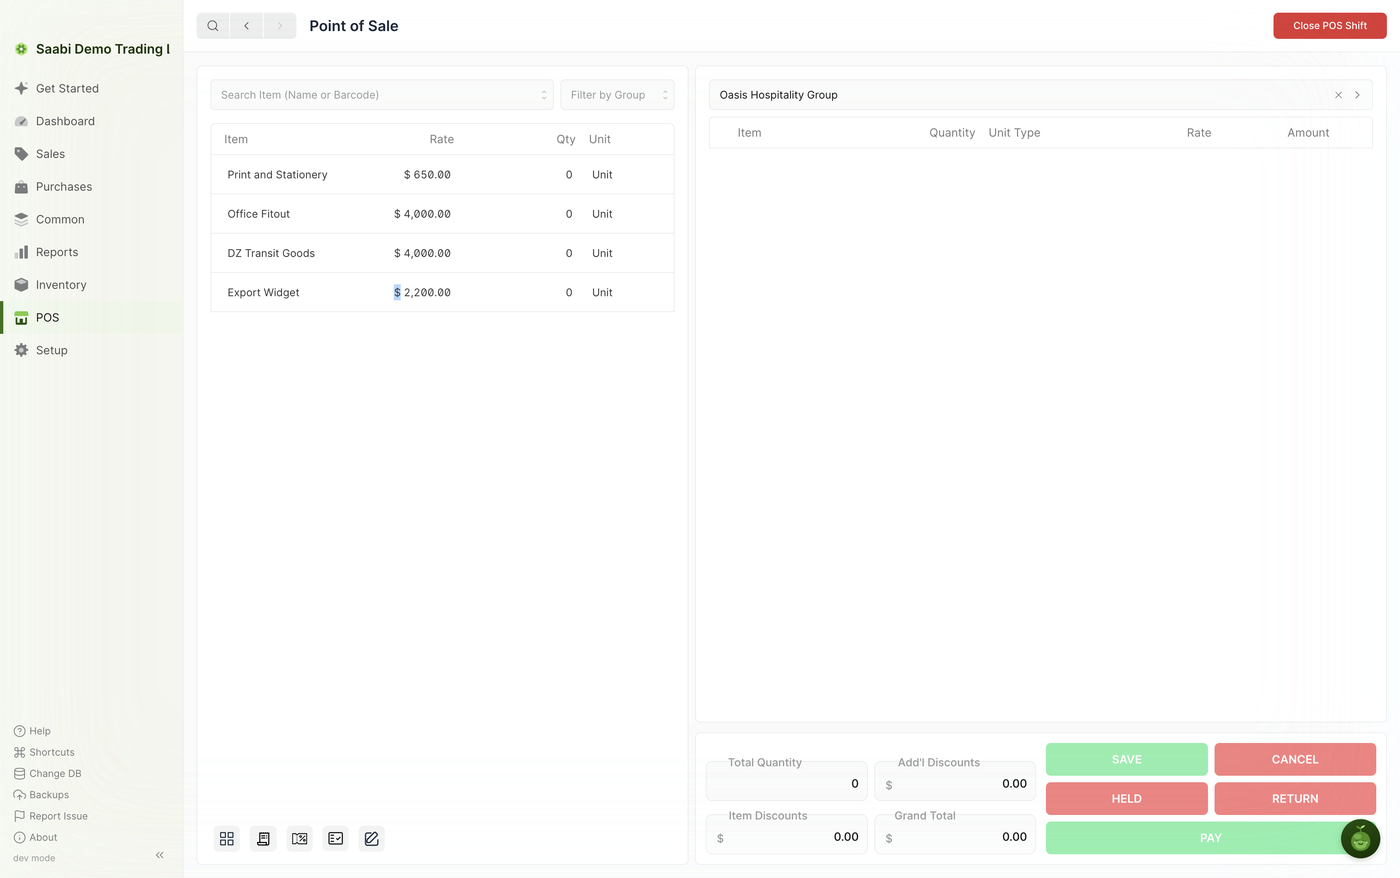
Click Customer at the top of the cart and pick who you are selling to. The field completes as you type, and offers to create the customer inline if they are new.
Set the customer before taking payment: it is what determines the receivable, and what lets loyalty points and customer-specific pricing apply to the sale.
Adding items to the cart
There are three ways to get an item into the cart:
- Click it in the list on the left.
- Scan its barcode into the search field. The item is added straight away.
- Type part of its name into the search field, then click the item you want. Use Filter by Group to cut a long list down to one item group first.
To change a quantity, click the expand arrow on the cart line and either type the figure into Transfer Quantity or step it with the arrows. To take a line off the sale, click the delete button beside it.
Totals and cart actions

The four boxes on the left are the running totals: Total Quantity is the number of items in the cart, Add'l Discounts is a discount applied to the sale as a whole, Item Discounts is the total of the discounts on individual lines, and Grand Total is what the customer pays.
The buttons on the right are:
- SAVE — stores the sale as a draft invoice, keeping everything entered so it can be finished later.
- CANCEL — discards the sale and resets the screen for the next customer.
- HELD — opens the parked sales, in two sections: saved sales not yet submitted, and submitted invoices including part-paid ones. A search box finds one by invoice name.
- RETURN — lists return invoices; choosing one loads its items into the cart.
- PAY — takes payment for what is in the cart.
Taking payment
Click PAY once the cart is complete and the customer is set. SAABI shows the payment methods available at this till — cash, bank and transfer — and the amount payable for you to confirm. Choose the method the customer is paying by, then complete the sale. You can complete it and print the receipt in one action, or complete it without printing. Cancelling at this point closes the payment view and leaves the cart as it was, so nothing is lost.
Completing the payment submits the sales invoice behind the sale and records the payment against it. The sale then appears under HELD among the submitted invoices, and in Sales > Sales Invoices like any other invoice.
Closing the shift
At the end of the day, click Close POS Shift at the top right.
Closing has two halves. Under the closing cash count, enter the quantity of each note and coin actually in the drawer; the counts start pre-filled from the opening float, and SAABI recalculates the closing cash and shows the difference against what it expected as you correct them. Below that, a read-only table sets out each payment method with its opening amount, expected amount, closing amount and difference, which is where a shortage or a surplus shows itself.
Click SUBMIT to close. SAABI validates the closing amounts, records the closing date and time, and links the closing record to the shift it opened against.
Important
Count the drawer before you enter anything, not after reading the expected figure. The difference between the counted and the expected amount is the only thing the closing count is for, and it is worth knowing about the same day.
Saabi Desktop User Manual 1.0 · covers Desktop 1.0.0 · Something wrong or missing? Tell us