
Chapter 52 · Configuration · 9 min read
Settings
On this page
Settings is where you set up the company itself: who it is, which accounts it posts to, which parts of SAABI are switched on, what a new entry starts with, how invoices print and how numbers and dates are displayed. You visit it once when you set up a company, and then only when something about the business changes. Everything here applies to the company that is open — see Chapter 51 for what that means when you keep more than one set of books.
Opening Settings
Navigate to Setup > Settings in the sidebar, or open the Quick Search, type Settings and press Enter. The tabs run along the bottom of the settings card, and the name of the tab you are on appears at the top left.
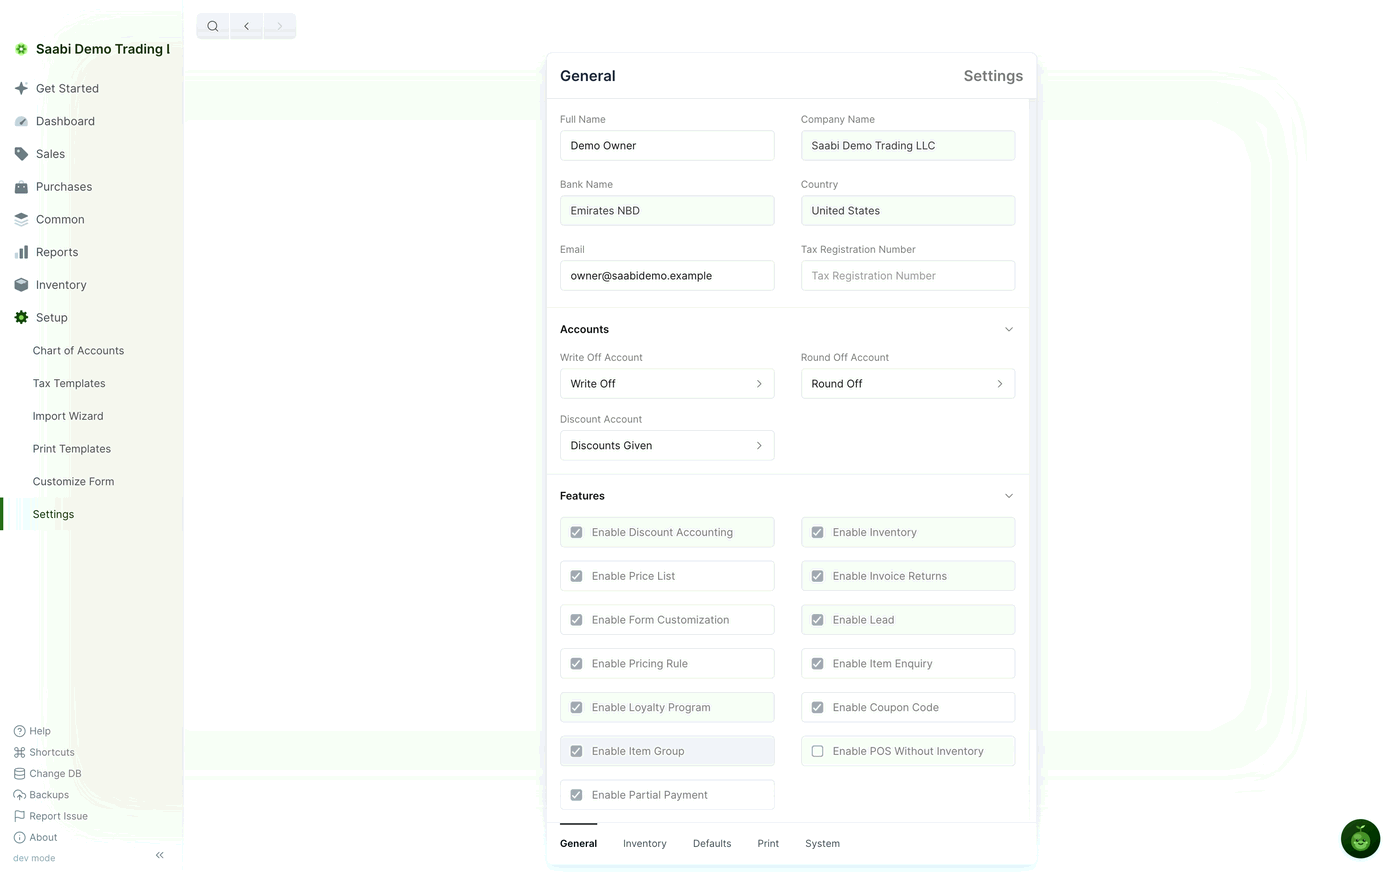
SAABI has five settings tabs:
- General — who the company is, which accounts it uses, which features are switched on, and the fiscal year.
- Inventory — stock locations, stock accounts and stock features. This tab appears only when Enable Inventory is ticked.
- Defaults — the values a new entry starts with.
- Print — the logo, colours and options used by the invoice print view.
- System — date format, number display, theme and the app version.
A sixth tab, POS Settings, appears when point of sale is switched on.
Changes are not saved as you type. When you edit a field, a Save button appears at the top right of the window; click it to store the change.
General
The six fields at the top identify the company.
- Full Name — the name of the person who owns or keeps the books.
- Company Name — the business name, used across the app and on printed documents.
- Bank Name — the bank the company banks with.
- Country — the country the company trades in. It sets the chart of accounts when the company is created and the default locale used to display numbers and currency.
- Email — the company's email address.
- Tax Registration Number — your registration number, where you have one. Leave it blank if you do not.
Note
Full Name, Company Name, Bank Name and Country are set when you create the company in the setup wizard. Treat them as fixed once you have started posting entries.
Accounts sets three accounts SAABI needs to post to on your behalf:
- Write Off Account — the account used when you set a write off amount while making a payment.
- Round Off Account — the account used to settle the difference between credit and debit when the general ledger is updated.
- Discount Account — the account discounts are posted to when discount accounting is on.
Features is a block of checkboxes. Each one shows or hides a part of SAABI, so a company that does not sell stock, run a loyalty scheme or take card payments is not asked about any of it.
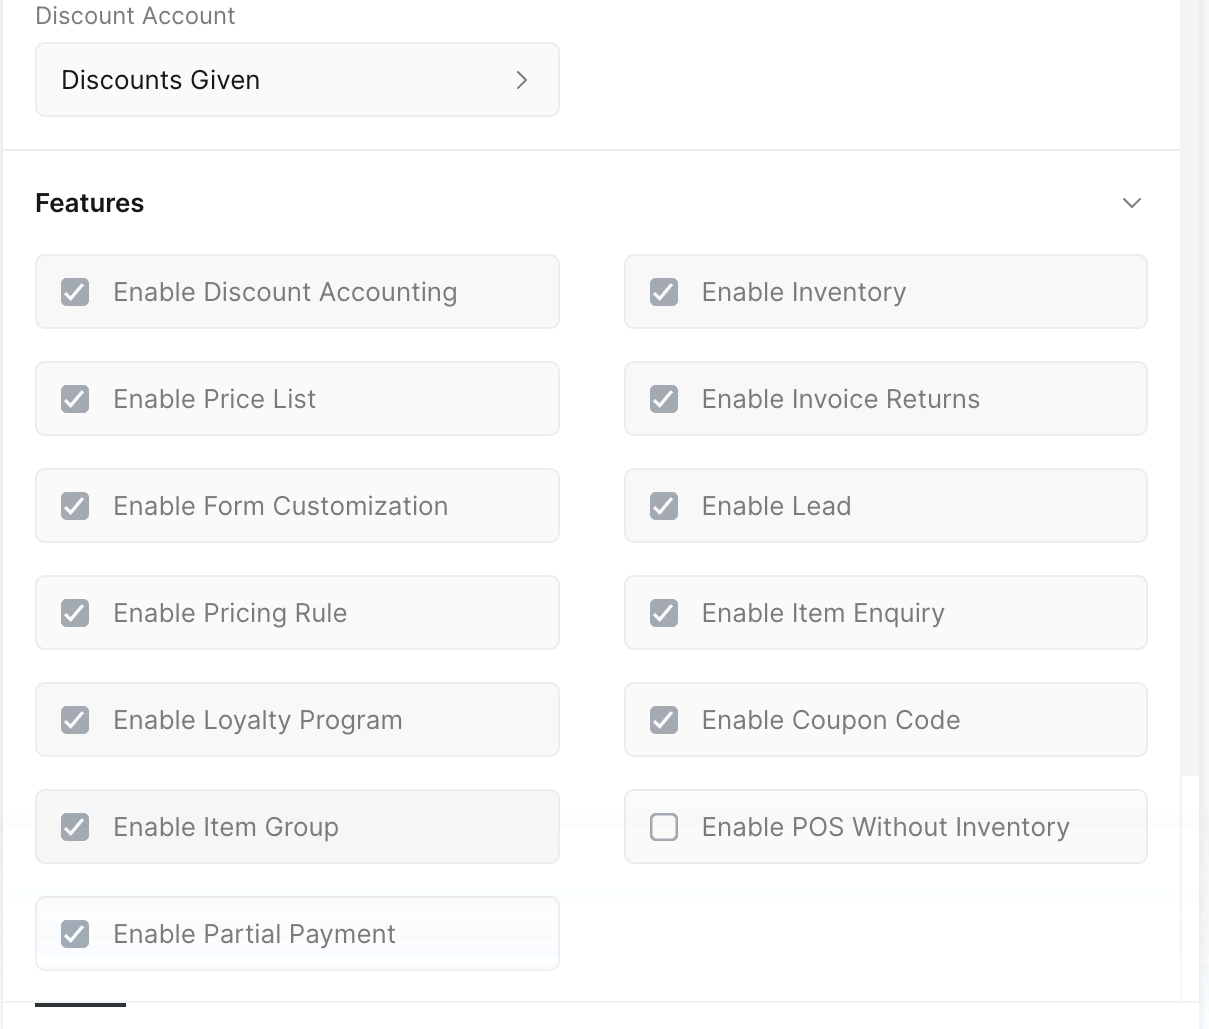
- Enable Discount Accounting — lets you set discounts on invoices and posts them to the Discount Account.
- Enable Inventory — turns on stock: the Inventory section in the sidebar, the Inventory settings tab, and stock tracking on items.
- Enable Price List — turns on price lists, and adds the Price List field to entries.
- Enable Invoice Returns — lets you raise a return against a submitted invoice.
- Enable Form Customization — adds
Setup > Customize Form. See Chapter 55. - Enable Lead — adds Lead under Sales.
- Enable Pricing Rule — adds Pricing Rule under Sales.
- Enable Item Enquiry — turns on item enquiry.
- Enable Loyalty Program — adds Loyalty Program under Sales.
- Enable Coupon Code — adds Coupon Code under Sales.
- Enable Item Group — lets you group items.
- Enable POS Without Inventory — turns on point of sale for a business that does not track stock.
- Enable Partial Payment — lets you record a payment for part of an invoice, so an invoice can sit at Partly Paid.
Fiscal Year holds a Start Date and an End Date. Reports that run by fiscal year use these two dates as the period, so set them to your accounting year rather than the calendar year if the two differ. The demo company runs from Jan 1, 2026 to Dec 31, 2026.
Feature switches and the reload prompt
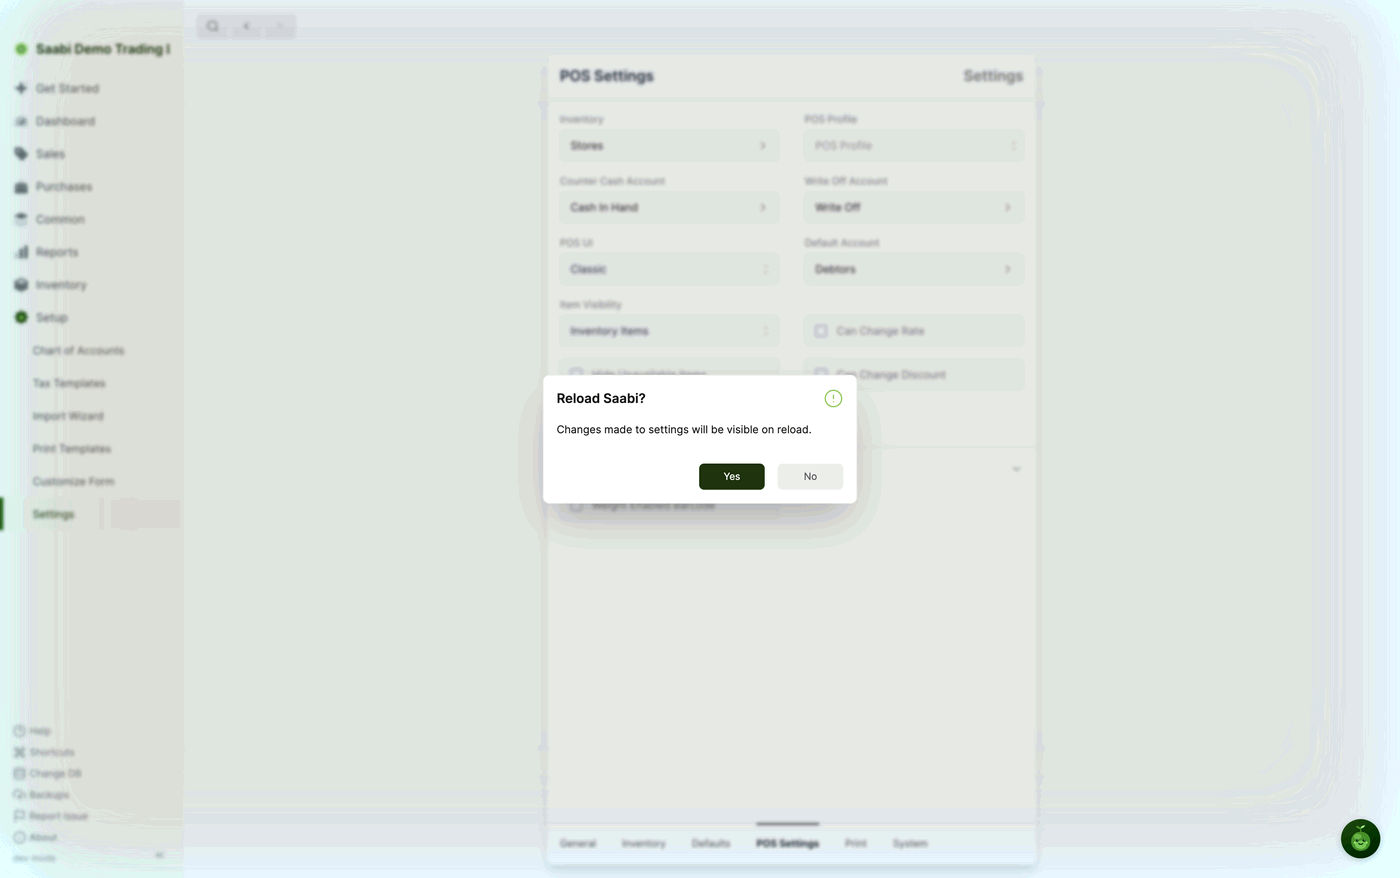
Feature switches change what the app is made of, so SAABI has to rebuild the interface before you can see the difference. When you change one, SAABI asks:
Note
Reload Saabi? Changes made to settings will be visible on reload.
Click Yes and SAABI reloads immediately. Click No and the change is still saved, but the sidebar, tabs and forms keep their old shape until the next time you reload or restart the app. You can reload at any time with ⌘ R on macOS or Ctrl R on Windows and Linux.
Tip
Turning a feature off hides it; it does not delete anything. Entries you already made stay in the file and come back when you switch the feature on again.
Inventory
This tab is visible only when Enable Inventory is ticked on the General tab. Chapter 38 describes each setting in detail.
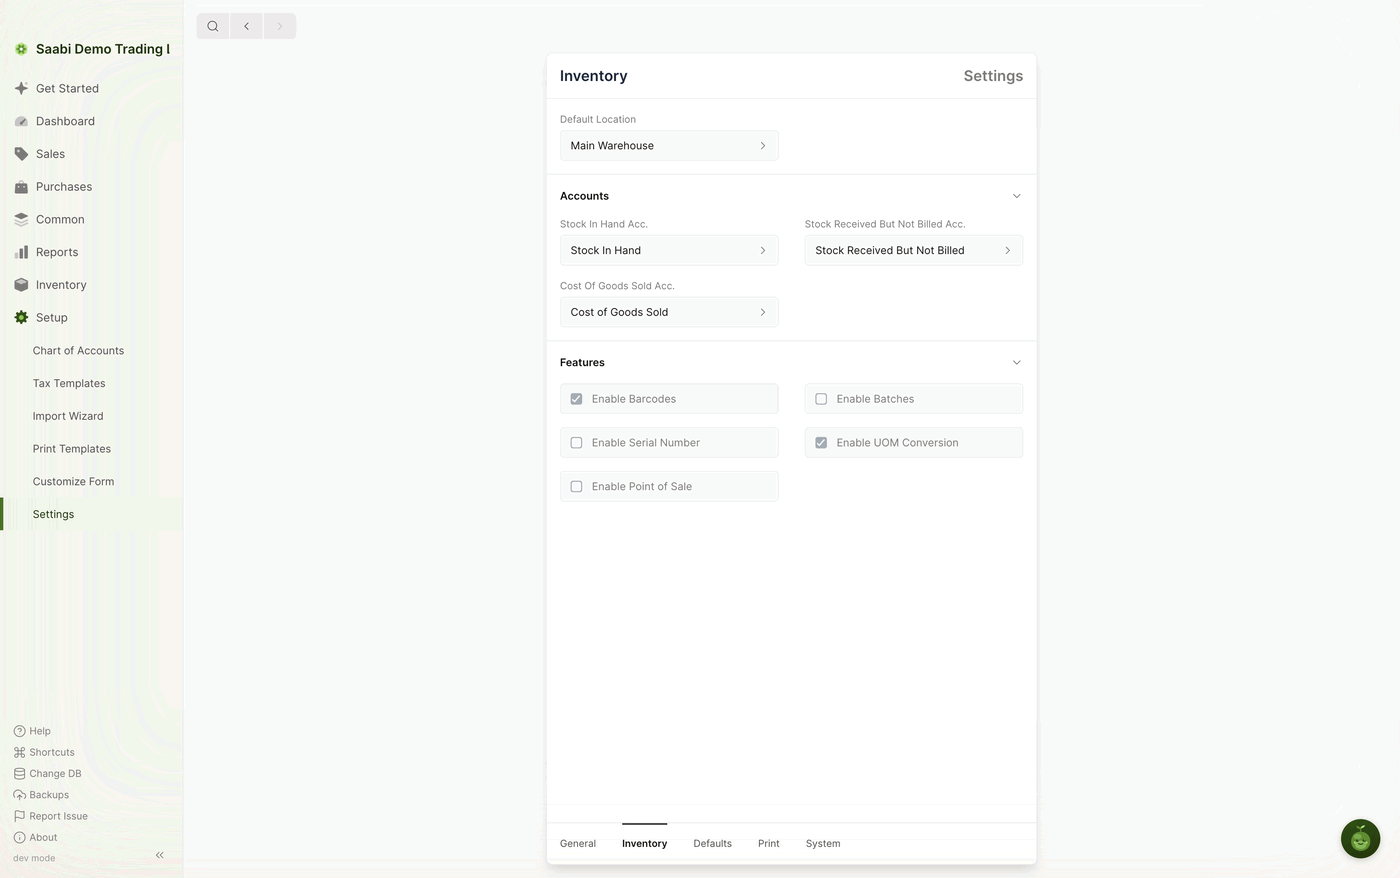
- Default Location — the location used whenever an inventory transaction line is created. Set it to the place most of your stock moves through.
Accounts sets the three accounts stock movements post to:
- Stock In Hand Acc. — debited whenever stock is received.
- Stock Received But Not Billed Acc. — debited when you make a purchase invoice for a tracked item, and credited when the purchase receipt is made.
- Cost Of Goods Sold Acc. — debited whenever a shipment is made.
Features switches on the parts of stock handling you need:
- Enable Barcodes — lets you set a barcode on an item, and adds a barcode input to the forms where items are entered.
- Enable Batches — lets items be tracked in batches, and adds the Has Batch option to items.
- Enable Serial Number — lets items be tracked by serial number, and adds the Has Serial Number option to items.
- Enable UOM Conversion — lets an item carry more than one unit of measure, so you can enter a quantity in a transfer unit and have SAABI convert it to the stock unit.
- Enable Point of Sale — turns on the point of sale screen and adds the POS Settings tab.
Defaults
The Defaults tab sets the values a new entry starts with. Every one of them can still be changed on the entry itself; they exist so that most entries need no changing at all.
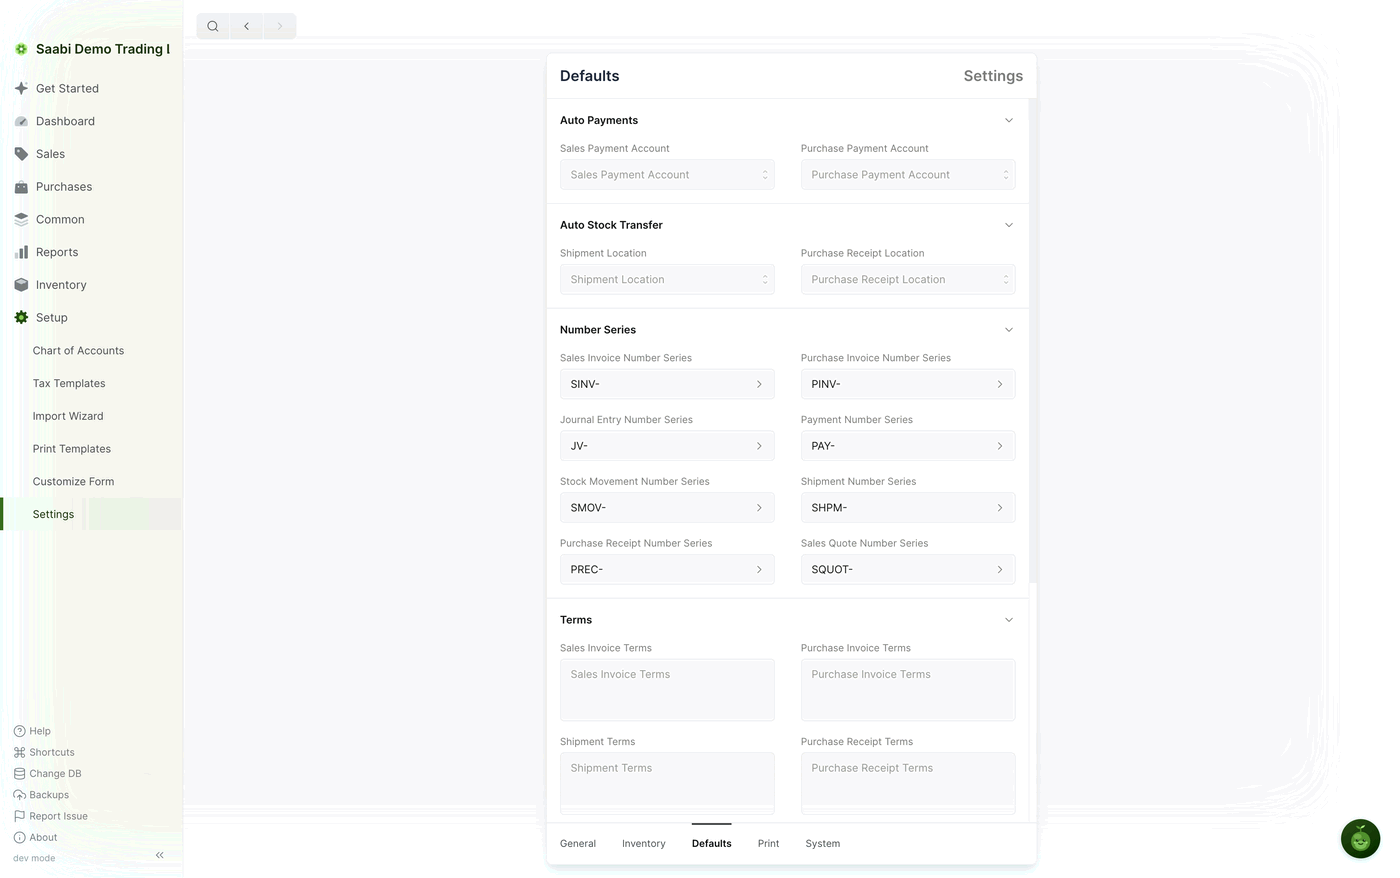
Auto Payments — the accounts used when SAABI creates a payment for you:
- Sales Payment Account — the account money received from customers is paid into.
- Purchase Payment Account — the account money paid to suppliers comes out of.
Auto Stock Transfer — the locations used when SAABI creates a stock entry for you:
- Shipment Location — the location goods are shipped from.
- Purchase Receipt Location — the location goods are received into.
Important
An item on an invoice is included in an automatic stock transfer only when all three of these hold: the item does not use batches, the item does not use serial numbers, and there is enough of it at the location set here. Items that fail any of these have to be shipped or received by hand.
Number Series holds the naming scheme for each type of entry: Sales Invoice Number Series, Purchase Invoice Number Series, Journal Entry Number Series, Payment Number Series, Stock Movement Number Series, Shipment Number Series, Purchase Receipt Number Series and Sales Quote Number Series. See Chapter 53 for the default prefixes and how a series behaves once it has been used.
Terms holds the standard wording added to the entries that carry terms: Sales Invoice Terms, Purchase Invoice Terms, Shipment Terms and Purchase Receipt Terms. Type your payment terms, delivery conditions or notes here once and every new entry of that type starts with them.
POS Settings
This tab appears when point of sale is switched on, either with Enable Point of Sale on the Inventory tab or Enable POS Without Inventory on the General tab. The settings are described in Chapter 20.
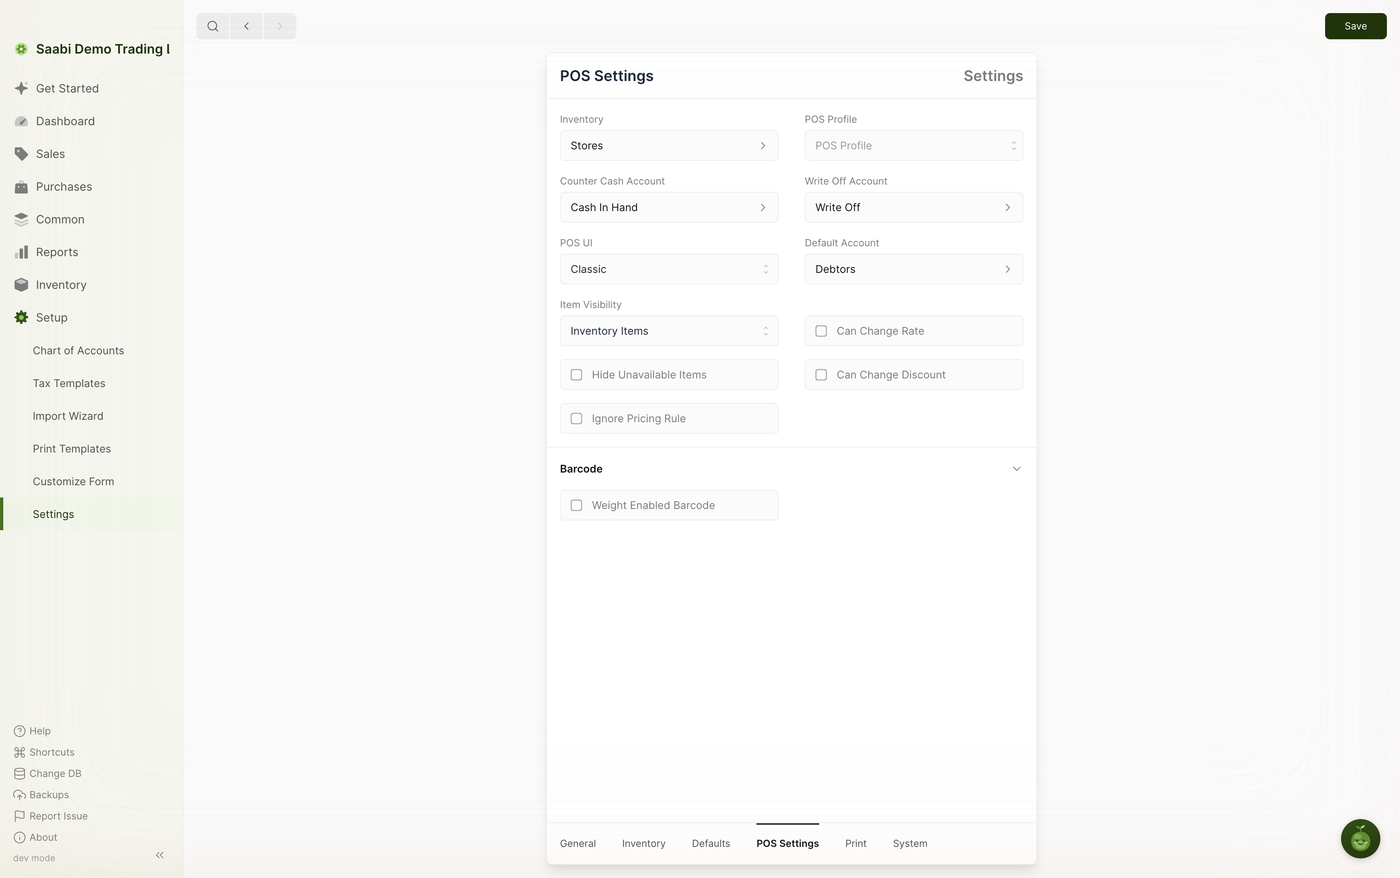
- Inventory — the location the counter sells from.
- POS Profile — the profile applied at the counter.
- Counter Cash Account — the account cash taken at the counter is posted to.
- Write Off Account — the account used for the small differences written off at the counter.
- POS UI — the layout of the point of sale screen.
- Default Account — the account used for the customer side of a counter sale.
- Item Visibility — which items the counter shows.
- Hide Unavailable Items — hides items with no stock available.
- Ignore Pricing Rule — sells at the item's own rate and ignores pricing rules.
- Can Change Rate — lets the operator change an item's rate at the counter.
- Can Change Discount — lets the operator change the discount at the counter.
- Weight Enabled Barcode — under Barcode, for scales that print a barcode carrying the weight of the item.
The Print tab controls what the invoice print view shows. The logo box at the top left uploads your company logo, and Company Name sets the name printed on the document.
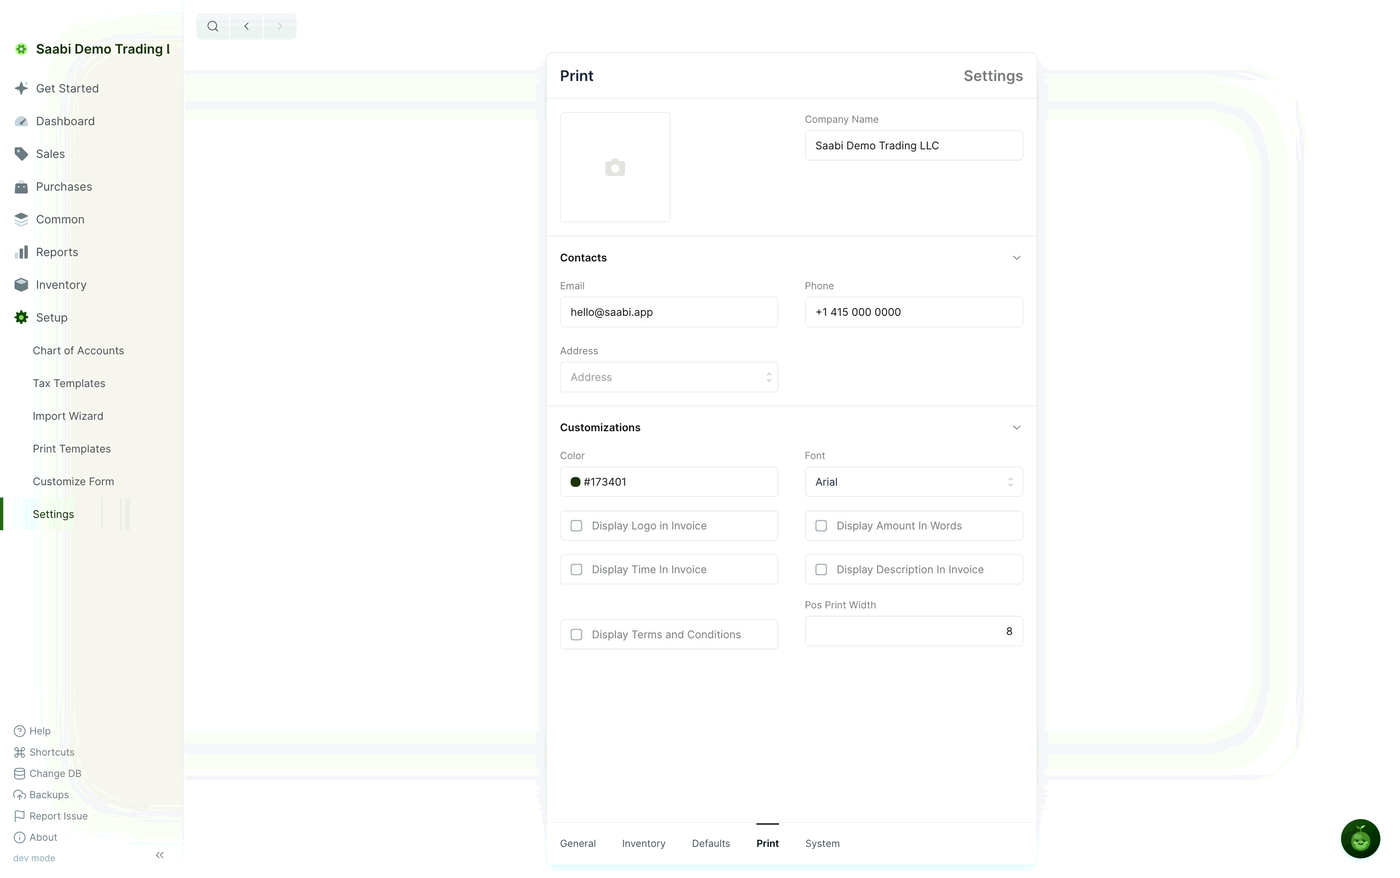
Contacts — the details printed in the from block of a document:
- Phone
- Address
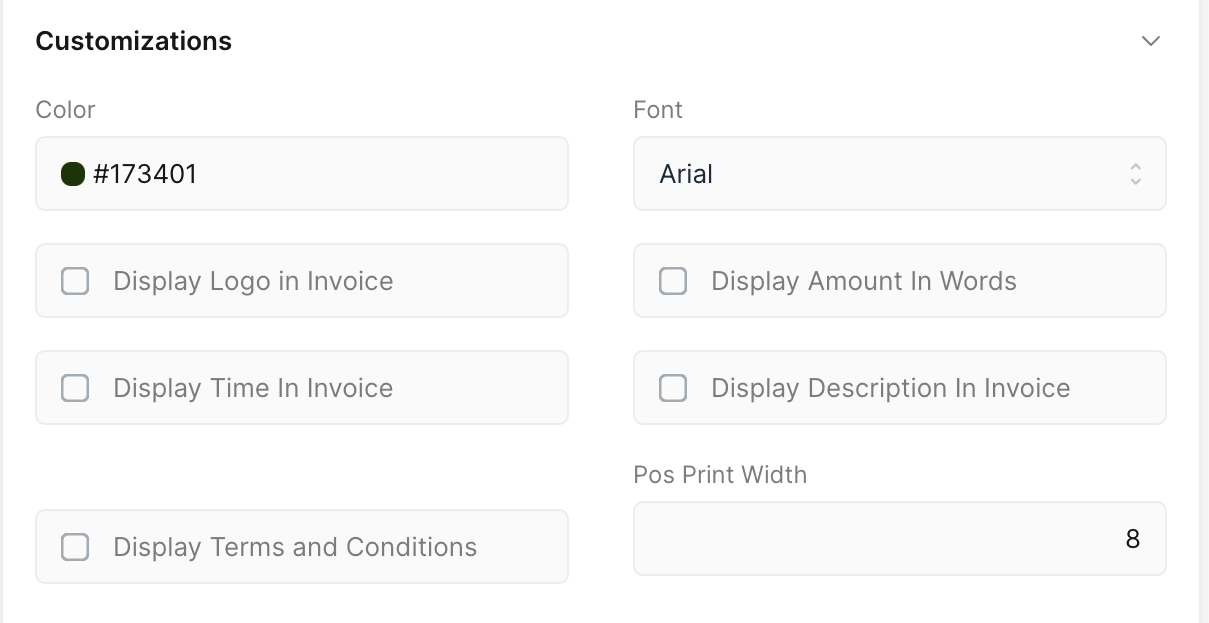
Customizations — how the printed document looks and what it shows:
- Color — the accent colour used for header bands and totals. The Saabi templates use forest green,
#173401. - Font — the typeface used on printed documents, for example
Arial. - Display Logo in Invoice — prints the logo you uploaded.
- Display Amount In Words — prints the grand total written out in words.
- Display Time In Invoice — prints the time alongside the date.
- Display Description In Invoice — prints each item's description under its name.
- Display Terms and Conditions — prints the terms set on the Defaults tab.
- Pos Print Width — the paper width, in centimetres, used for counter receipts.
Tip
These settings can also be reached from the print view of an entry, so you can change a colour or switch on the logo while you are looking at the document it affects. See Chapter 54.
System
The System tab sets how SAABI displays things, rather than what it records.
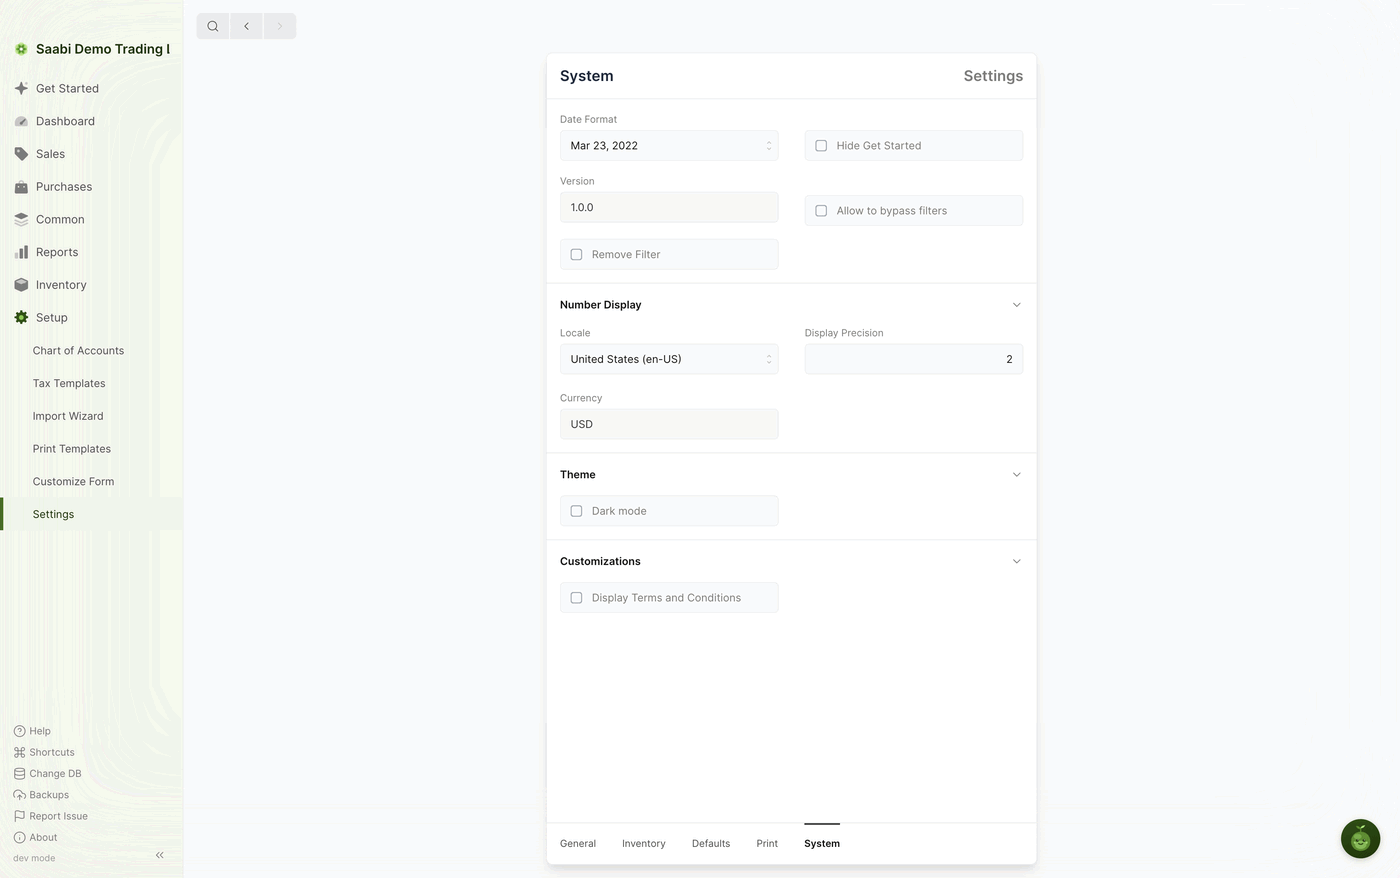
- Date Format — how dates are shown across the app. The demo uses
Mar 23, 2022. - Version — the version of SAABI you are running. This field is read only; the demo runs
1.0.0. - Hide Get Started — hides Get Started from the sidebar. SAABI also hides it on its own once you have worked through the cards.
- Allow to bypass filters and Remove Filter — change how the filters on list views behave.
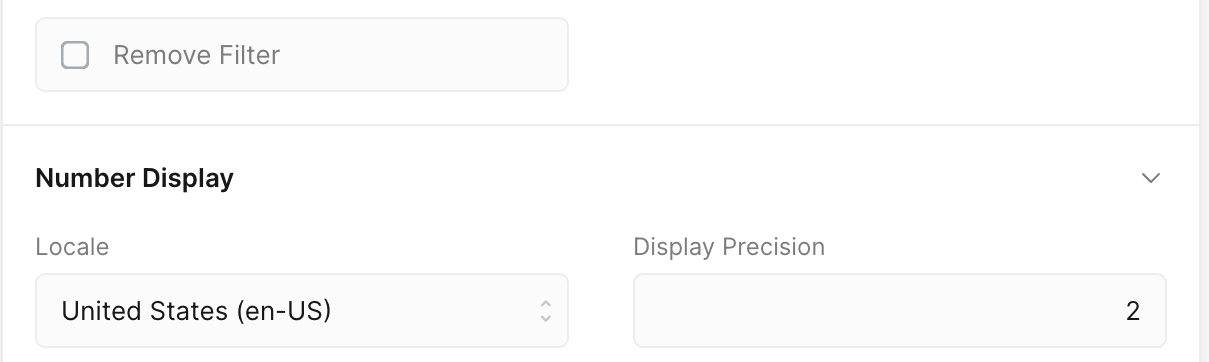
Number Display decides how amounts are written:
- Locale — the number format, for example
United States (en-US). It follows the country you set when you created the company unless you change it here. - Display Precision — how many digits are shown after the decimal point.
2for most currencies. - Currency — the currency used for all transactions. The examples in this manual use USD (
$).
Theme holds a single switch, Dark mode, which turns the interface dark.
Customizations holds Display Terms and Conditions, which shows the terms on screen as well as in print.
Note
Currency and Display Precision change how every amount in the company is shown, including amounts on entries you posted earlier. Set them before you start recording transactions.
Saabi Desktop User Manual 1.0 · covers Desktop 1.0.0 · Something wrong or missing? Tell us