
Chapter 22 · Purchases · 3 min read
Purchase Payments
On this page
A payment is the entry that records money changing hands. On the purchase side it records money leaving your bank or cash account to settle what you owe a supplier. Every purchase payment reduces the outstanding amount on the bill it is linked to and reduces the balance of the account the money came from. You will make most purchase payments straight from the invoice, but SAABI also lets you record one on its own.
The purchase payment list
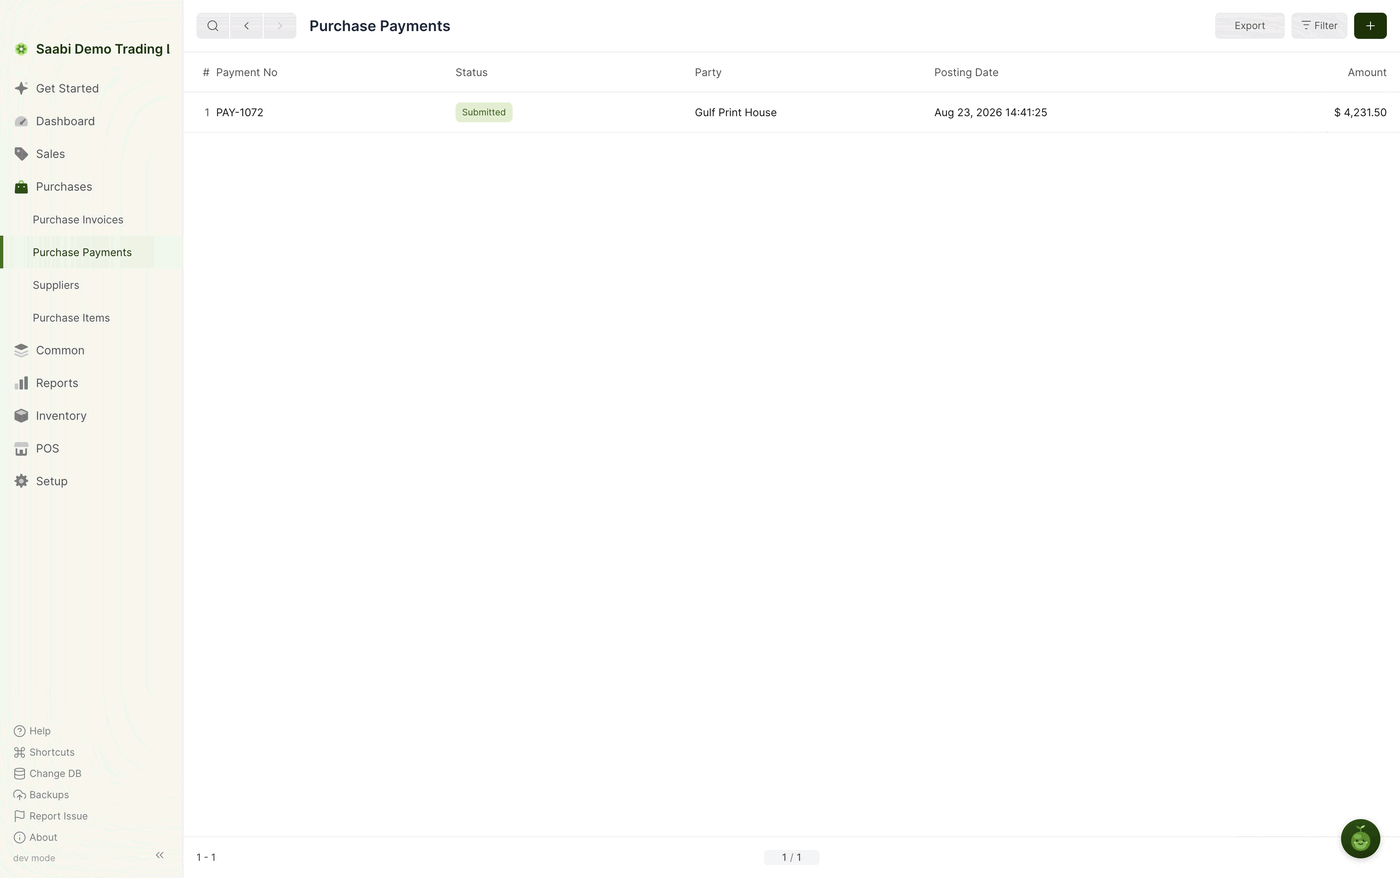
Go to Purchases > Purchase Payments. The list shows the Payment No, Status, Party, Posting Date and Amount of every payment you have made to a supplier.
Each row shows the payment number, its status, the supplier the money went to, the posting date and the amount. On a company file where no supplier payment has been recorded yet, the list shows No entries found and offers a Make Entry button, which does the same thing as the + button at the top right.
Paying a supplier from the invoice
Settling a bill from the bill itself is the most direct route, because the amount and the party are already known.
- Go to
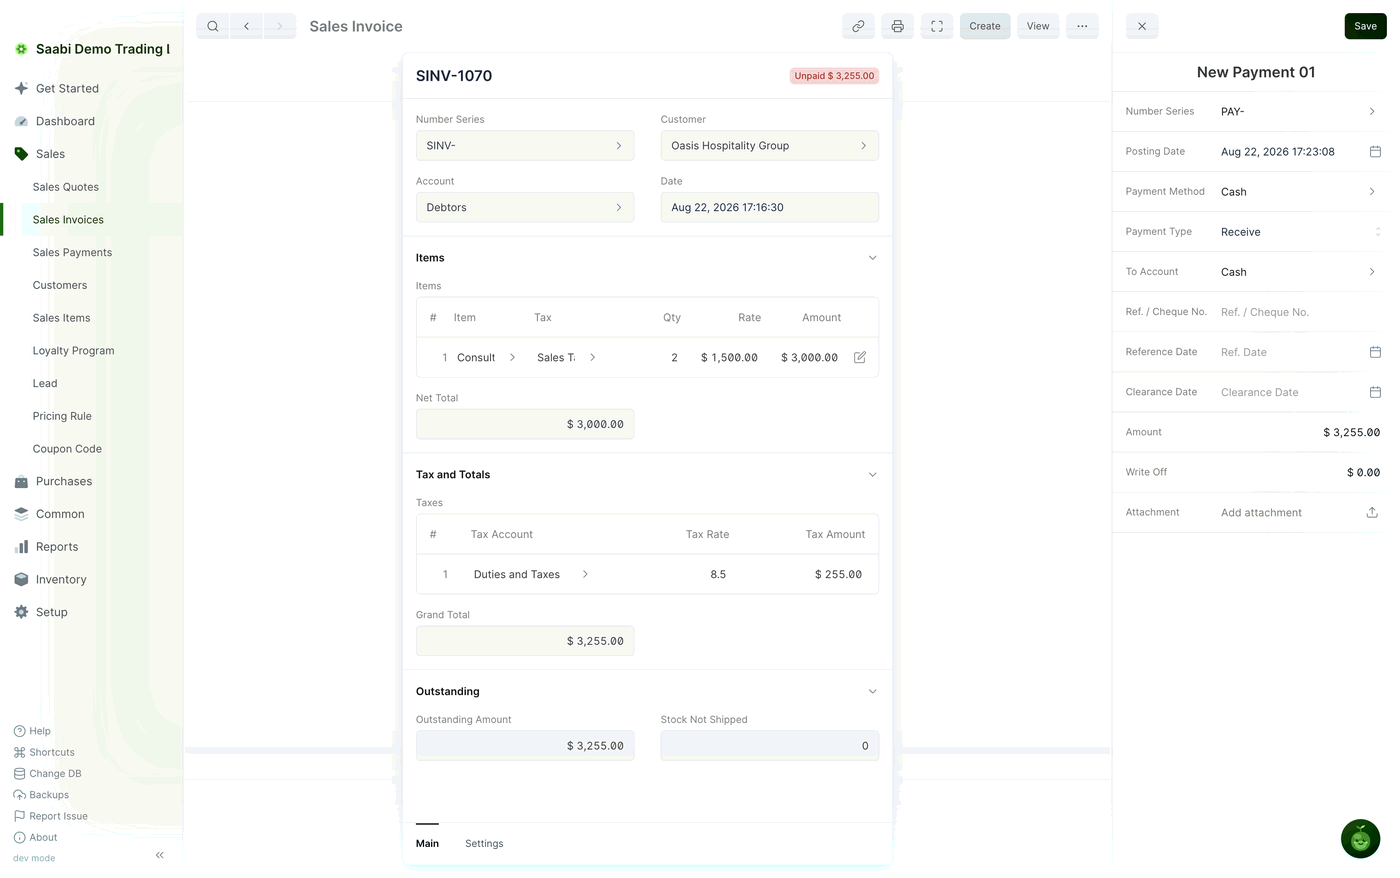
Purchases > Purchase Invoicesand open a submitted invoice with an outstanding balance. - Click Create > Payment.
- The payment panel opens beside the invoice with Amount already set to the outstanding amount and the supplier already filled in.
- Set the From Account — the bank or cash account the money is leaving.
- Change any other detail you need, such as the Posting Date or a cheque number.
- Click Save. SAABI saves and submits the payment in one step.
Payment Type and accounts
Payment Type is what makes a payment a purchase payment:
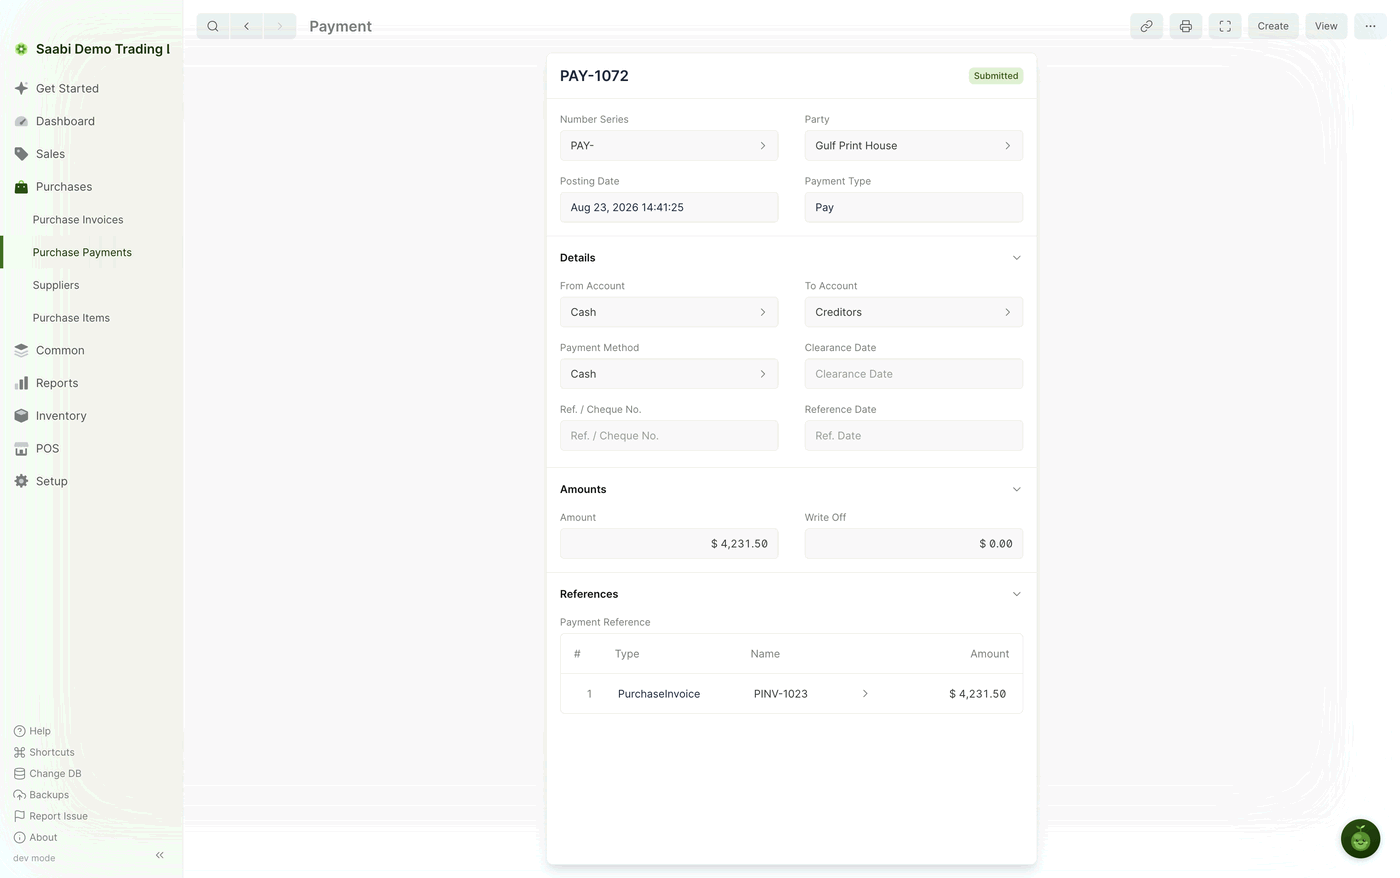
- Pay — money leaves your business. The From Account is your bank or cash account, and the amount is applied against the supplier's payable balance. This is the purchase side.
- Receive — money comes into your business. The To Account is your bank or cash account. This is the sales side, covered in Chapter 13.
The rest of the panel is the same for both:
- Number Series — the
PAY-series the payment number comes from. - Posting Date — the date the money moved.
- Payment Method — how it was paid, for example
Cash. - Ref. / Cheque No. and Reference Date — the cheque or transfer reference and its date.
- Clearance Date — the date the payment cleared the bank.
- Amount — the sum being paid.
- Write Off — a deduction on the payment, booked to the write-off account set in
Setup > Settings > General. The amount actually transferred is Amount minus Write Off. - Attachment — a remittance advice or bank slip kept with the entry.
Note
The final amount taken from your account is Amount minus Write Off. Use Write Off for small differences you do not intend to chase, not for genuine part payments.
Recording a payment on its own
If you paid a supplier before recording the bill, or you are catching up on bank entries, create the payment directly.
- Go to
Purchases > Purchase Paymentsand click +. - Set Payment Type to
Pay. - Select the supplier as the party, then set the From Account and the Amount.
- To settle a specific bill, add the invoice in the references table at the foot of the panel. This is what updates the invoice's Outstanding Amount.
- Click Save to save and submit the entry.
Important
A payment that is not referenced to an invoice still moves money between accounts, but it leaves the supplier's bills showing as unpaid. Add the reference whenever the payment settles a specific bill.
Paying automatically on submit
If you pay most bills as they arrive, set a default account once and let SAABI create the payment for you. Go to Setup > Settings > Defaults and set the Purchase Payment Account under Auto Payments. From then on, submitting a purchase invoice also creates the matching payment entry.
Saabi Desktop User Manual 1.0 · covers Desktop 1.0.0 · Something wrong or missing? Tell us