
Chapter 40 · Inventory · 3 min read
Purchase Receipts
On this page
A Purchase Receipt records stock arriving from a supplier after a purchase. It is the stock-side counterpart of the purchase invoice: the invoice says what you owe, the receipt says what turned up and where you put it. Every Purchase Receipt is an inward movement, so it increases the quantity held at the Location you receive into.
To see the receipts you have already made, go to Inventory > Purchase Receipt.
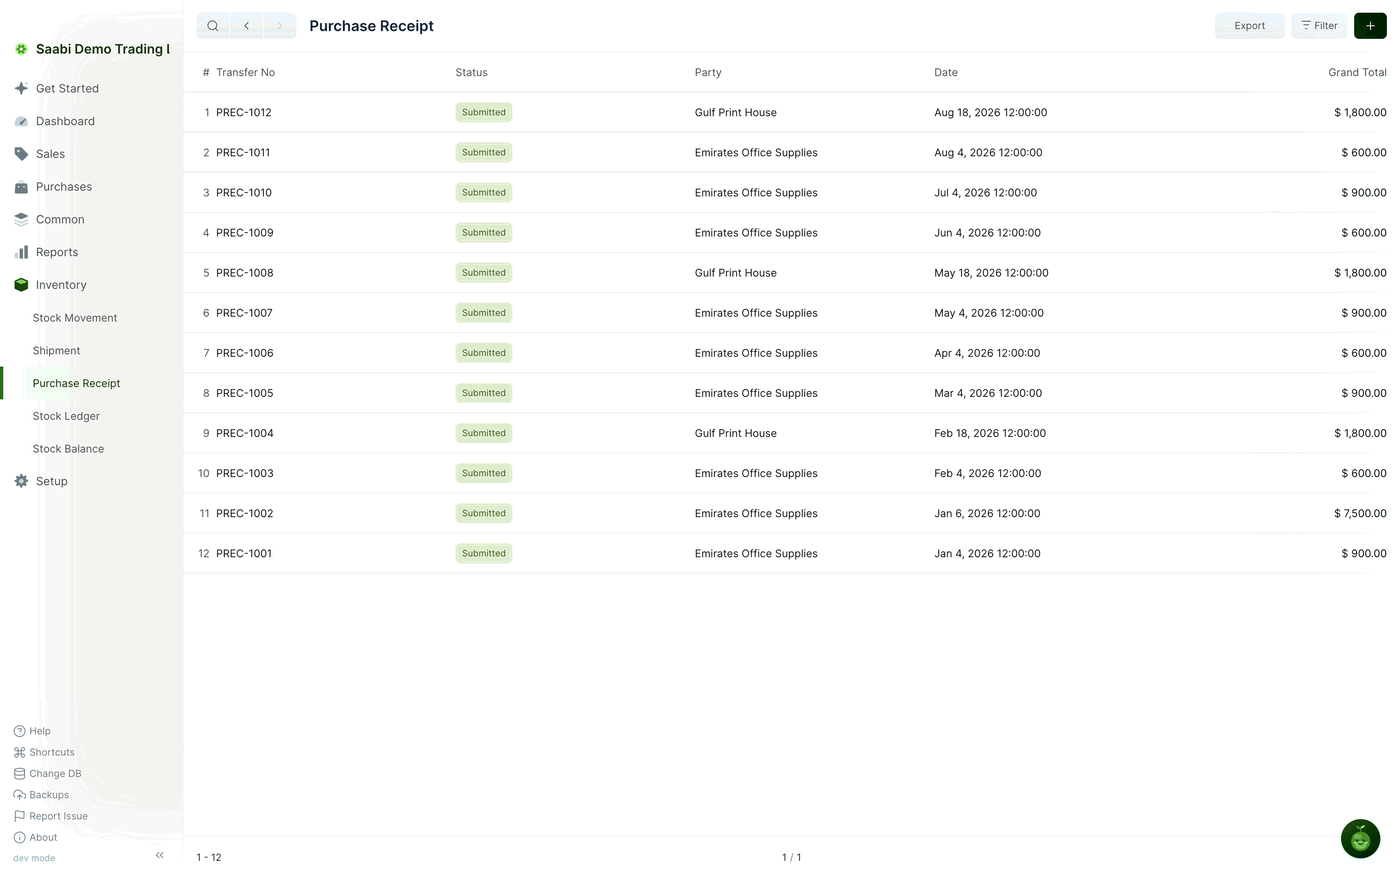
The list shows the Transfer No, the Status, the Party the goods came from, the Date and the Grand Total. Use Filter to narrow it to one supplier or one period.
Two ways to create a purchase receipt
You can start a receipt from the purchase invoice it belongs to, or on its own from the list. The first way links the two records together; the second does not.
From a purchase invoice
This is the usual route, because a delivery normally follows an order you have already invoiced.
- Open the submitted purchase invoice at
Purchases > Purchase Invoices. - Click Create in the toolbar.
- Choose Purchase Receipt.
- Check the rows SAABI has filled in against what actually arrived, and correct any quantity that differs.
- Click Save, then Submit.
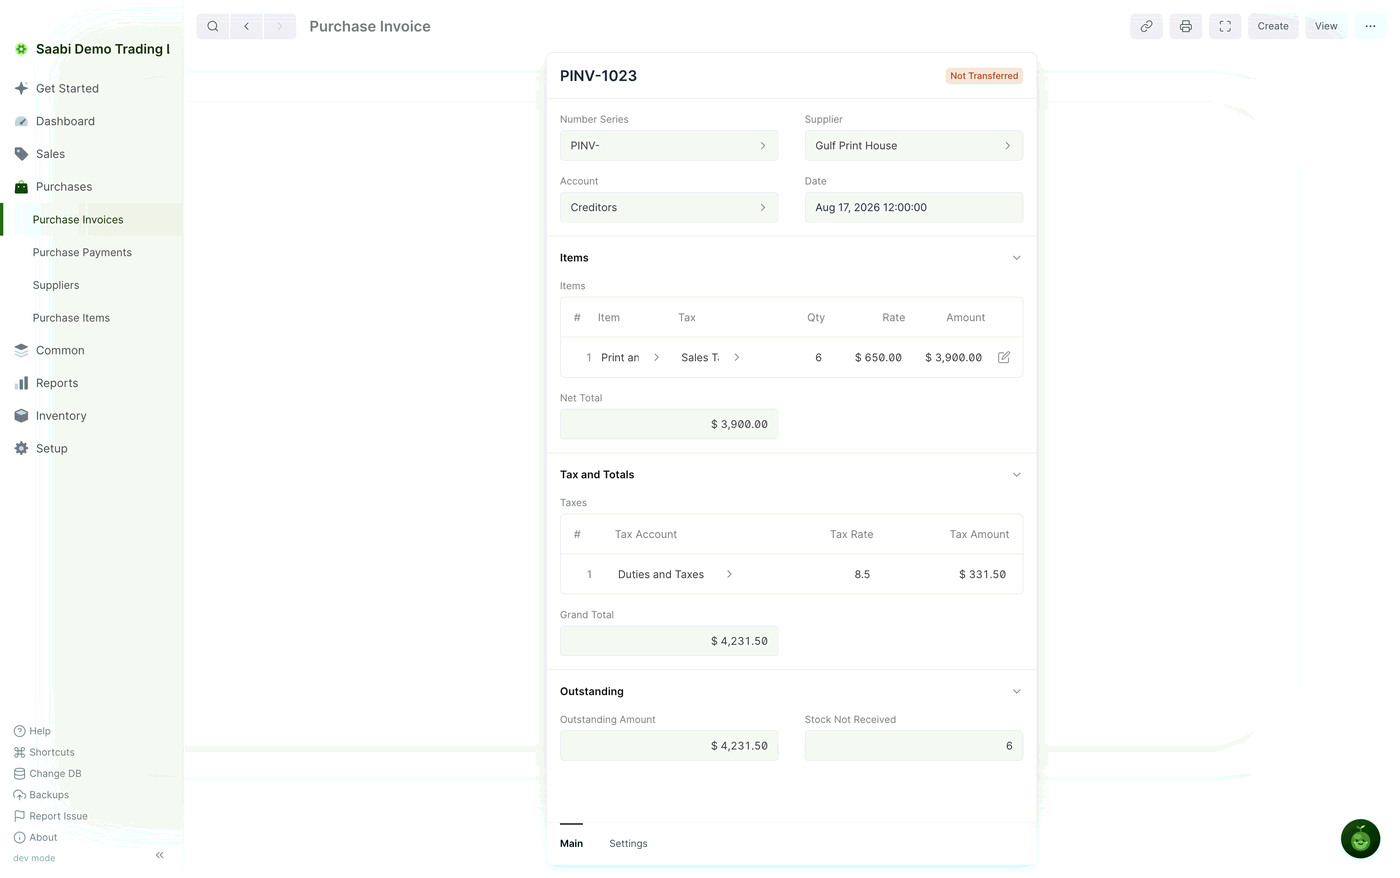
A receipt made this way keeps a reference back to the purchase invoice, so you can open the invoice later and see every receipt raised against it. The invoice tells you how much is still outstanding in two places: the Not Transferred status badge beside the entry name, and Stock Not Received in the Outstanding section, which gives the quantity still to arrive. In the invoice shown above, six units have been billed and none received.
Tip
Where a supplier delivers an order in parts, create one Purchase Receipt per delivery and enter only the quantity that arrived. Stock Not Received falls each time until the order is complete.
From the list view
- Go to
Inventory > Purchase Receiptand click the + button in the title bar. - Enter the details yourself, as you would for any other entry.
- Click Save, then Submit.
Note
A receipt created this way is an isolated entry. It records the stock correctly but carries no link to any purchase invoice, so the invoice's Stock Not Received quantity is unaffected. Use this route for goods that arrive without an invoice behind them in SAABI.
The Purchase Receipt form
Both routes lead to the same form. If you came from a purchase invoice the rows are filled in for you; otherwise you enter them yourself.
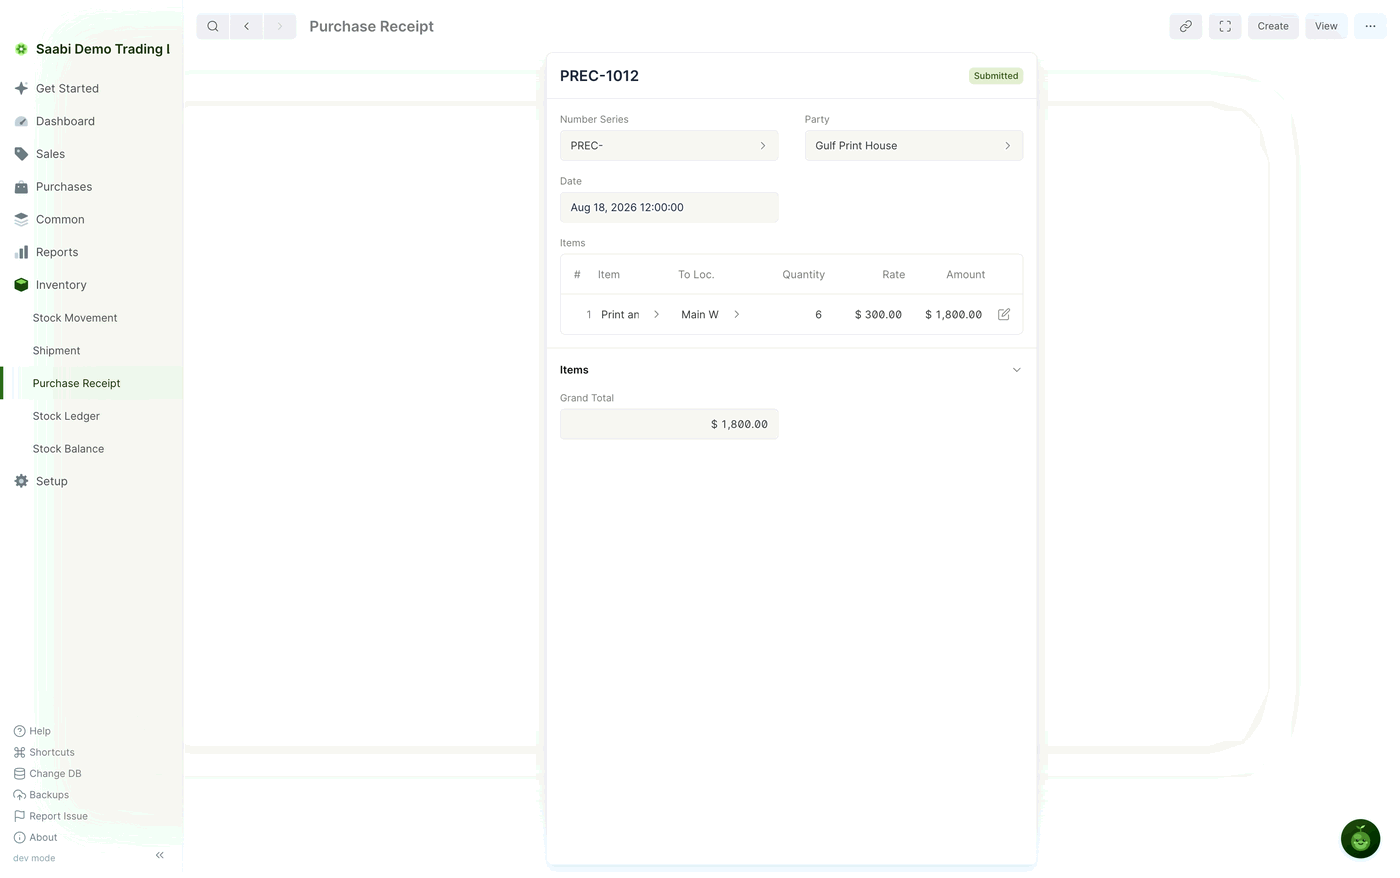
The fields above the grid are:
- Number Series — the prefix for the entry number,
PREC-in the demo file. - Party — the supplier the goods came from.
- Date — the date the goods arrived. Backdate it if the delivery was earlier than the entry.
Each row of the Items grid holds:
- Item — the tracked item received.
- To Loc. — the Location the goods are received into. This is the field that decides where the stock lands; SAABI offers the Default Location from Settings, and you can change it row by row when a delivery is split between Locations.
- Quantity — how many units arrived.
- Rate — the value of one unit, in USD.
- Amount — quantity multiplied by rate, calculated for you.
Grand Total below the grid adds up every row.
Important
Nothing reaches your stock records until you click Submit. A saved receipt can still be edited; a submitted one cannot, and must be cancelled if it is wrong.
After you submit
Submitting a Purchase Receipt writes lines into the Stock Ledger, raises the quantity in the Stock Balance for the Locations you received into, and posts the value of the goods to the stock accounts set on the Inventory tab of Settings. To see exactly what was written, open the submitted receipt and pick the ledger you want from the View menu in the toolbar.
If you would rather SAABI raised these receipts for you, set Purchase Receipt Location under Auto Stock Transfer on the Defaults tab of Settings, as described in Chapter 38.
Saabi Desktop User Manual 1.0 · covers Desktop 1.0.0 · Something wrong or missing? Tell us