
Chapter 12 · Sales · 7 min read
Sales Invoices
On this page
A sales invoice is the bill you send a customer when you have made a sale. It is the entry that books your income, adds the tax you have charged, and creates the amount the customer owes you. Every invoice moves through the same short life: you fill it in and save it as a draft, you submit it to post it to your accounts, and you record a payment against it to settle it. This chapter follows one invoice through that whole life, from the list view to the printed PDF.
The Sales Invoice list
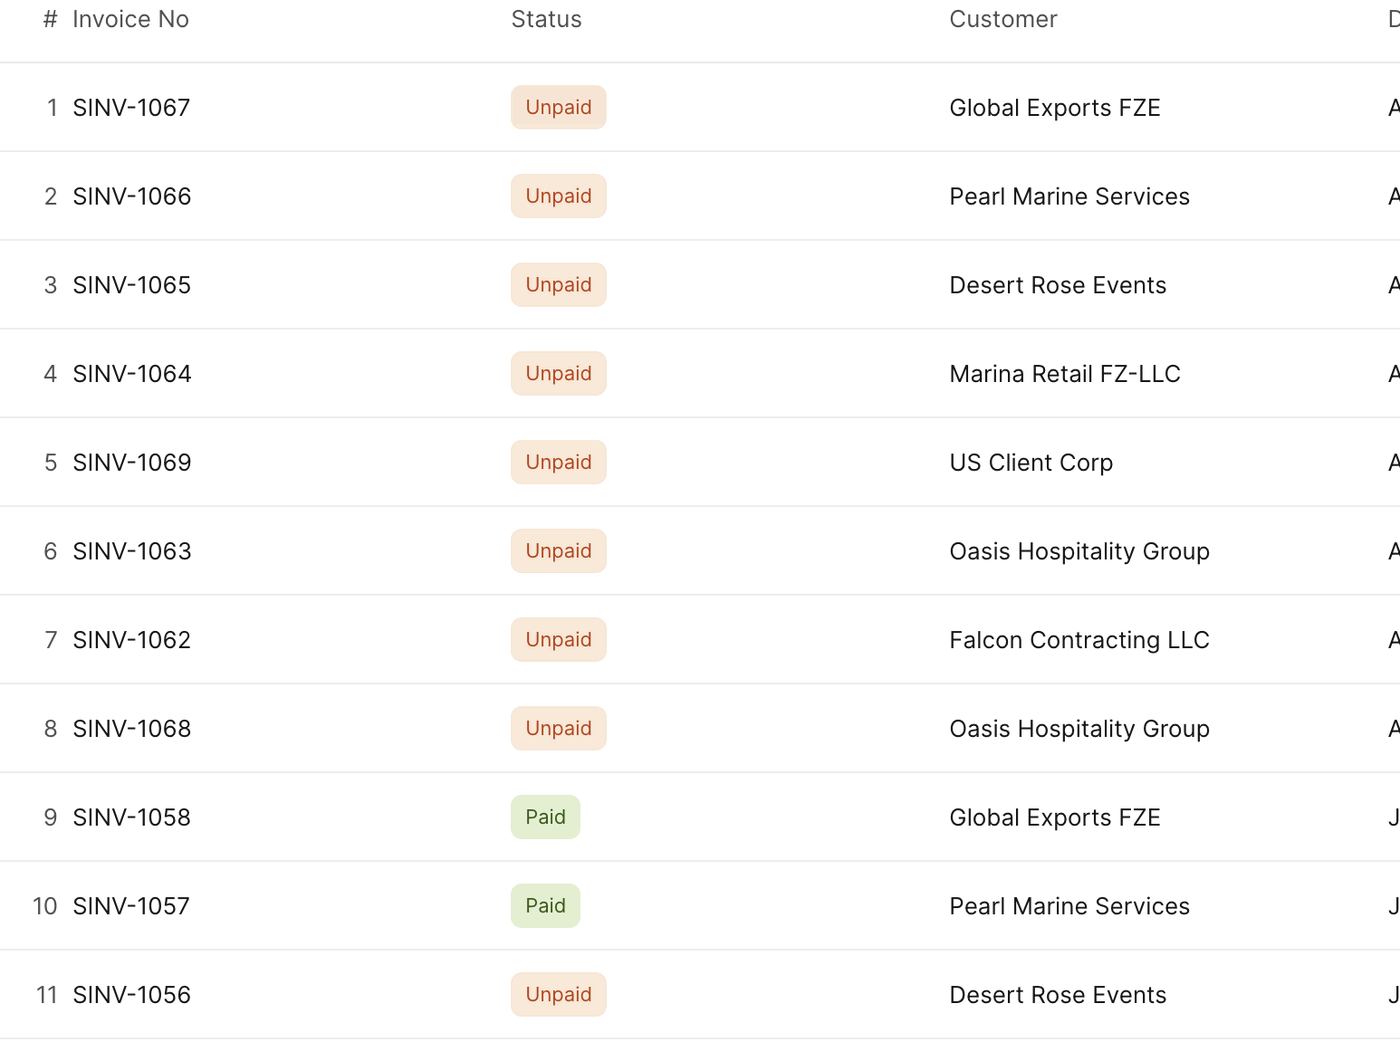
Open Sales > Sales Invoices. The list shows every invoice on the company file, newest first.
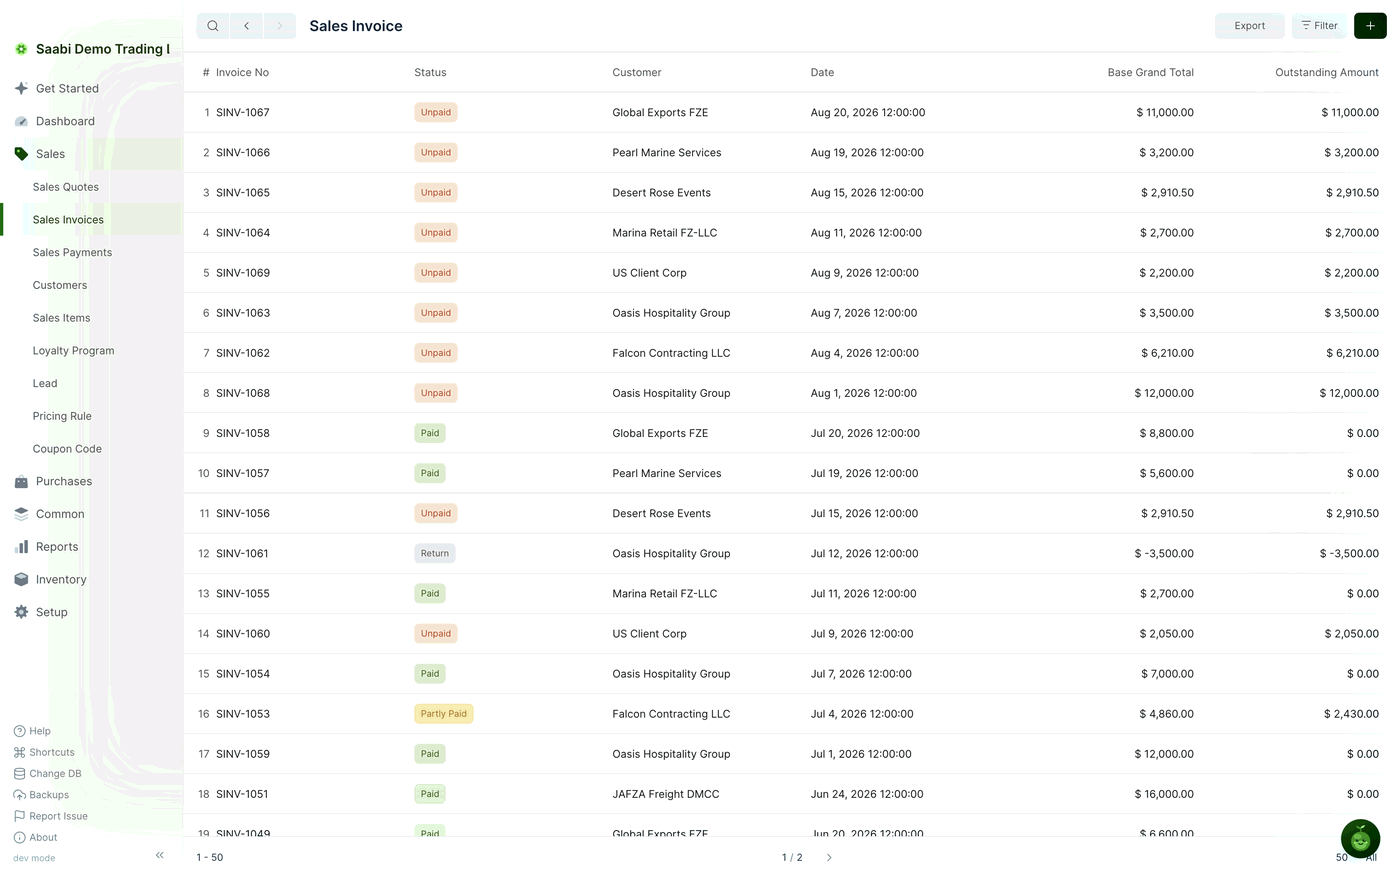
Each row carries the invoice number, a status badge, the customer, the date, the Base Grand Total and the Outstanding Amount. The footer shows the range of rows on screen, the page control, and a page-size control if the list runs past one page.
The toolbar holds everything you can do to the list as a whole.

- Export writes the rows you can see to a file.
- Filter narrows the list, for example to one customer or to unpaid invoices only.
- + opens a blank invoice form.
Starting a new invoice
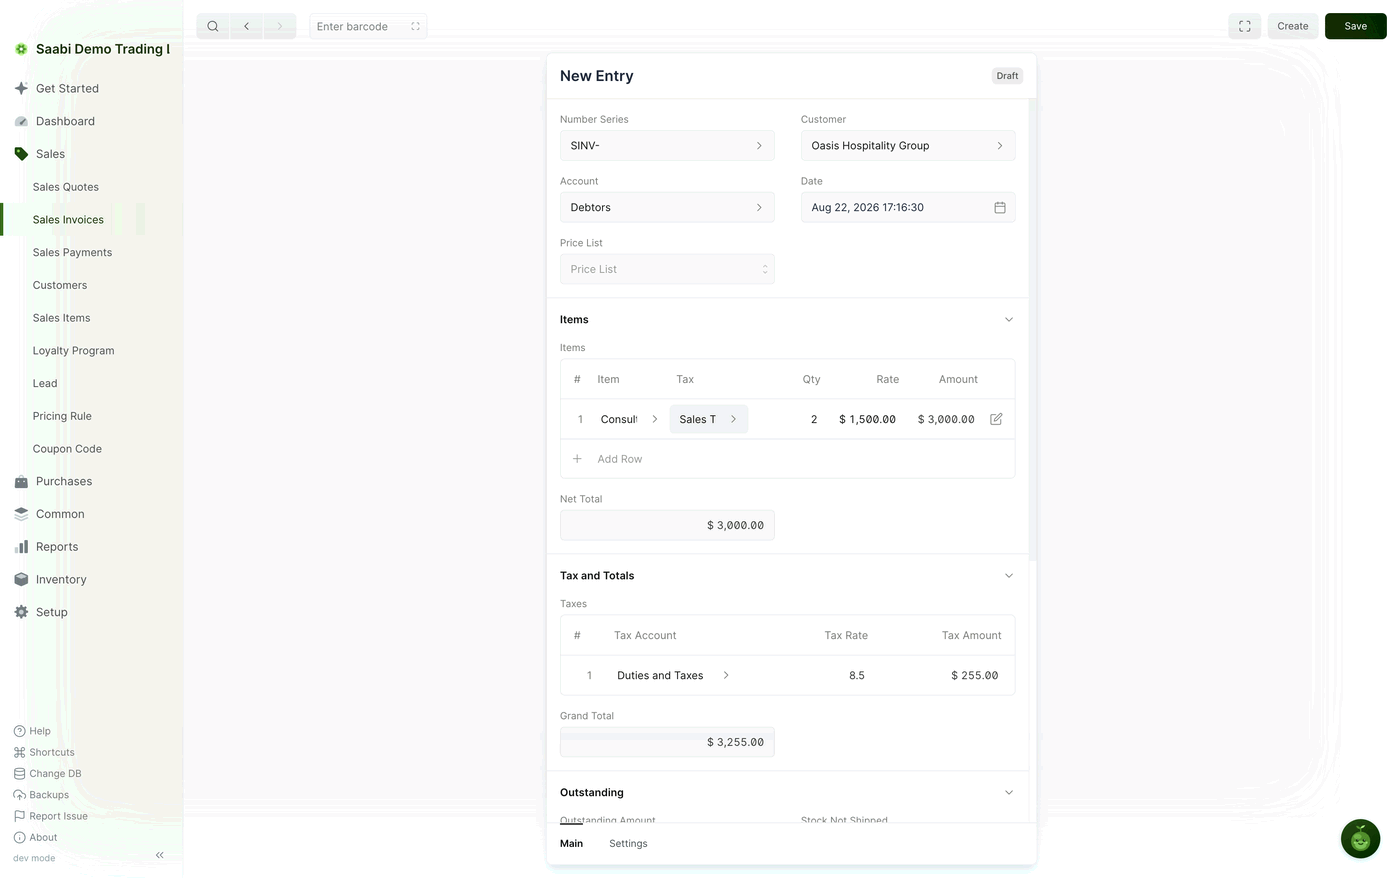
Click +. SAABI opens a blank entry titled New Entry with a Draft badge in the corner. Nothing has been written to your books yet.
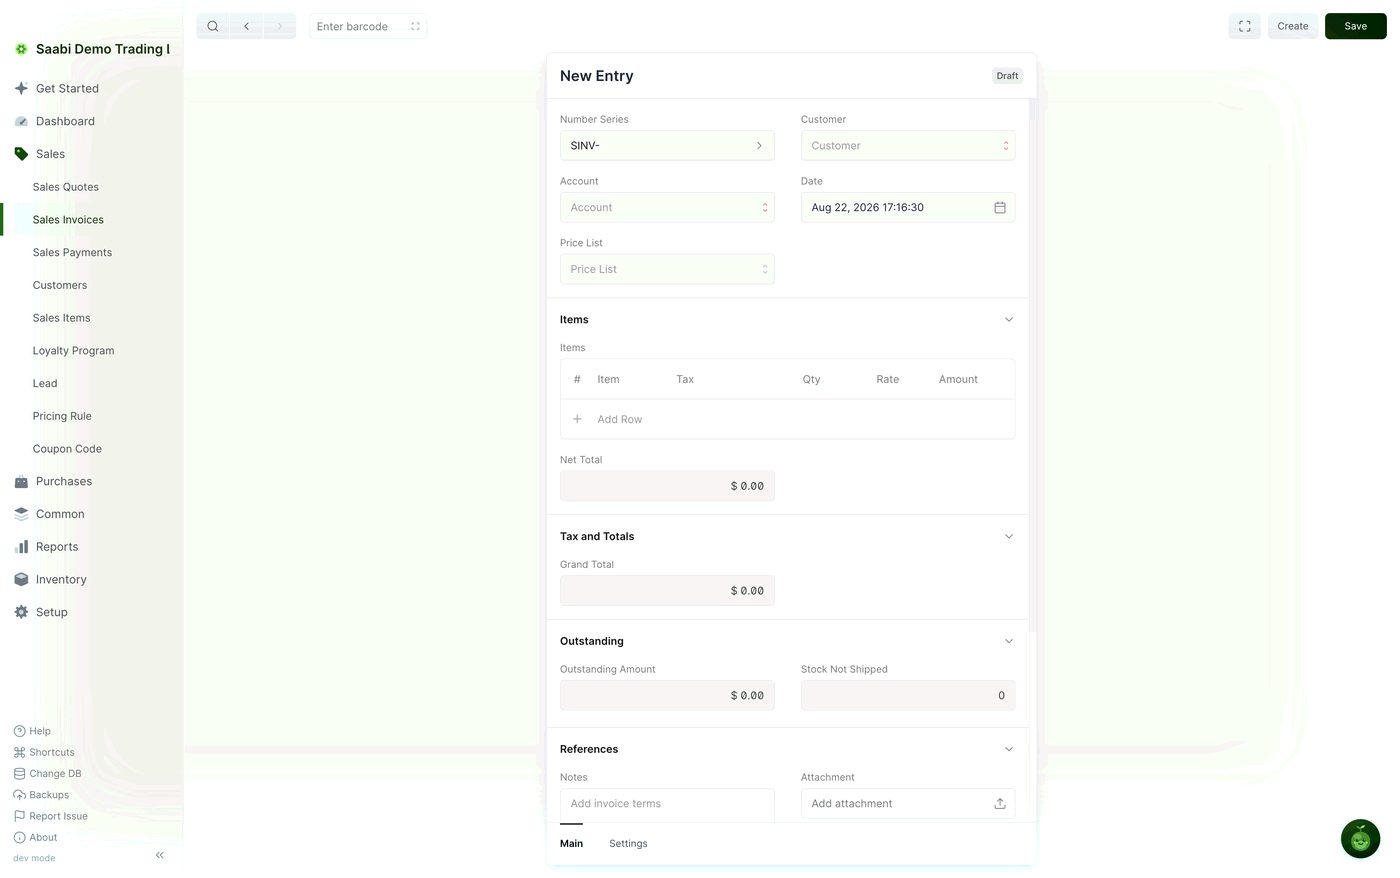
The header fields are:
- Number Series — the prefix the invoice number comes from,
SINV-by default. - Customer — who you are billing.
- Account — the receivable account the invoice is booked against. SAABI fills this in from the customer record once you pick a customer.
- Date — the invoice date, set to now and editable.
- Price List — an optional price list to take rates from instead of each item's own rate.
Below them sit the Items grid, Net Total, the Tax and Totals section, an Outstanding section, and a References section for notes and attachments. At the foot of the card are two tabs, Main and Settings.
Choosing the customer
Click the Customer field and start typing. Link fields in SAABI complete as you type and show matching records underneath.
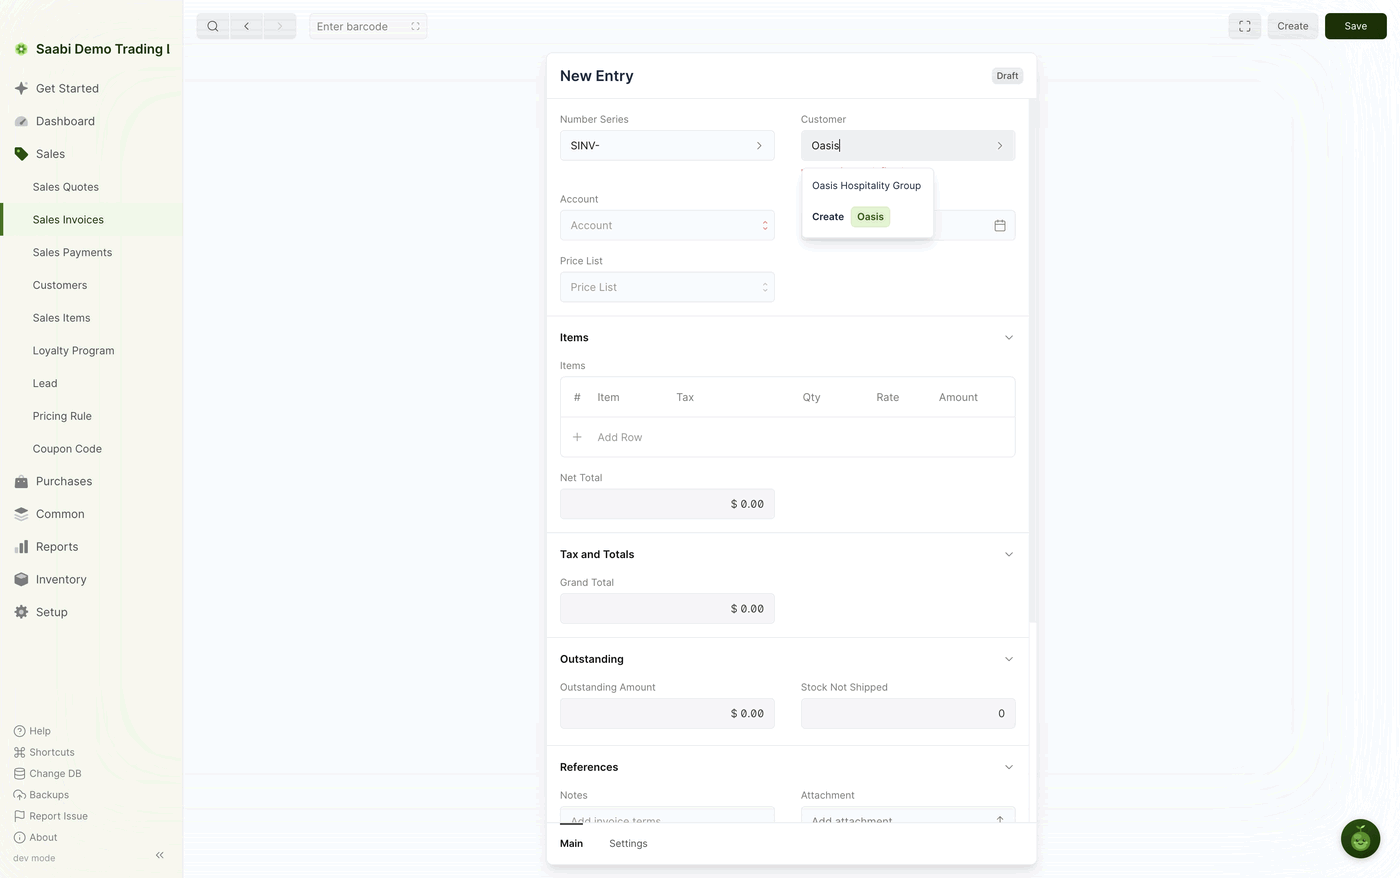
If the customer is not on your books yet, you do not have to break off and create them first. The same list offers Create followed by the text you typed.
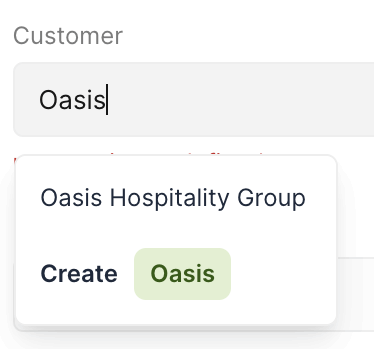
Choose Create and SAABI opens a short form for the new customer; save it and you are returned to the invoice with the field filled in. Every link field on the form behaves this way, including Item and Tax on the item rows.
Adding the items
- In the Items section, click Add Row. An empty row appears in the grid.
- Click the Item cell and pick what you are selling. The item's Rate and its default Tax are fetched from the item record.
- Set Qty. The Amount column recalculates as you type.
- Change the Rate or the Tax on the row if this sale differs from the item's defaults.
- Repeat for each item on the bill.
As soon as a taxed row exists, the Tax and Totals section grows a Taxes grid showing each tax account, its rate and the tax amount, and the Grand Total below it.
Saving the invoice
Click Save. SAABI asks you to confirm before it creates the entry.
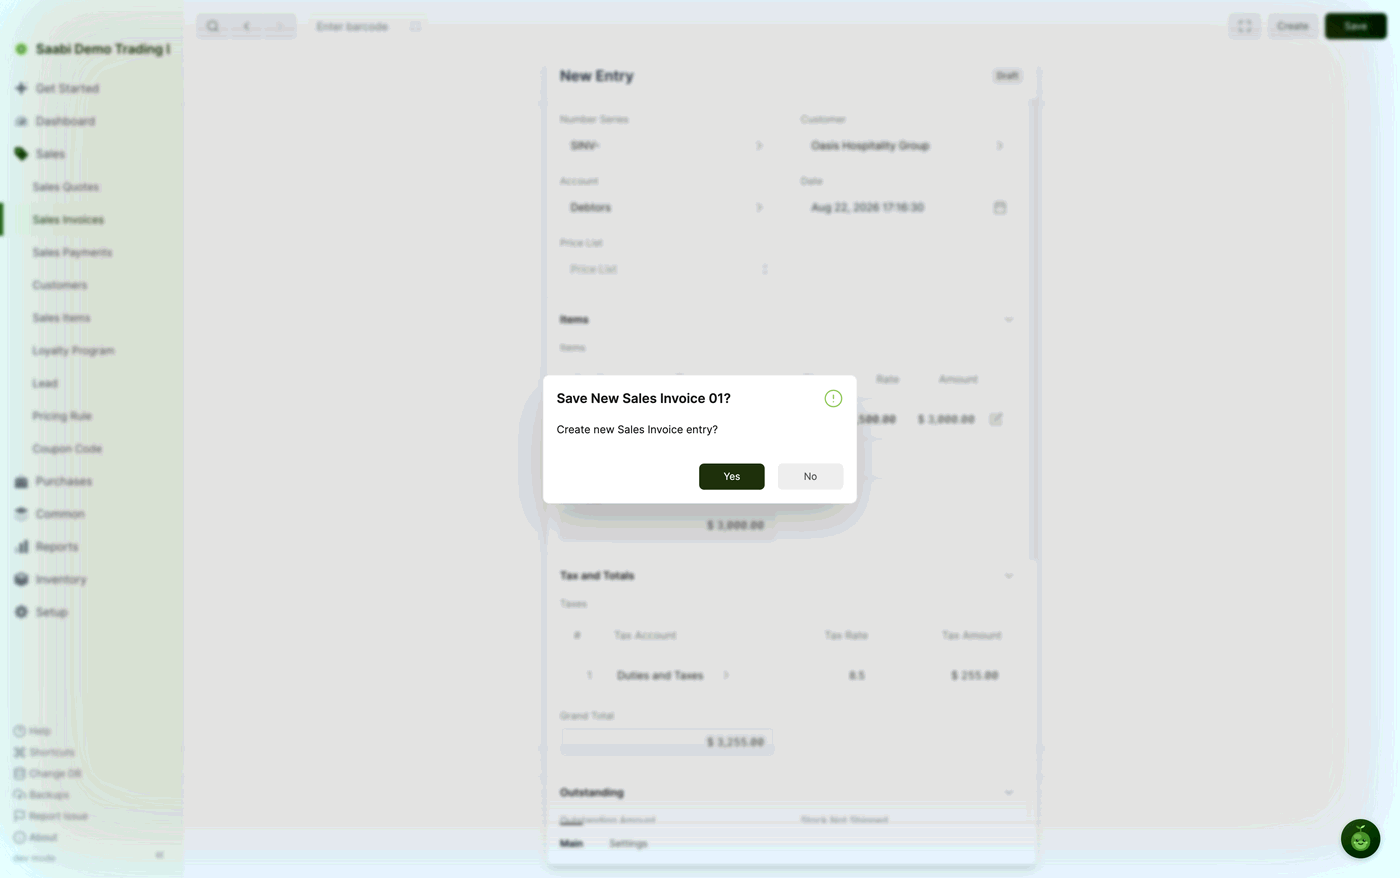
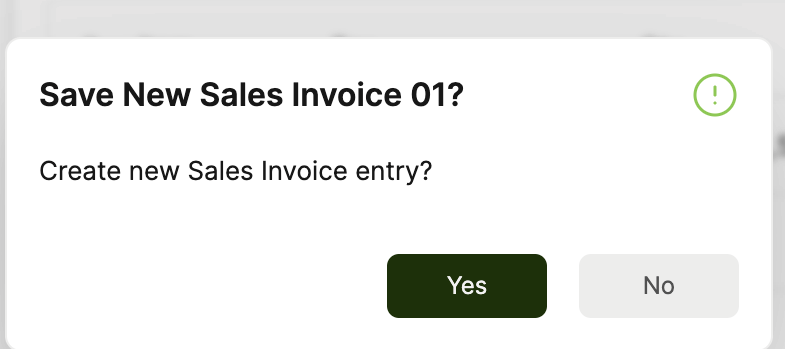
Click Yes. The entry is written, the title changes from New Entry to the invoice number, and the badge changes to Not Submitted.
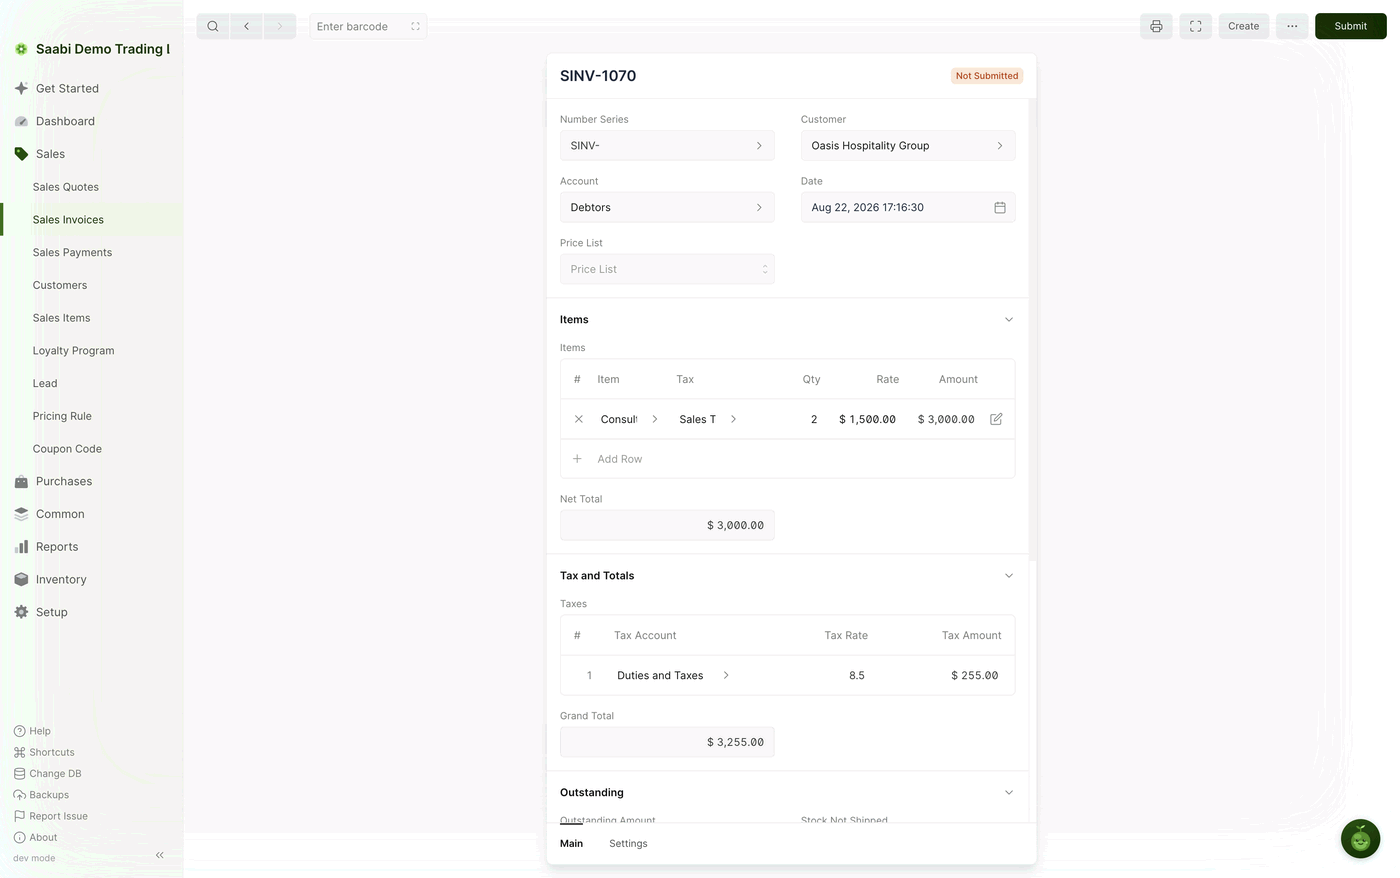
A saved but not submitted invoice is a real record you can come back to, but it has not been posted. Nothing has moved in your accounts, the customer owes nothing yet, and you can still change any field, add rows, or remove rows using the delete control that has appeared at the left of each line.
Submitting the invoice
Submitting is what posts the invoice. Click Submit and confirm.
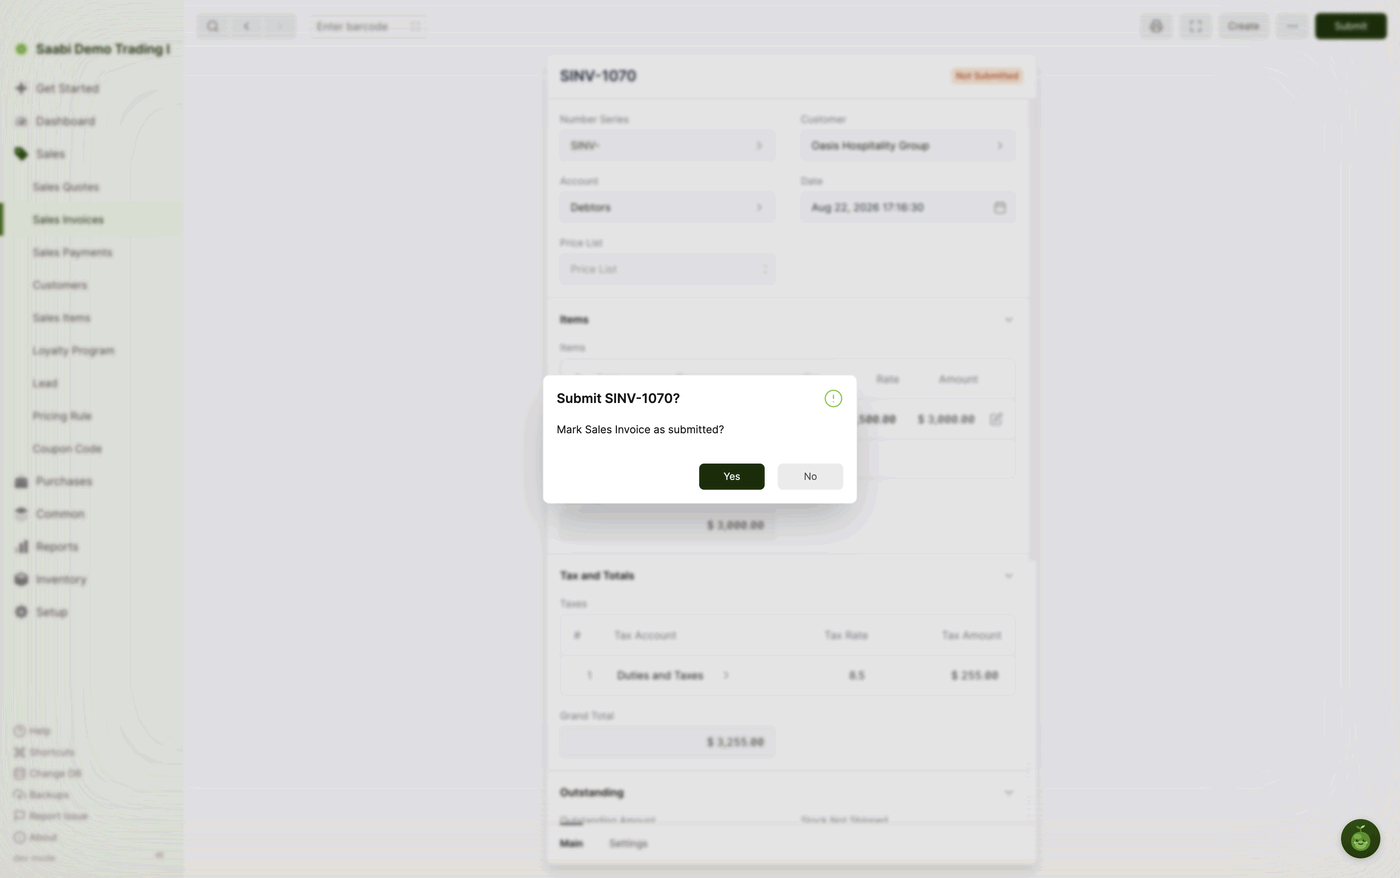
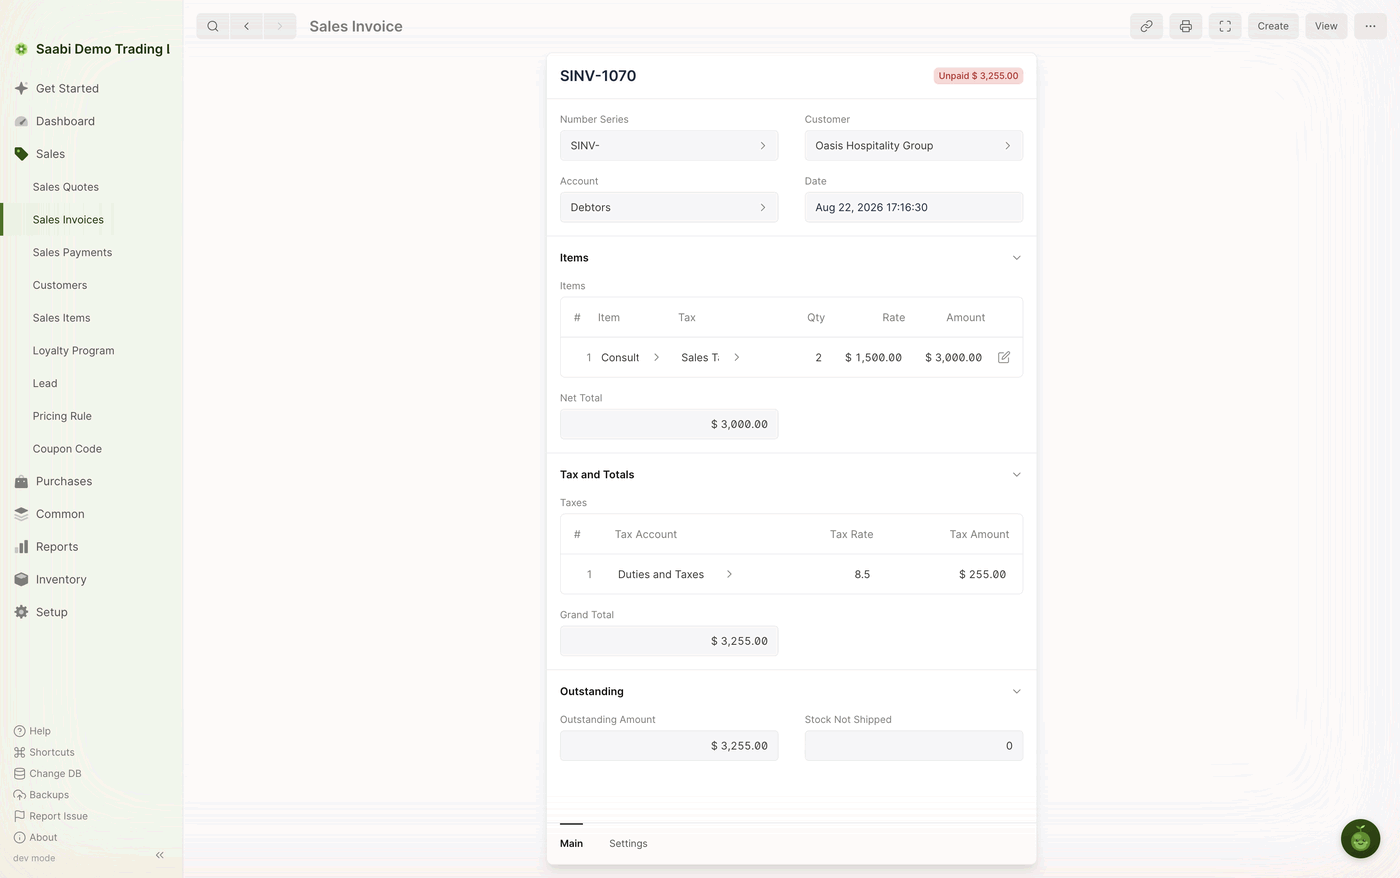
Click Yes. SAABI makes the ledger entries against the accounts on the invoice: the income is booked, the tax is recorded, and the grand total is added to what the customer owes you. The badge changes to Unpaid and shows the amount outstanding.
Important
A submitted invoice cannot be edited. If you have submitted an invoice with the wrong figures on it, cancel it and raise a corrected one, or record a return against it. Both are covered later in this chapter.
Recording a payment
An invoice stays Unpaid until you record the money you have received. Open the submitted invoice and click Create in the toolbar.
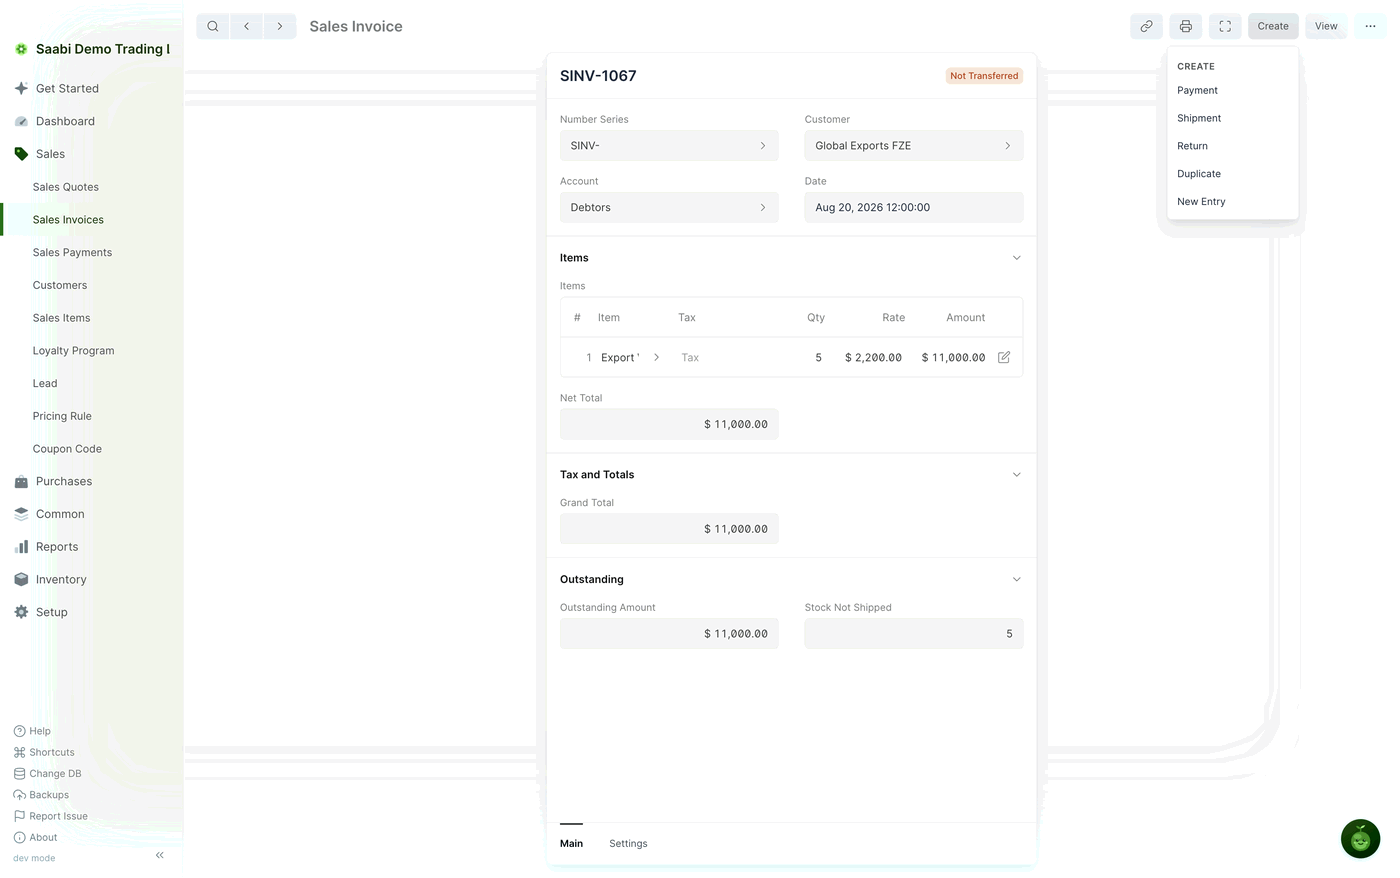
Choose Payment. A quick-edit panel opens down the right-hand side of the screen with the outstanding amount already filled in.
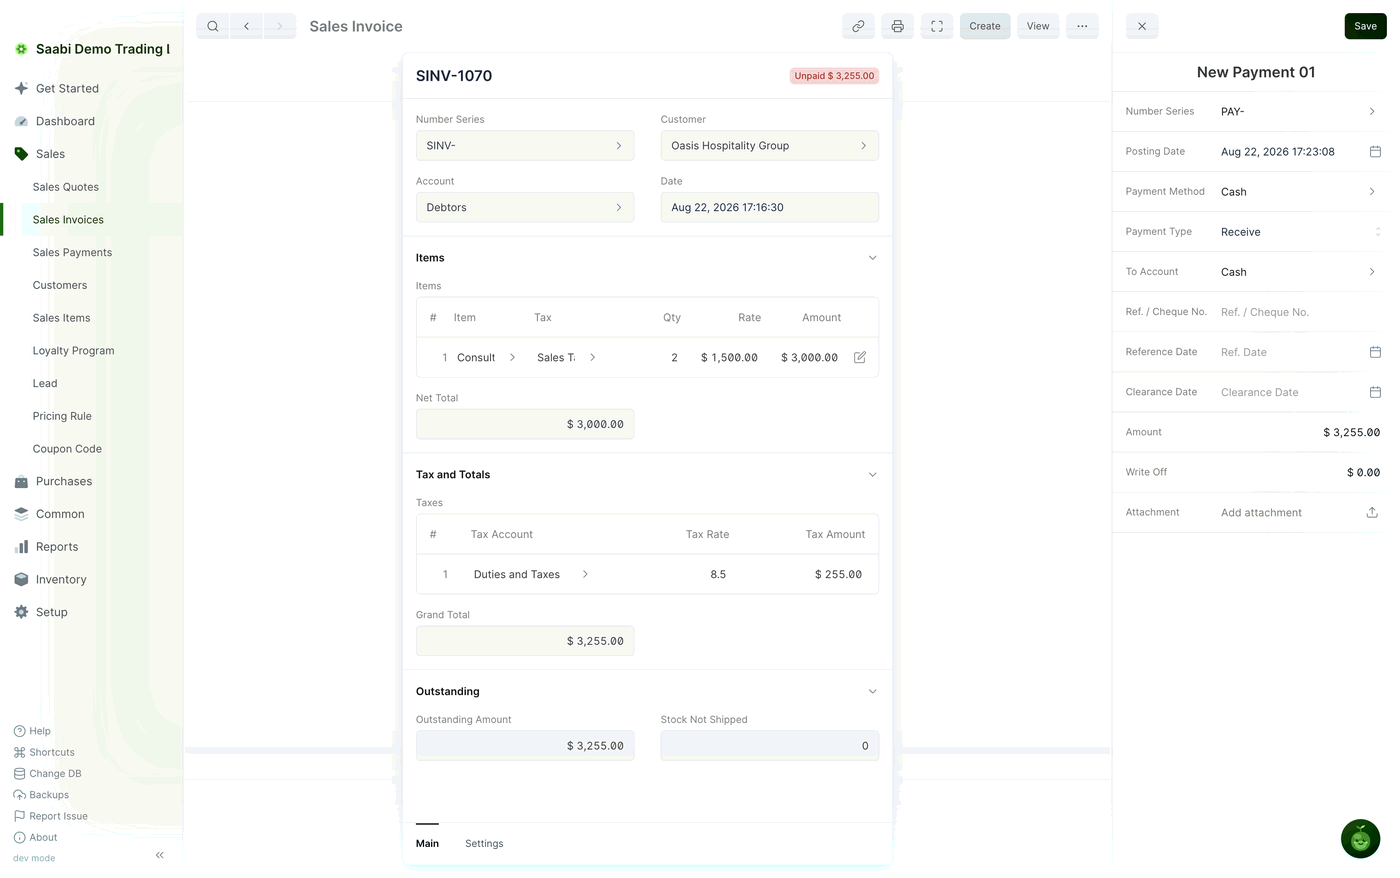
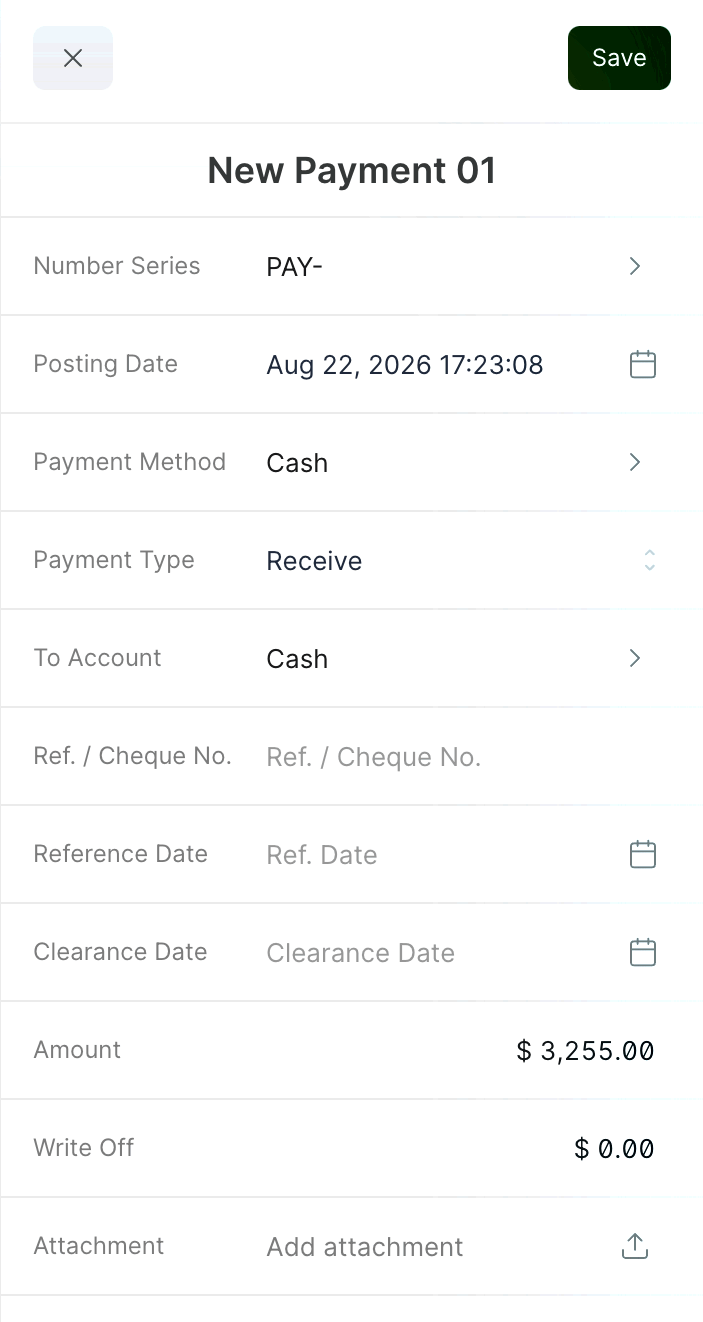
Check Payment Method, To Account — the bank or cash account the money went into — and Posting Date, and add a reference if you have one. Leave Amount as it is for payment in full, or reduce it for a part payment. Every field on the panel is described in Chapter 13.
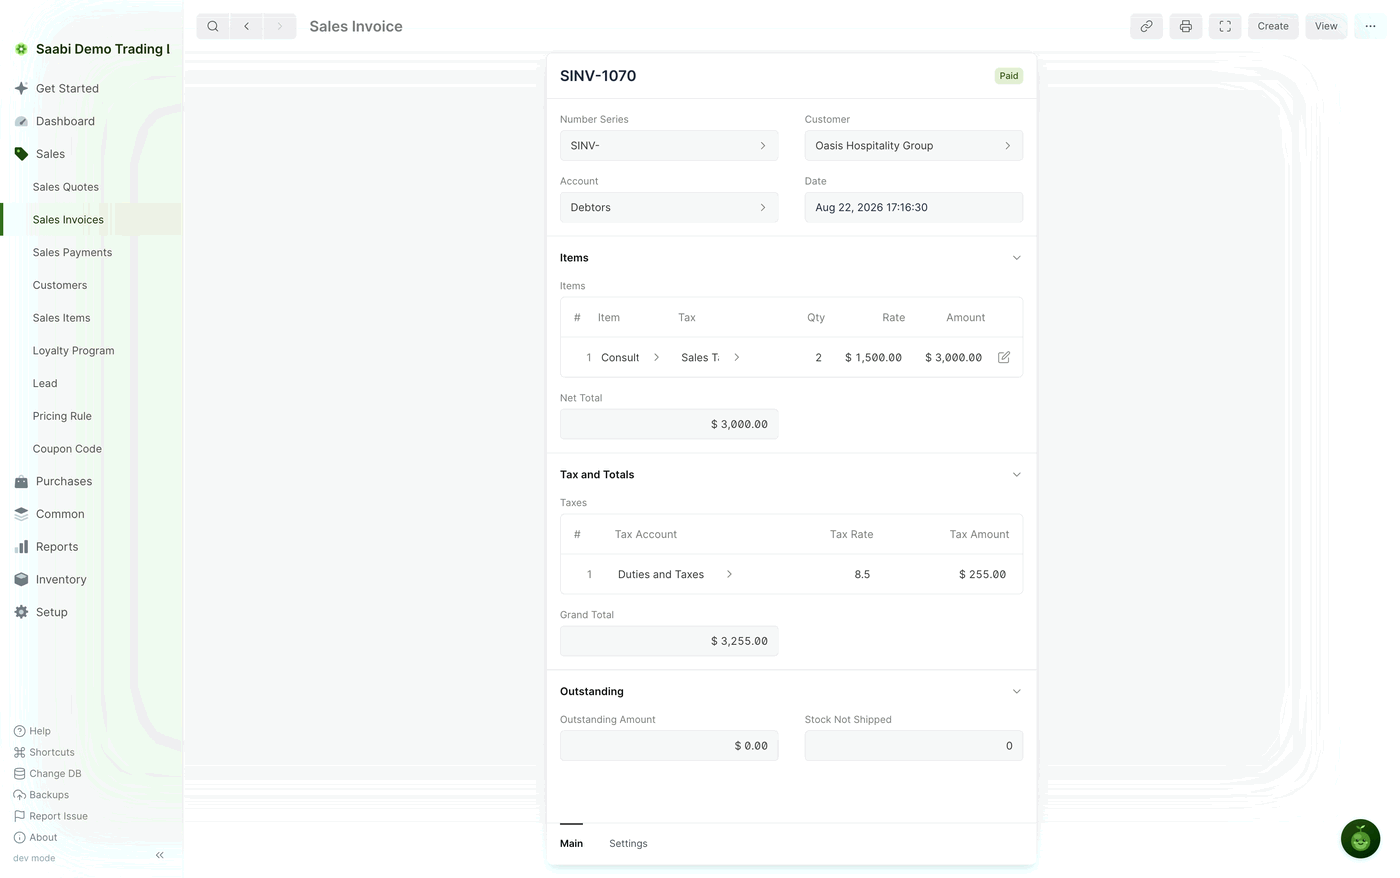
Click Save. SAABI saves and submits the payment together, reduces the receivable, increases the balance on your bank or cash account, and updates the invoice.
Note
A part payment leaves the invoice Partly Paid with the remainder still in Outstanding Amount. Record further payments the same way until the outstanding amount reaches zero, at which point the status becomes Paid.
Editing an invoice item
Each item row has an edit button at its right-hand end. Click it to open the row in a panel where every field on the line is available, not only the five columns the grid has space for.
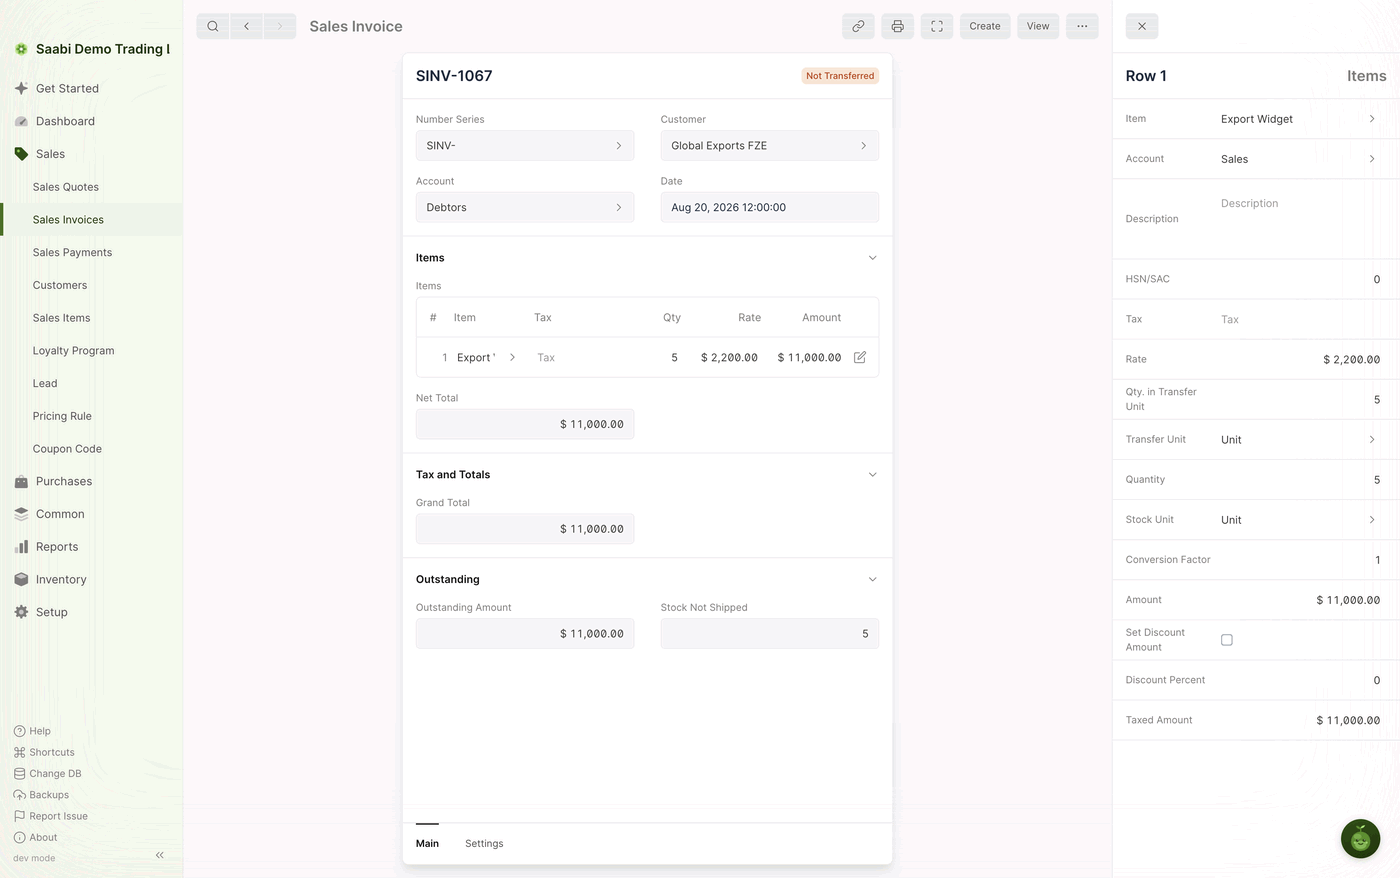
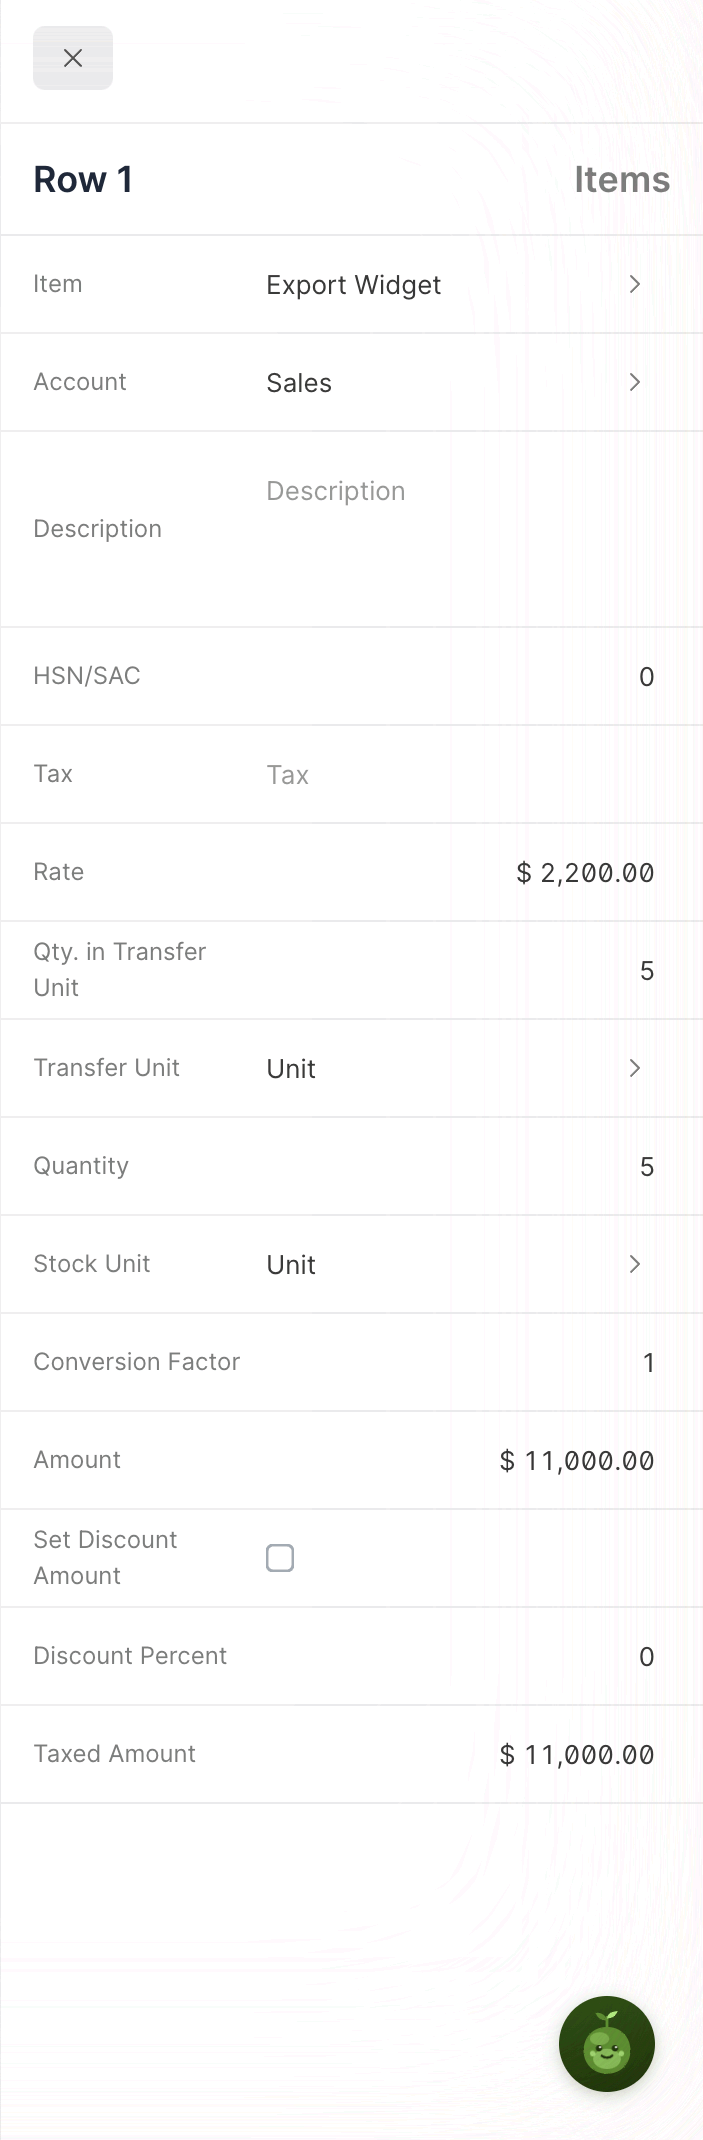
The panel contains Item, Account, Description, HSN/SAC, Tax, Rate, Qty. in Transfer Unit, Transfer Unit, Quantity, Stock Unit, Conversion Factor, Amount, Set Discount Amount, Discount Percent and Taxed Amount. Use it to give a line its own description on the printed invoice, to record the HSN or SAC code, to apply a discount to one line, or to check what the line comes to after tax.
Tip
You can type into Taxed Amount directly. SAABI works the rate back from the figure you enter, which is quicker than calculating a rate that lands on a round total.
The Settings tab
The tabs at the foot of the form card switch between Main, which is everything above, and Settings.
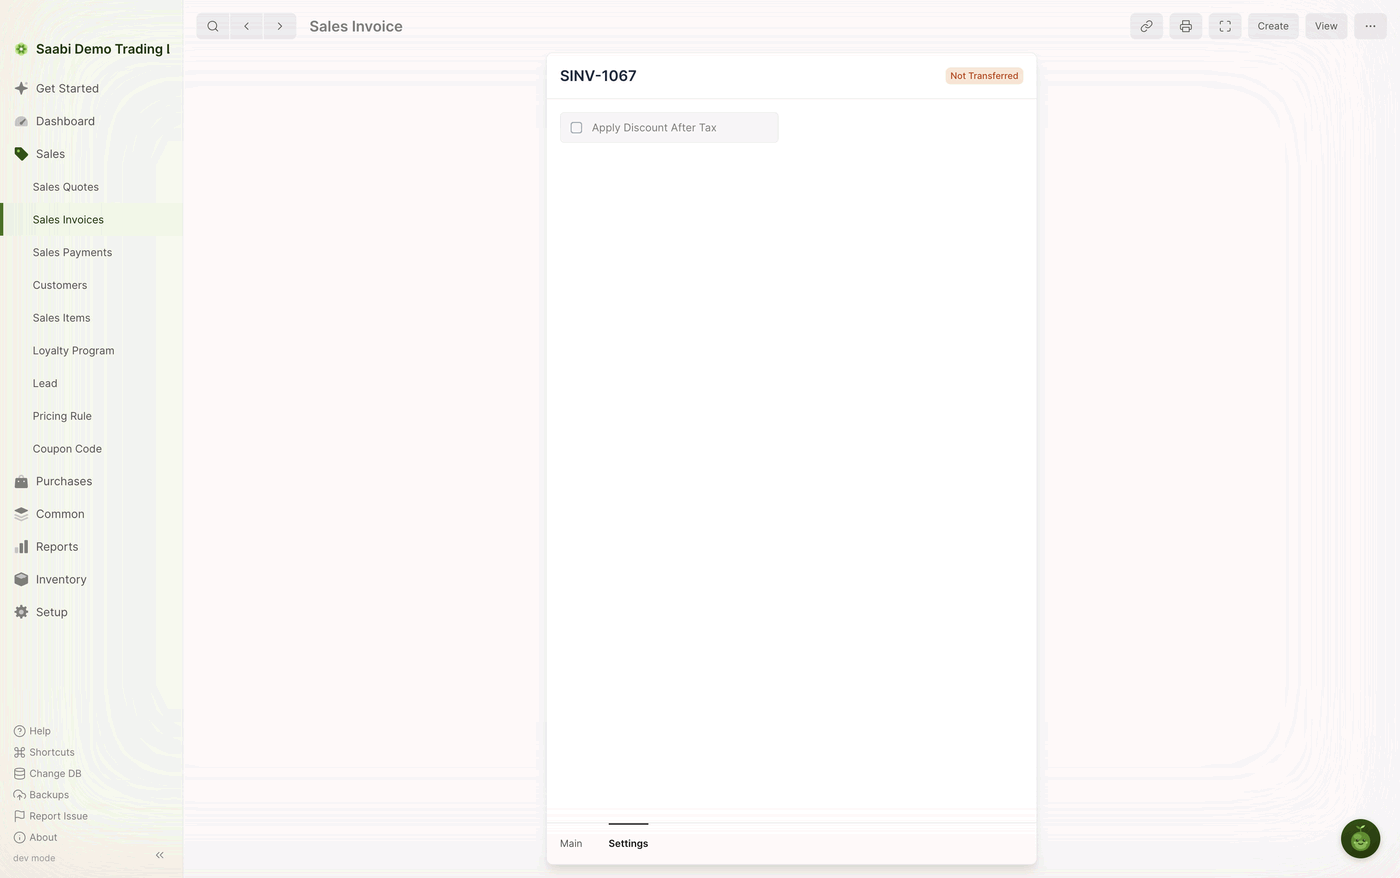
Apply Discount After Tax decides the order the two calculations run in. Leave it clear to take the discount off the item amounts and then charge tax on what is left. Tick it to charge tax first and take the discount off the taxed total. Discounts are covered in Chapter 30.
The Create menu
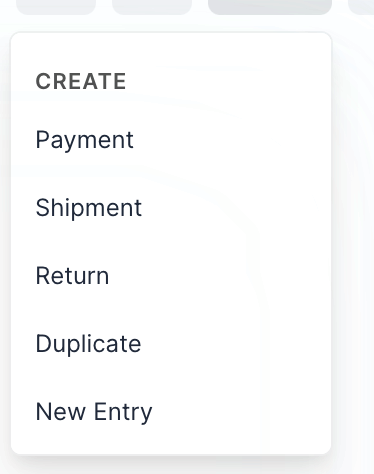
Create on a submitted invoice raises a related document with the invoice's details already filled in:
- Payment — records money received, as described above.
- Shipment — records the goods leaving your inventory against this invoice.
- Return — raises a credit against this invoice when the customer sends goods back. Quantities on a return are entered as negative figures, so the return reverses the original entry.
- Duplicate — copies this invoice into a new draft, useful for a customer you bill for the same thing every month.
- New Entry — starts a blank invoice.
Cancelling an invoice
The … menu next to Create holds Cancel.
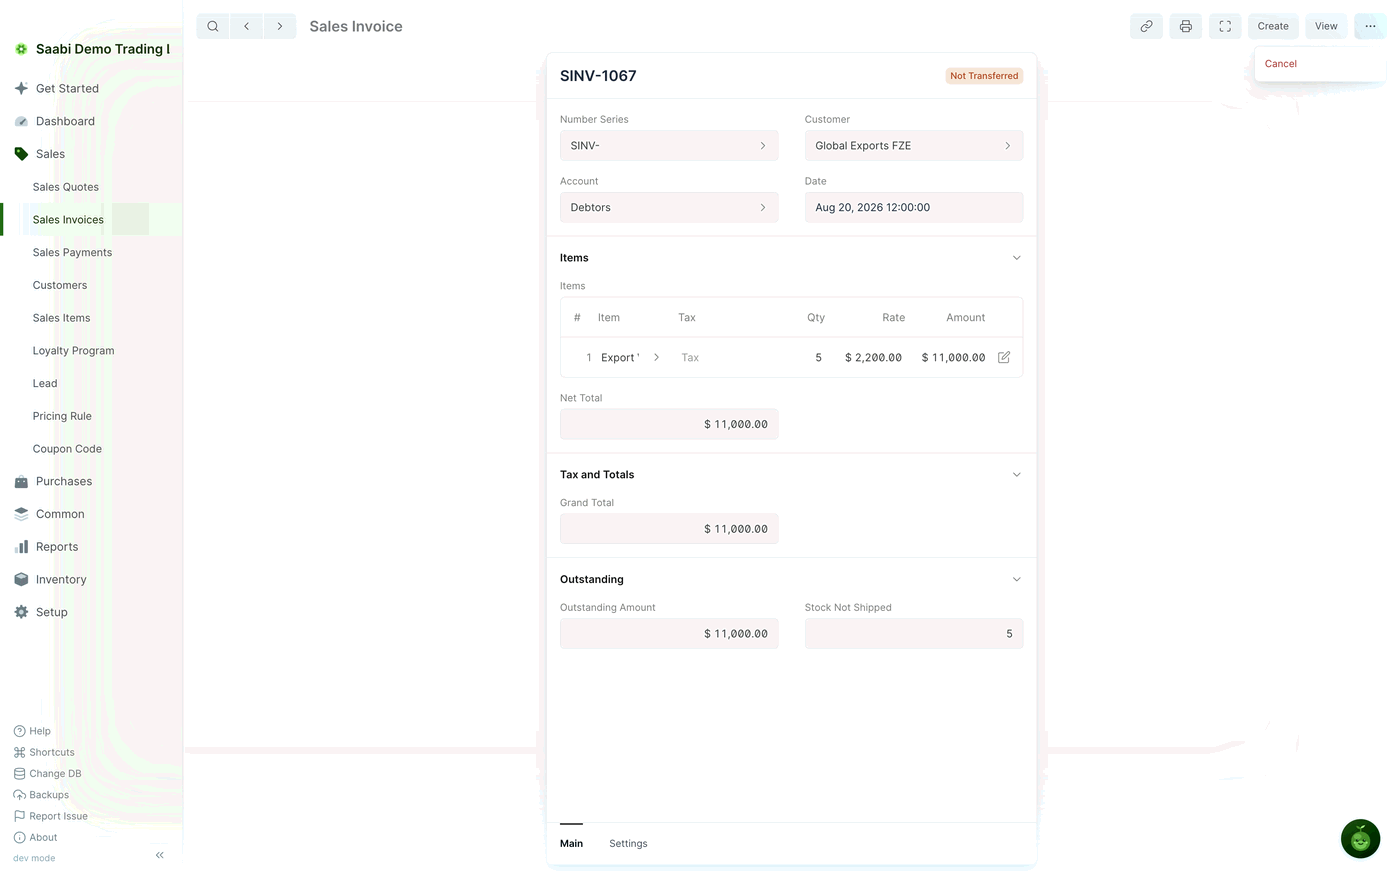
Cancelling reverses the ledger entries the invoice made and leaves the invoice on file, marked as cancelled, so the number is never reused and the history stays intact. Use it when an invoice should not have been raised at all. When goods have genuinely been sold and then returned, use Create > Return instead, so both the sale and the return appear in your records.
Printing and sending the invoice
Click the print icon in the toolbar to open the print view.

Pick a template from the selector on the left, then use Save as PDF to write a file you can email, or Print to send it to a printer.
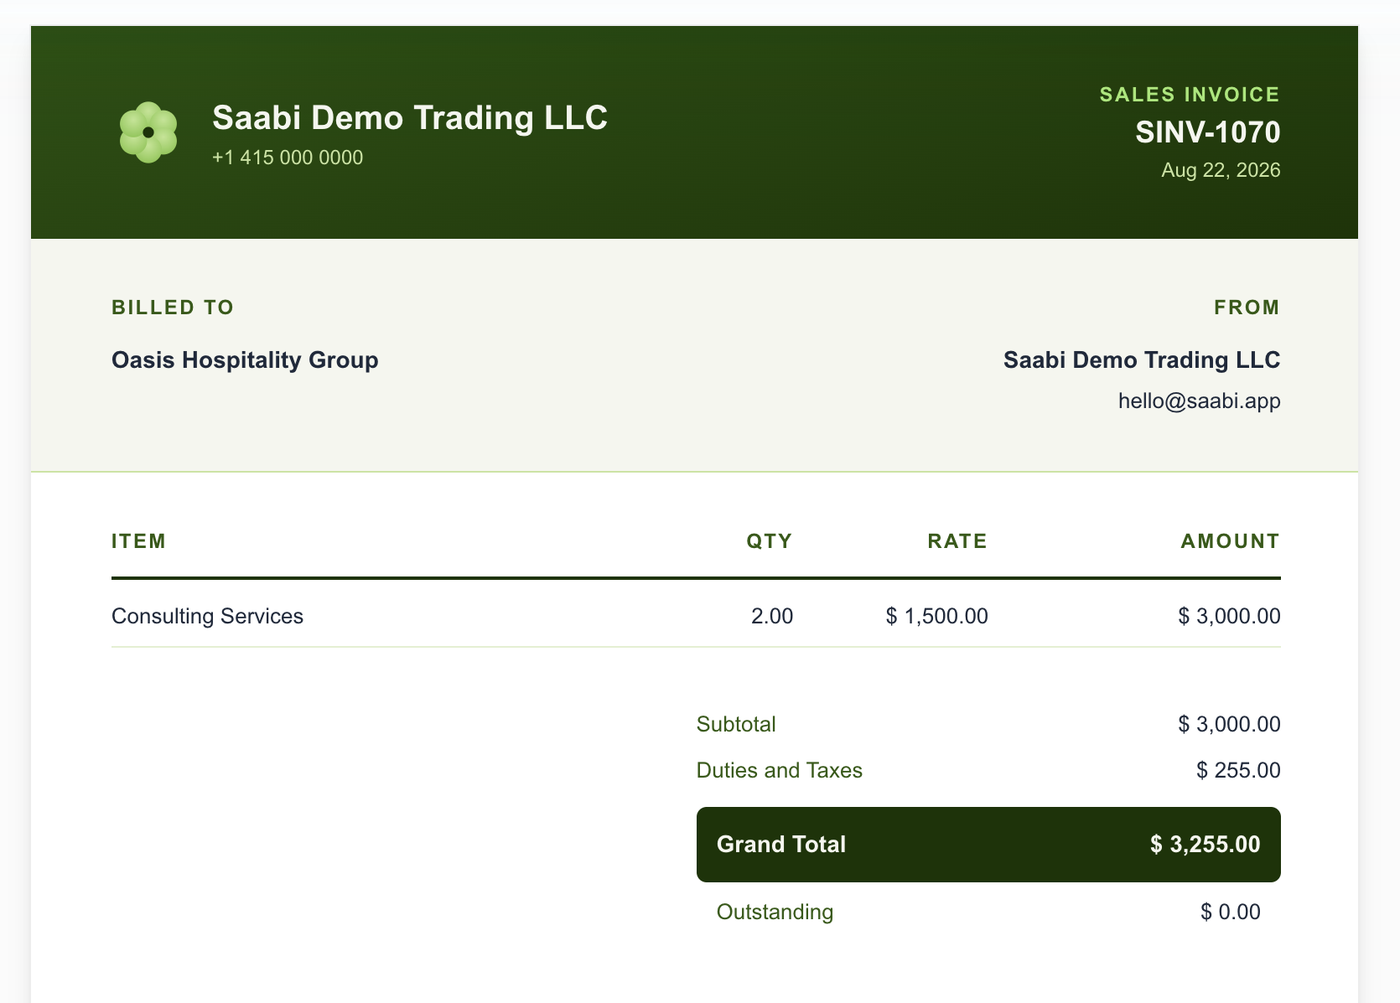
What appears on the printed invoice — your logo, the brand colour, the font, and whether terms, descriptions and amounts in words are shown — is set once at Setup > Settings > Print (Chapter 52) and applies to every invoice you print. Templates are covered in Chapter 54.
Invoice statuses
The badge in the invoice header and the Status column in the list use the same set of labels. Appendix B lists every status in SAABI.
- Draft — a new entry that has not been saved.
- Not Submitted — saved, fully editable, not yet posted.
- Unpaid — submitted and posted, nothing received yet.
- Partly Paid — some of the balance has been received.
- Paid — the outstanding amount has reached zero.
- Return — a credit raised against an earlier invoice.
- Not Transferred — submitted, with stock on the invoice not yet shipped.
Saabi Desktop User Manual 1.0 · covers Desktop 1.0.0 · Something wrong or missing? Tell us