
Chapter 6 · Getting started · 5 min read
Creating your first records
On this page
Before SAABI can raise an invoice it needs to know two things: what you sell, and who you sell it to. Those are items and parties. This chapter covers creating both, then raising a first sales invoice from them. The Get Started page sequences the work, so that is where we begin; everything here is also reachable from the sidebar.
Working from the Get Started cards
Open Get Started from the sidebar. The Sales group holds the three cards that take you through this chapter.
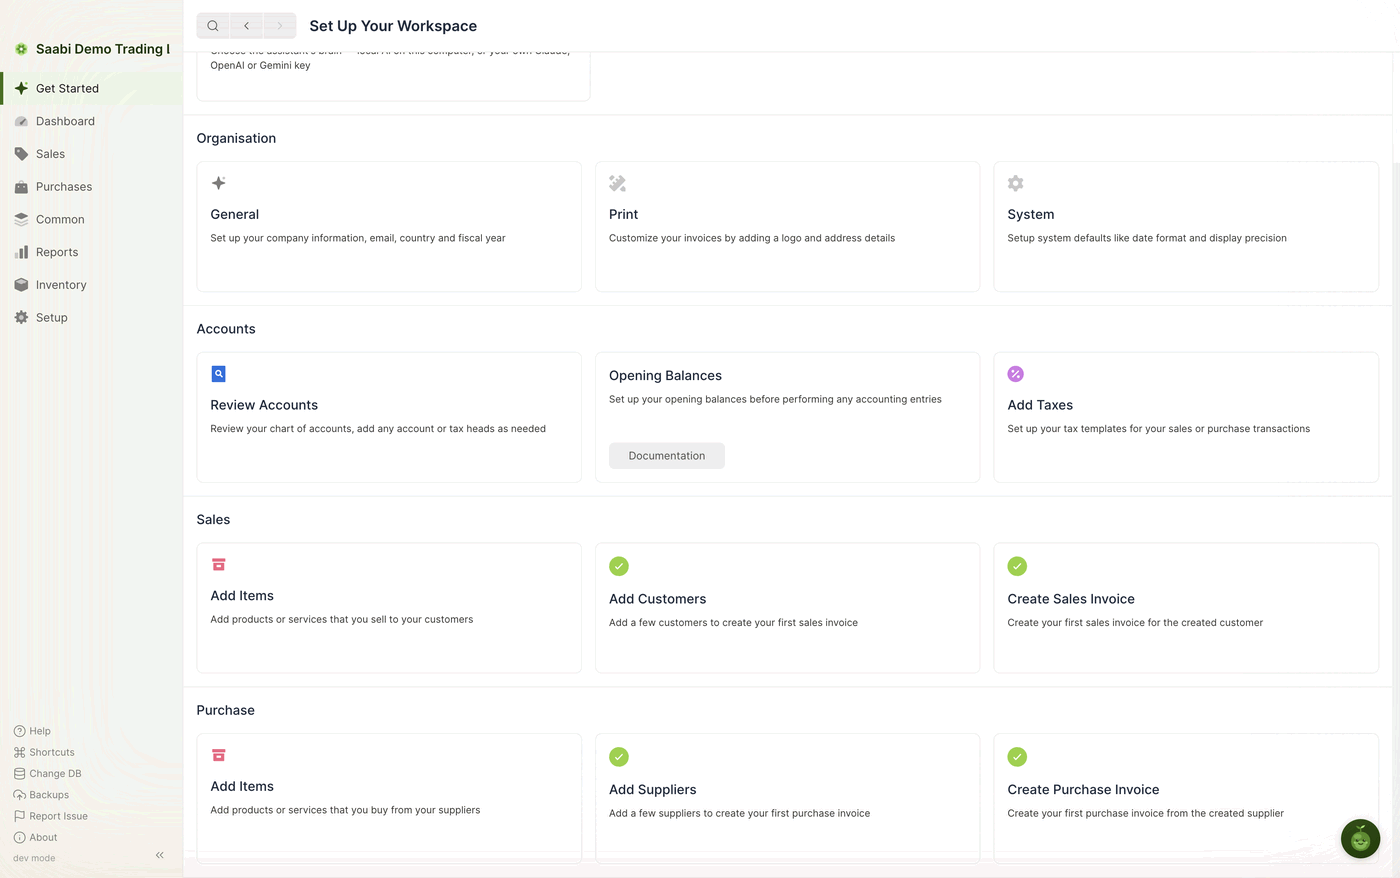
- Add Items — "Add products or services that you sell to your customers"
- Add Customers — "Add a few customers to create your first sales invoice"
- Create Sales Invoice — "Create your first sales invoice for the created customer"
Hover a card to reveal its Set Up button; a green tick appears once the task is done. The Purchase group repeats the pattern for the buying side. The page as a whole is described in Chapter 3.
Take the cards in order. An invoice needs an item and a customer to exist first.
Adding items
An item is anything you sell or buy — a physical product or a service. Open Common > Items for the full list, or Sales > Sales Items to see only the ones you sell. The full item record is described in Chapter 27.
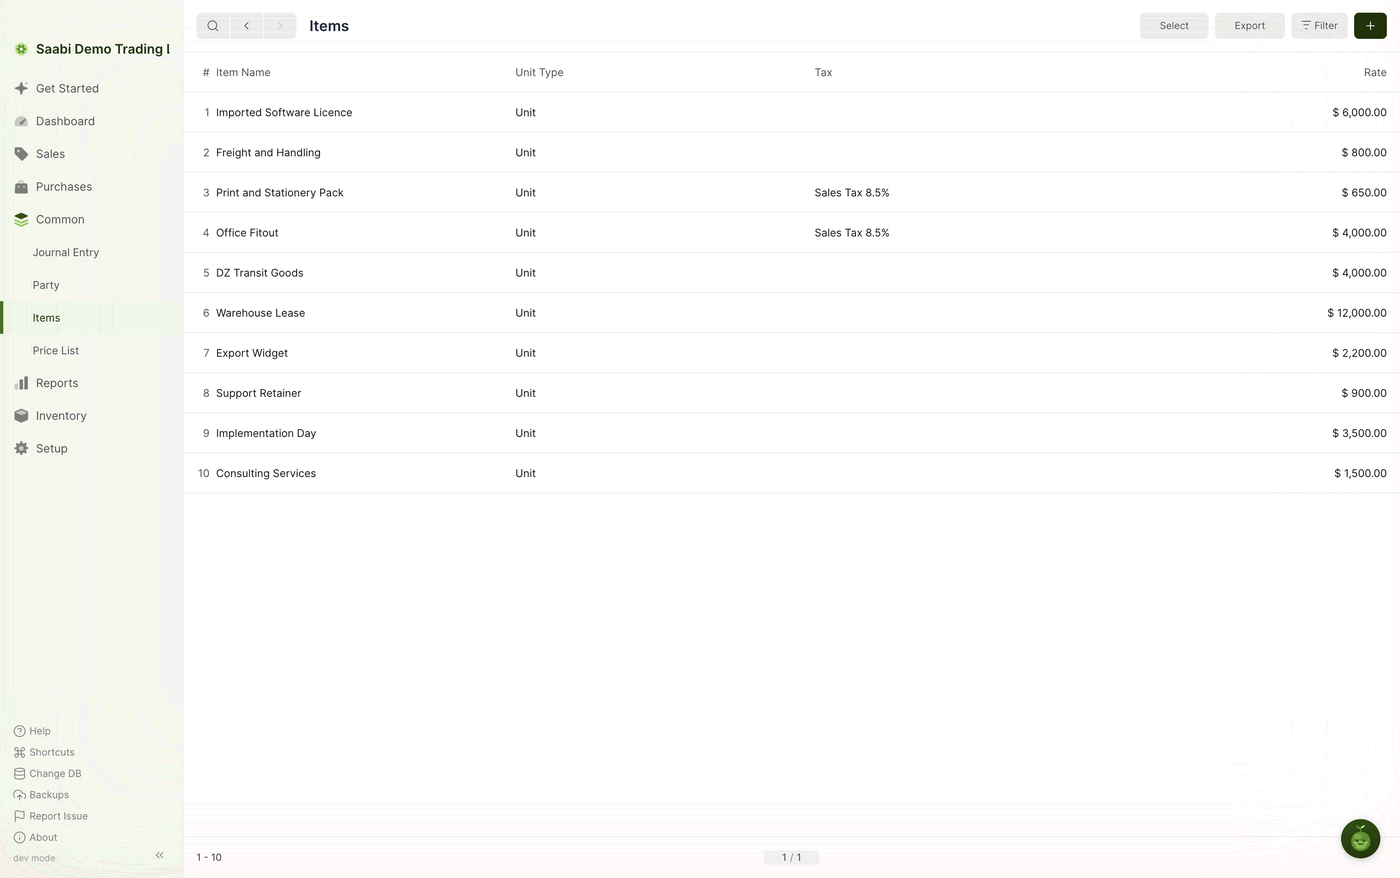
To create one, click the + button at the top right of the list. The item form opens.
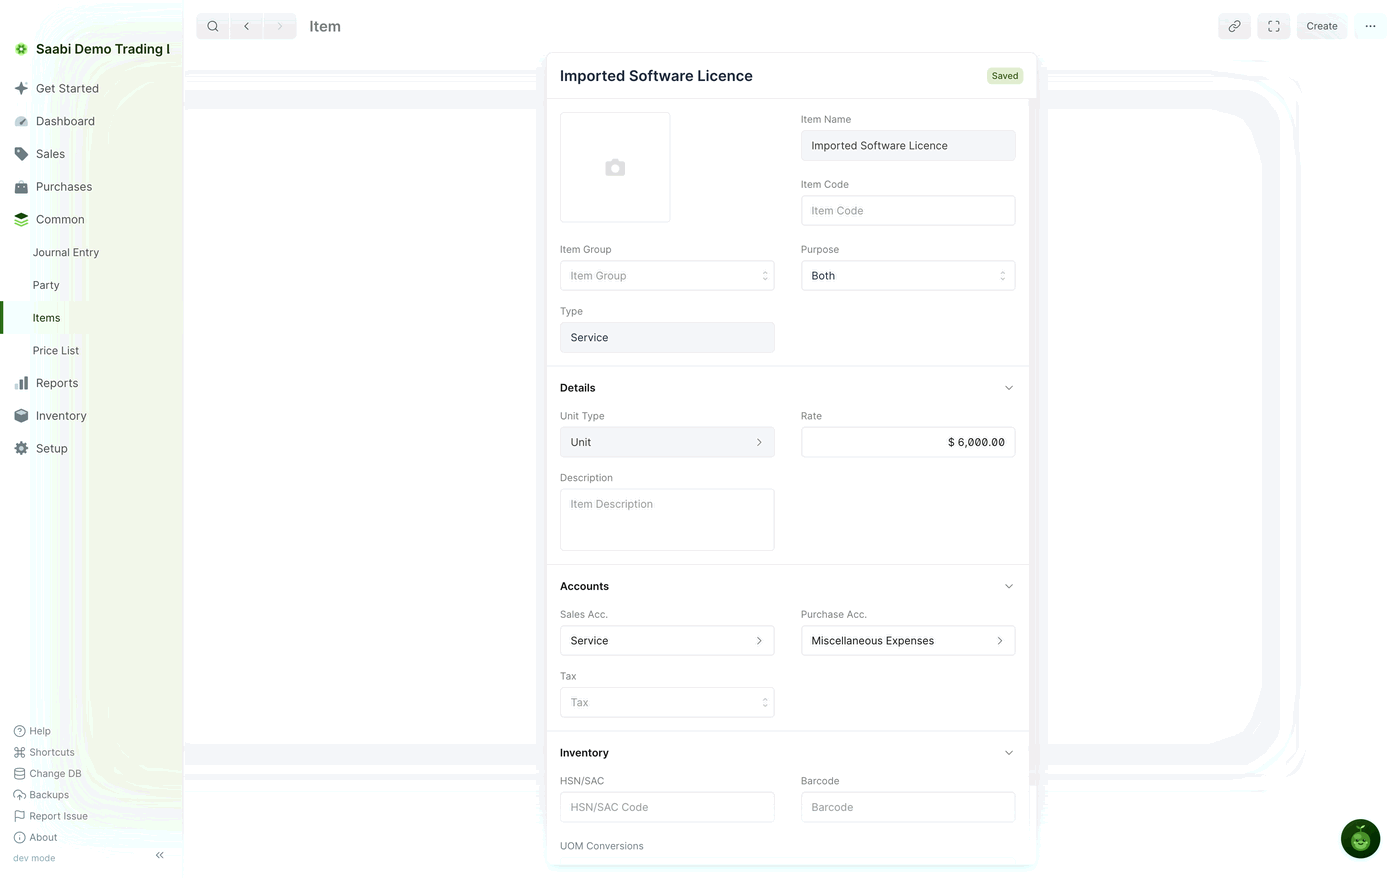
Fill in the fields you need.
- Item Name — what the item is called, for example
Consulting Services. This is what appears on invoices. - Item Code — an optional internal reference or stock code.
- Item Group — an optional category, useful once you have many items.
- Purpose — whether the item is for Sales, Purchases or Both.
- Type — whether the item is a Product or a Service. Products can be tracked in inventory; services cannot.
The Details section holds the commercial terms.
- Unit Type — the unit the item is sold in,
Unitby default. - Rate — the default price, for example
$ 1,500.00. SAABI fills this in on an invoice line when you select the item, and you can override it there. - Description — optional text that can be carried onto the invoice.
The Accounts section decides where the money lands.
- Sales Acc. — the income account this item is credited to when you sell it.
- Purchase Acc. — the expense account it is debited to when you buy it.
- Tax — a default tax template, applied automatically every time the item goes on an invoice.
Click Save. The status badge at the top right of the card changes to Saved.
Tip
Set the Tax on the item rather than on each invoice. It is the difference between getting the tax right once and getting it right every time. Tax templates are created under Setup > Tax Templates.
Adding customers and suppliers
Customers and suppliers are both parties. The difference is the Role on the record (Chapter 26). Open Sales > Customers, Purchases > Suppliers, or Common > Party for both together.
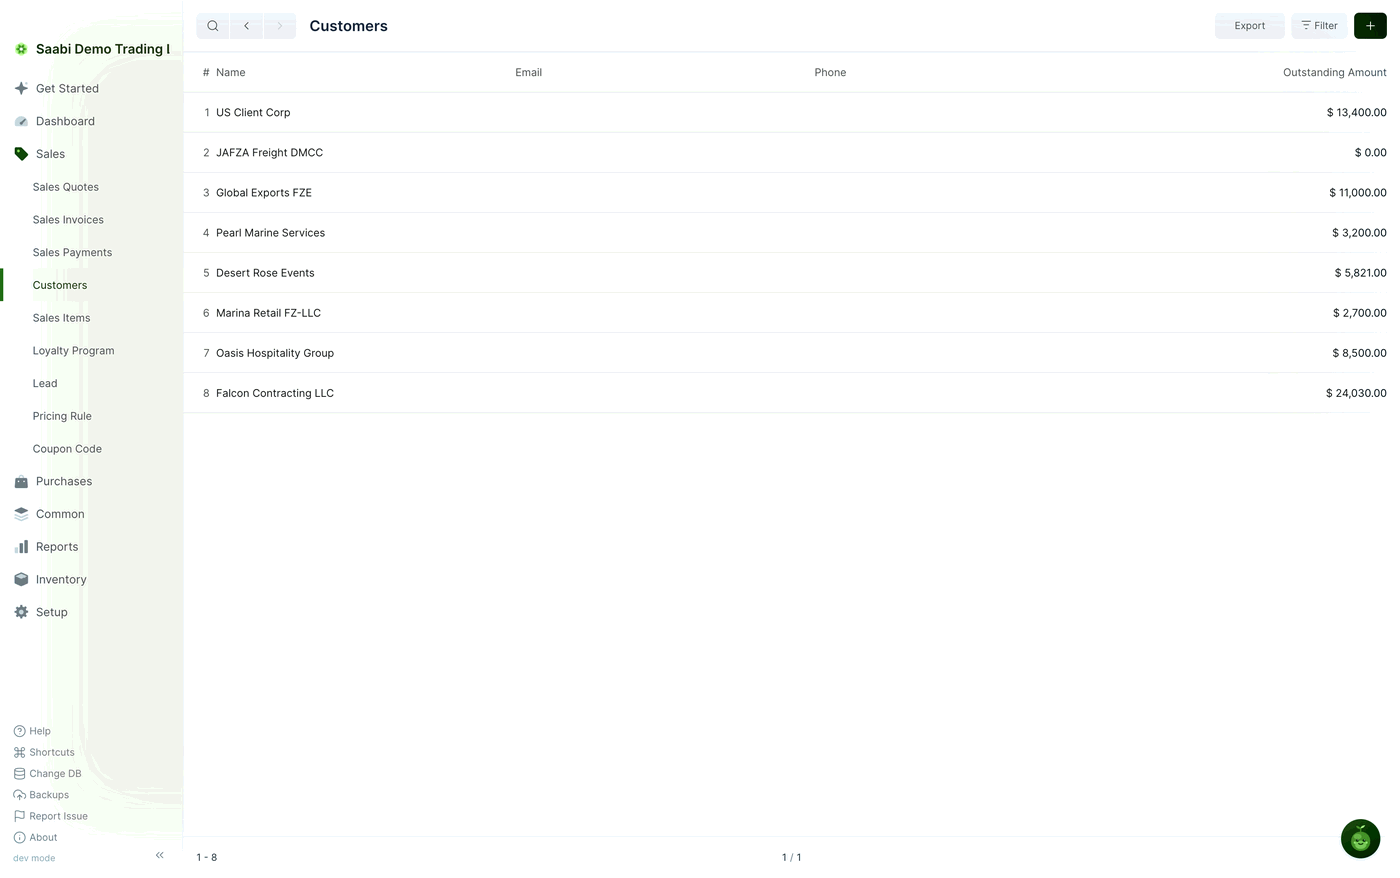
Click + to create one.
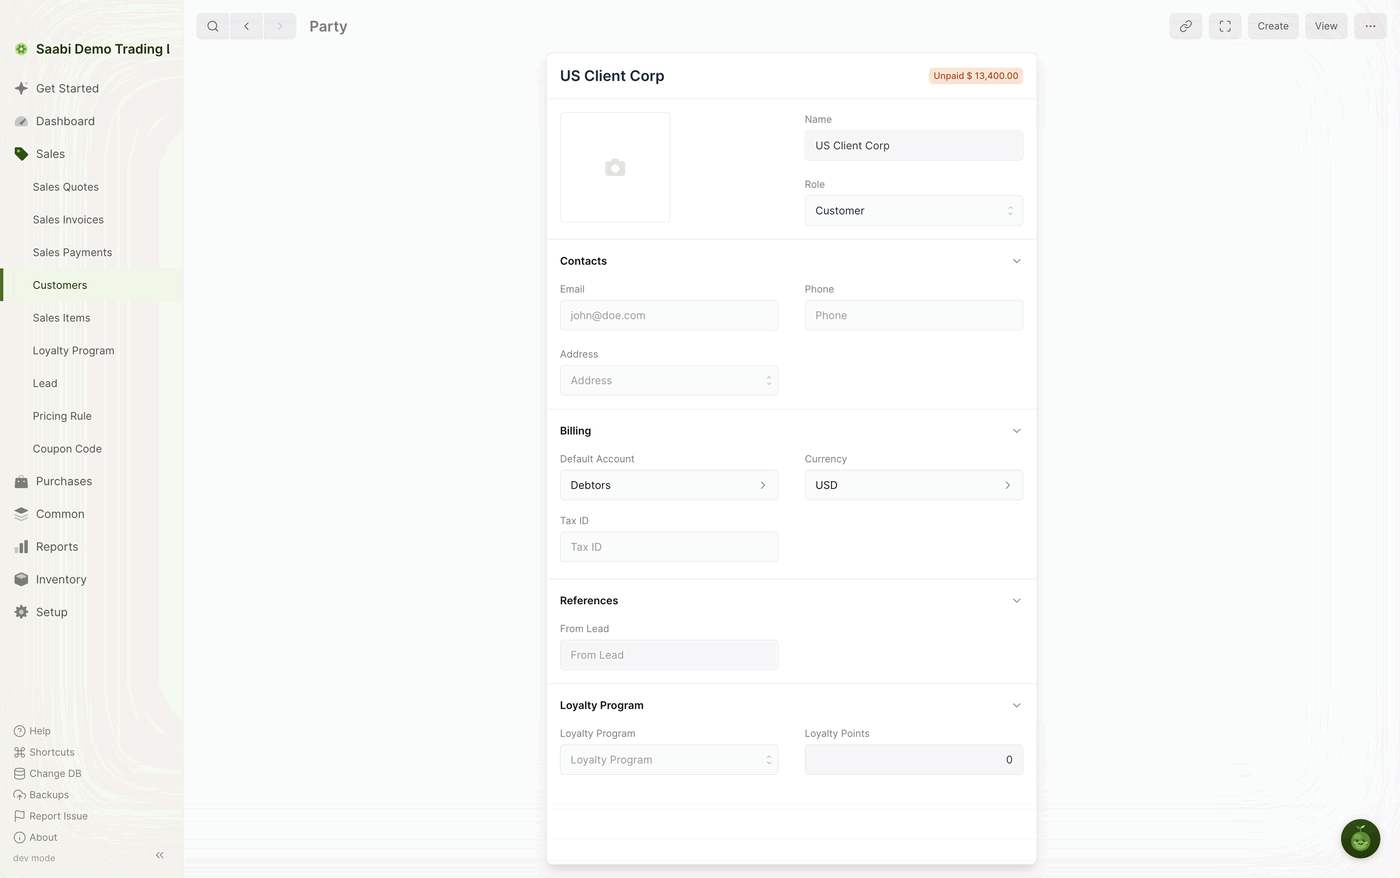
- Name — the customer or supplier name, for example
US Client Corp. This is the only field you have to complete. - Role — Customer, Supplier or both, depending on your relationship with them.
The remaining sections are optional but worth completing.
- Contacts — Email, Phone and Address. These appear on printed invoices, so filling them in now saves editing the document later.
- Billing — Default Account, Currency and Tax ID. The default account is normally Debtors for a customer and the payables account for a supplier. Set Currency if this party trades with you in something other than your company currency.
Click Save.
Once a party has invoices against it, the badge at the top right shows the amount outstanding, and the list's Outstanding Amount column shows the same figure.
Note
You do not have to create a customer in advance. On an invoice, type a name that does not exist yet into the Customer field and SAABI offers to create it inline. The record it creates holds only the name, so come back and complete the contact details afterwards.
Creating your first sales invoice
With an item and a customer in place, open Sales > Sales Invoices and click +.
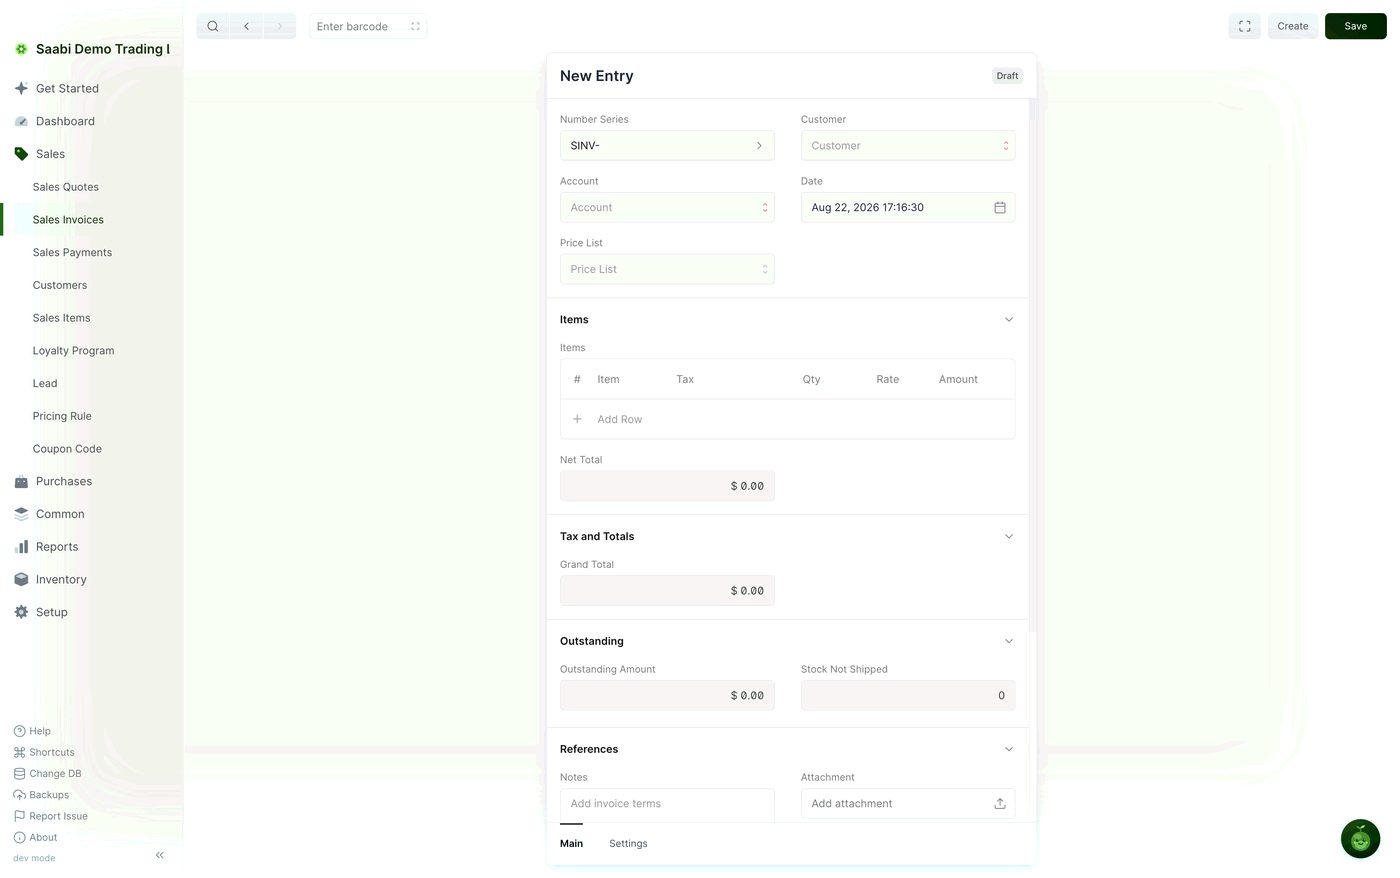
The form opens headed New Entry with a Draft badge. Work down it.
- Number Series — the prefix for the invoice number,
SINV-by default. Leave it unless you run more than one series. - Customer — select the customer. Start typing to filter the list.
- Account — the account the invoice is billed to. SAABI fills this in from the customer's default account.
- Date — the invoice date. It defaults to now.
- Price List — optional, if you use price lists.
In the Items section, click Add Row and select an item. SAABI fills the Rate from the item record and the Tax from its default tax template. Enter the Qty and the Amount calculates. Add a row for each line on the invoice.
Below the grid, Net Total shows the total before tax. The Tax and Totals section lists the taxes applied and gives the Grand Total. Outstanding shows what is still owed once the invoice is submitted. References holds Notes and an Attachment.
Click Save. SAABI asks you to confirm that you want to create the entry; click Yes. The badge changes from Draft to Saved and the invoice takes its number.
Review the saved invoice, then submit it. Submitting posts the invoice to your accounts — until then it has no effect on your ledger. Once submitted, the badge changes to Unpaid, and the toolbar offers a Create menu for recording a Payment, raising a Shipment, or issuing a Return. Chapter 12 follows an invoice through the whole of this cycle.
Important
A saved invoice can still be edited. A submitted one cannot. Check the customer, the dates, the quantities and the tax before you submit; correcting a submitted invoice means cancelling it or issuing a return.
What to do next
Repeat for the rest of your items and customers. If you have many of either, do not type them one at a time — the Import Wizard loads them from a spreadsheet in one pass, and it is covered in Chapter 7.
Saabi Desktop User Manual 1.0 · covers Desktop 1.0.0 · Something wrong or missing? Tell us